28
CHECKING BLADE WEAR
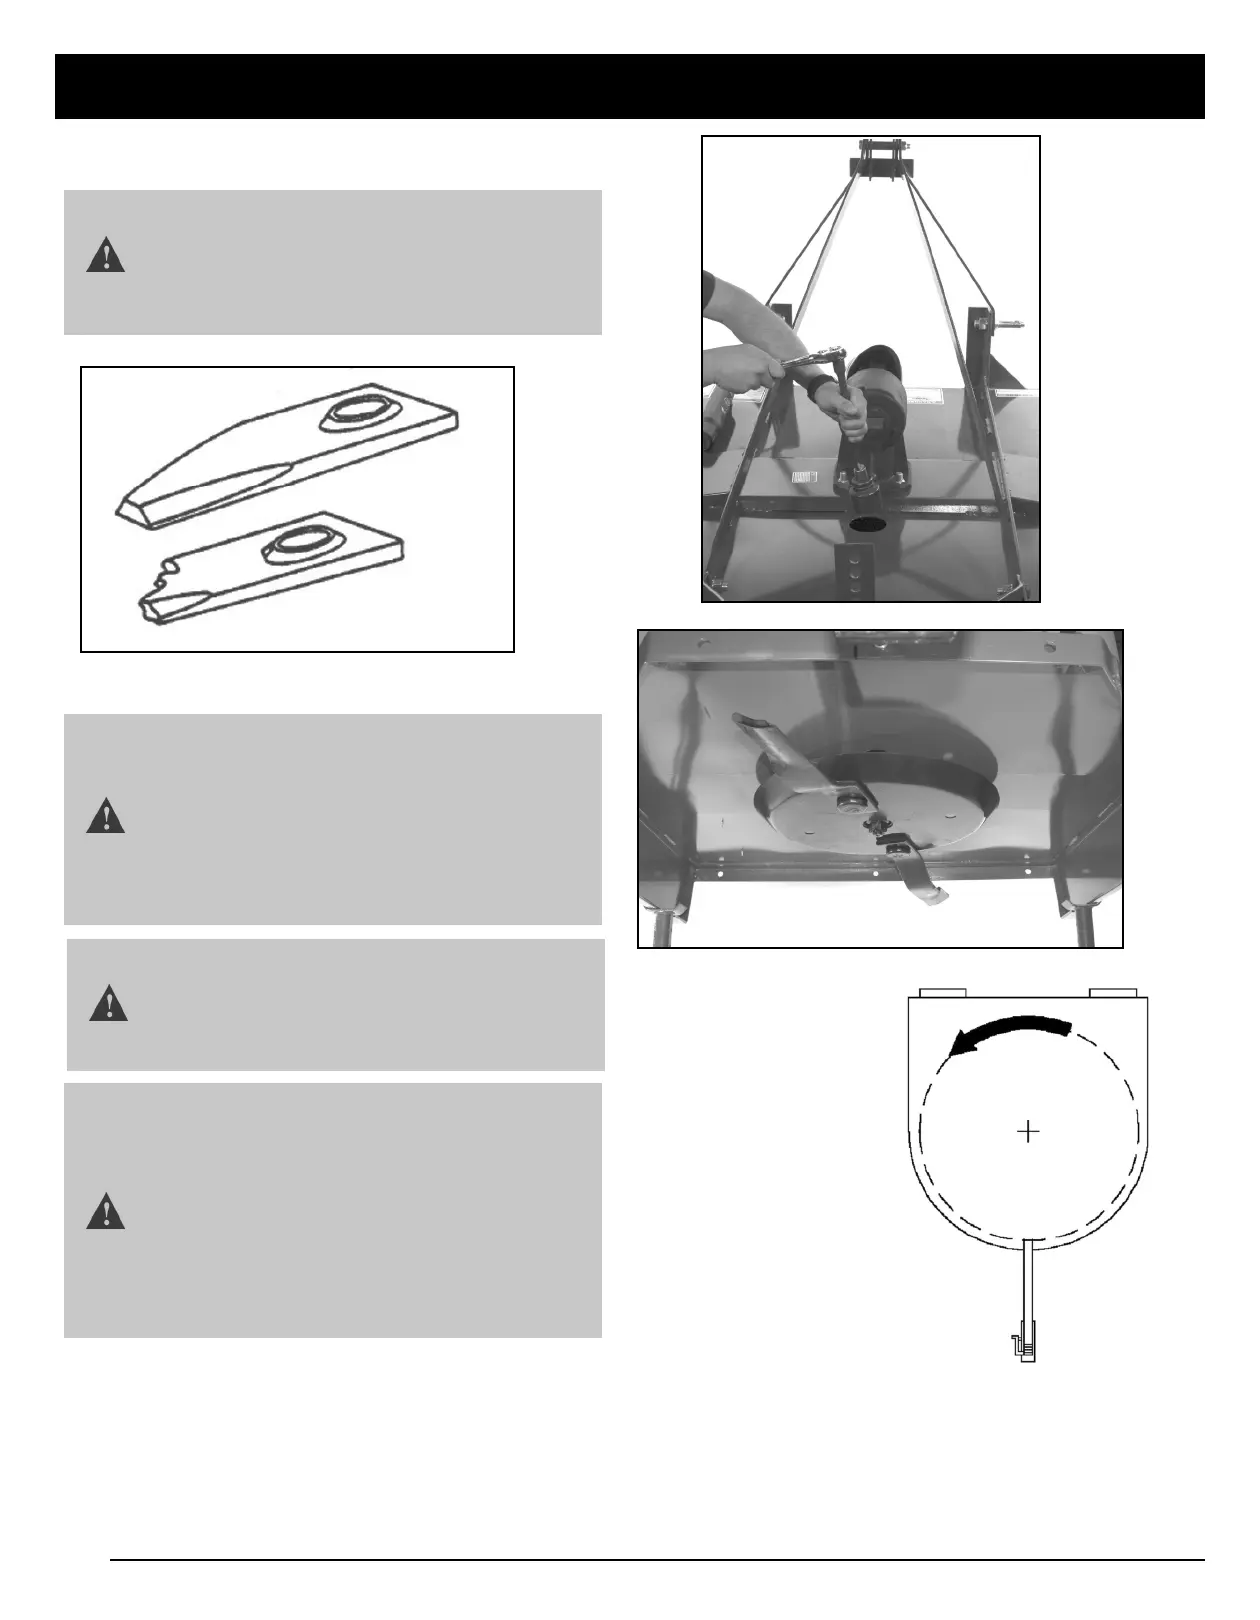
REPLACING BLADES
1. Manually rotate driveline to align blade lock nut
with access hole in top of deck behind gearbox.
2. Remove old blade bolts and blades.
3. Use new blade bolt hardware to install new
blades.
4. Tighten blade bolt lock nuts to 425 ft-lbs.
DIRECTION OF
BLADE ROTATION
IMPORTANT: Cutter
shown is viewed from the
top. Take special note of
blade rotation shown by
the arrow.
SERVICE
IMPORTANT: Operating with blades that are
not alike will cause vibration. Always replace
worn or broken blades in pairs. Never replace
a single blade. Check blades regularly for
wear or breakage.
IMPORTANT: Operating with loose blade
hardware will damage the blade pan and
blades. Whenever the blades have been
removed or replaced, blade hardware MUST
also be replaced. Check blade hardware
torque after one hour of operation and every
eight (8) hours thereafter.
CAUTION: When replacing blades, blade
hardware, and blade pan it will be necessary
to work underneath cutter. Be sure to support
cutter frame at all four corner locations with
safety shop stands, blocks, or other firm
supports to prevent accidental lowering.
Do not position safety stands under wheel
support because these components can
rotate.
NOTE: Suction blades have cutting edge on
one side only. Take note of blade rotation
when installing blades. (See DIRECTION OF
BLADE ROTATION in this section.)