EasyManua.ls Logo

Tascam DR-60D II User Manual

Tascam DR-60D II
2 pages
To Next Page IconTo Next Page
Page #1 background imageLoading...
Page #1 background image
Tascam DR-60D II Quick Start Guide
Carefully remove the battery cover on the back and
insert 4 AA batteries over the strip of fabric. When you
want to remove the batteries you may pull up the fabric
and it will pull out the batteries for you.
Fully charged batteries should last you several hours of
recording time. You will be provided with at least 8
batteries and may request more.
Insert a SD card.
Plug in headphones and make sure the
headphone volume is turned up to at least 5.
Make sure Phantom Power is turned off until
you have connected all cables.
On the left side plug in the XLR cable from
your microphone or boompole to input 1. You
should connect all cables before powering up
the unit.
On the right side of the unit turn on the power
and make sure the Hold switch is set to off.
Depending on the kit that you have you will
have either a case secured from a harness or
a clamp that will clamp to the boompole and
screw on to the base of the recorder. Either
way make sure the recorder is secured and
stable before beginning your recording.
Headphone Output
& Volume Control
Power
Hold
Mic
Input 1
Re-format your SD Card:
Use the menu button and the scroll dial to enter the
menu and change settings. Push in the scroll dial to
select. Push the Home button to exit the menu.
It is a good idea to re-format your SD card to wipe out
older files, maximize your free space and to setup the
card for this recorder. Only do this if you’ve backed up
the card. To format your card go to Menu > Others >
System > Quick Format.
Batteries
Setup
Menu & SD Card
1
Menu
Scroll Dial
Push to
Select
Question and Answer IconNeed help?

Do you have a question about the Tascam DR-60D II and is the answer not in the manual?

Tascam DR-60D II Specifications

General IconGeneral
A/D Resolution24-bit
Sample Rates44.1 kHz, 48 kHz, 96 kHz
USBUSB 2.0
Memory (Type)SD/SDHC card
File FormatWAV
Power4 x AA batteries or USB
Weight1.1 lbs
Analog Inputs4 x XLR / 1/4" Combo Jack (Mic/Line)

Summary

Batteries

Setup

Menu and SD Card Operations

Re-format SD Card

Wipe out old files, maximize free space, and set up the card for the recorder. Navigate to Menu > Others > System > Quick Format.

Input Settings and Levels

Source Switch

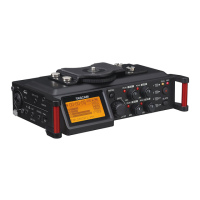
Set the Source Switch to Mic +48V Phantom Power when using a boom mic. Do not use phantom power if the mic has its own battery.

Input Level Adjustment

Turn up Input Level to 12:00. Audio levels should reach the -12dB mark on VU meters for optimal recording.

Recording Configuration

Dual Mono Recording

Records two mono tracks from the same source. Set Rec Mode to DUAL MONO and Source to CH 1.

File Format Settings

Set recording format to WAV 24bit and sample rate to 48kHz for optimal audio quality.

Gain Level Check

Adjust mic gain level to Mid Level for optimal audio. Avoid setting it too high to prevent unwanted noise.

Recording Process

Related product manuals