towards the back of the mower.
• To lower the height, pull the height adjustment lever from the current stop position and push it
towards the front of the mower.
CUTTING HEIGHT POSITIONS
POSITION CUT
1 1 7/8 in.
2 2 1/4 in.
3 2 1/2 in.
4 2 3/4 in.
5 3 in.
6 3 3/8in.
7 3 5/8 in.
MAINTENANCE
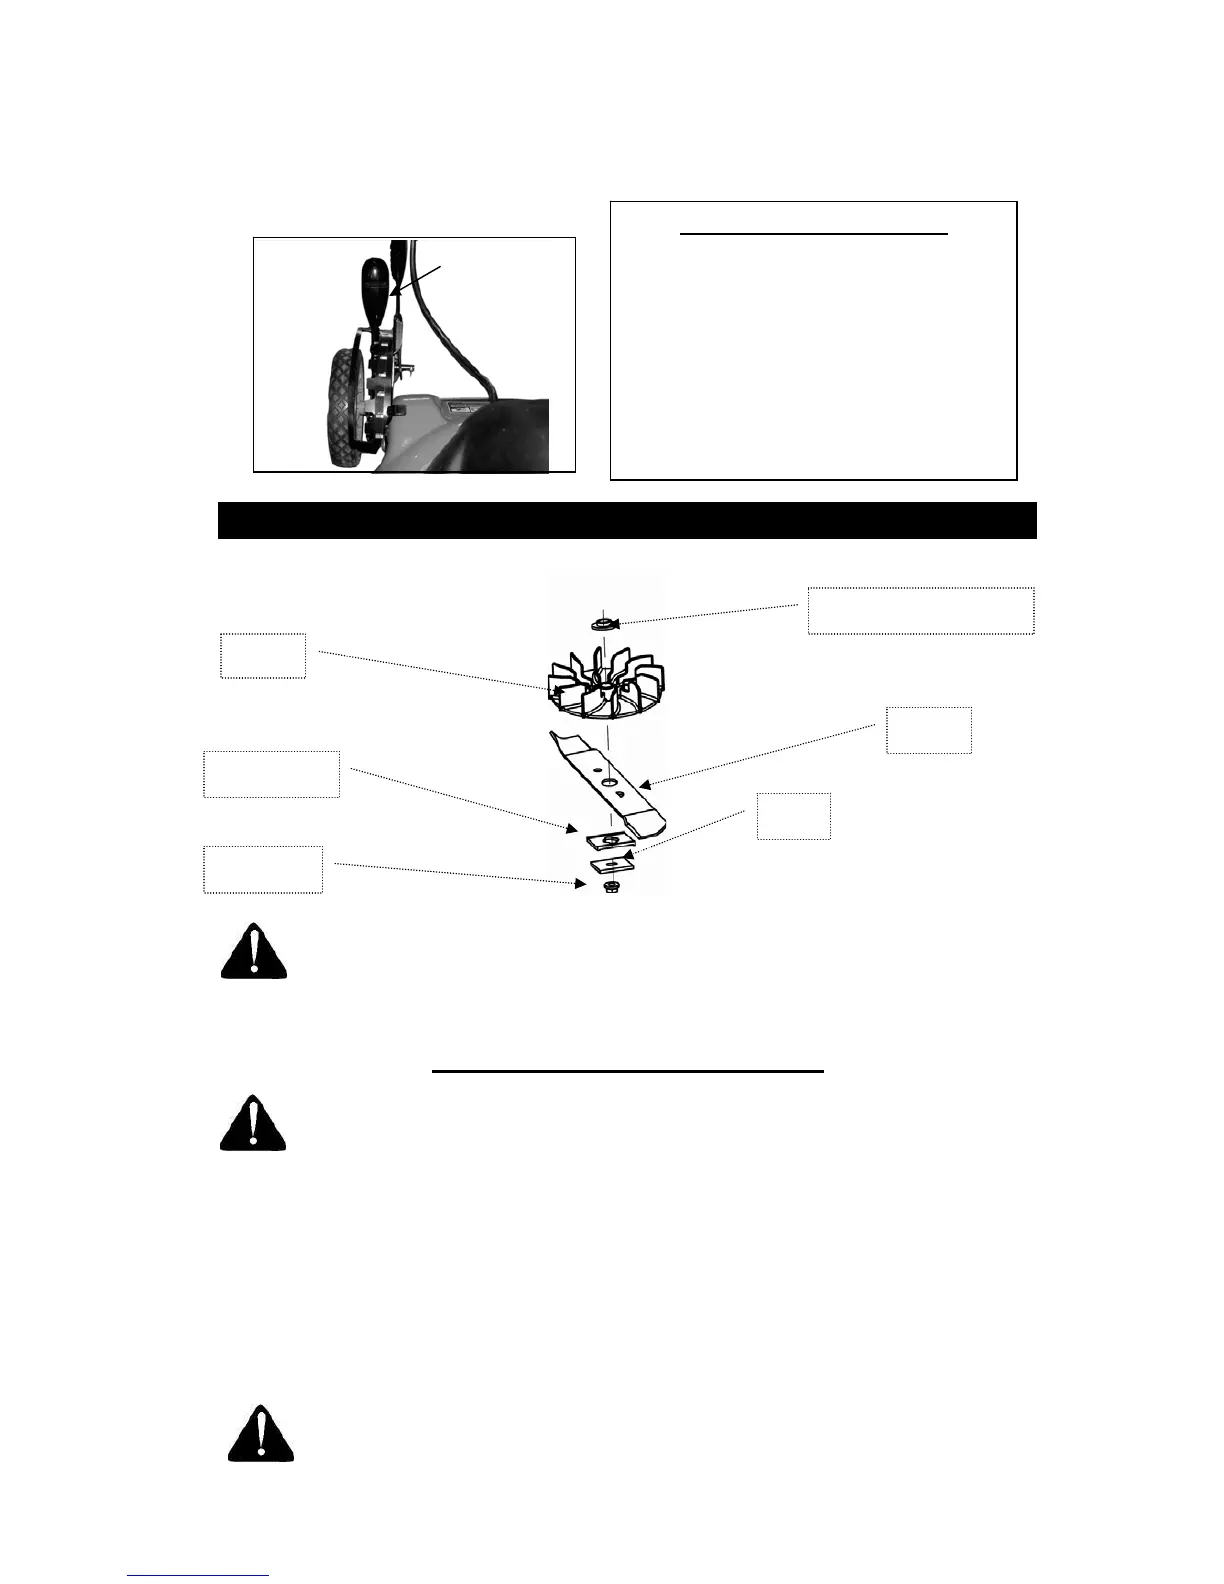
Fig. 8
Motor spindle sleeve
Fan
Plate
Blade
Locking plate
Blade nut
WARNING: Always stop the motor and disconnect from the power source before
cleaning, lubricating or performing repairs or maintenance on the lawn mower.
Cutting Blade Replacement
WARNING: Always protect hands by wearing heavy gloves and/or wrapping
cutting edges with rags other material when performing blade maintenance. Be
certain to disconnect the power supply.
Removing the Blade
• Stop the motor and disconnect the power supply to the mower. Turn the mower on its side.
• Wedge a block of wood between the blade and mower deck to prevent the blade from turning
when the nut is removed.
• Using a 15 mm wrench or socket, loosen the blade nut and remove the blade (see Fig. 8).
Installing the Blade
WARNING: The blade hardware is not only used to attach the blade assembly, but