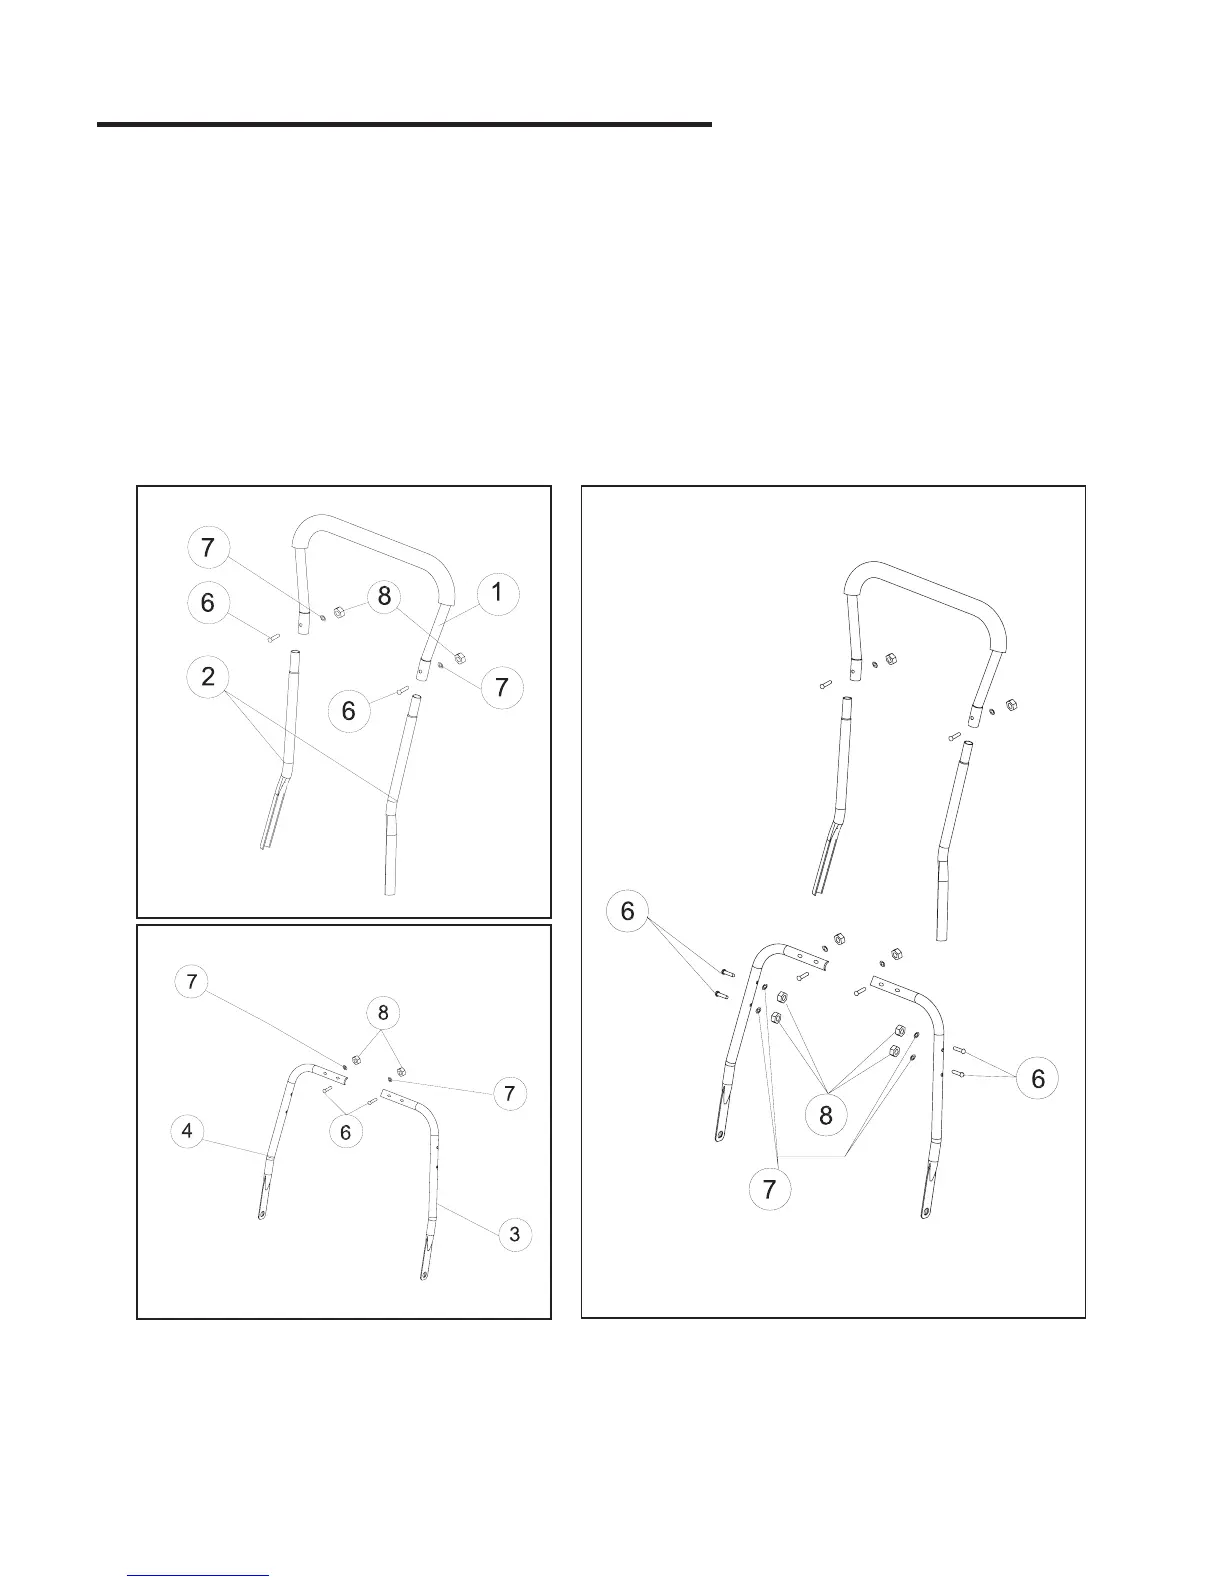
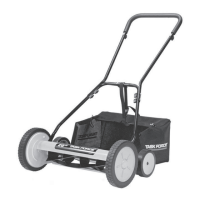
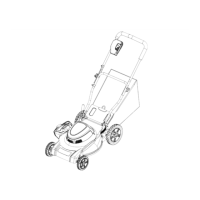
ASSEMBLING THE HANDLE:
NOTE: Do not completely tighten bolts until assembly is complete.
1. Insert the two center handle pieces (2) into the left and right side of the top handle (1) and secure with two
(6)
, flat washer (7) and Locknuts ( 8) provided. (Fig.2)
2. Connect the right lower handle (4) with the left lower handle (3) and secure with two
Carriage Bolts(6), flat
washer (7) and
Locknuts
(8) provided. (Fig.3)
3. Attach the top handle subassembly previously assembled, to the lower handle subassembly using four
(6),flat washer (7) and Locknuts (8) provided. (Fig.4)
4. Tighten all the locknuts on the joints of the handle assembly.
Carriage Bolts
Carriage Bolts
ASSEMBLY INSTRUCTIONS
5
Fig.2
Fig.3
Fig.4
Assemble the handle less than 15 minutes.