Do you have a question about the TasmanEco Vogue Cot and is the answer not in the manual?
| Type | Cot |
|---|---|
| Convertible | No |
| Assembly Required | Yes |
| Side | Fixed |
| Adjustable Base Height | Two levels |
| Safety Standards | AS/NZS 2172 |
| Finish | Non-toxic, water-based paint |
Follow assembly instructions, avoid hazards, keep items out of reach, adjust base height.
Use specific mattress dimensions (750x1310mm, max 120mm thick) for safety and proper fit.
Re-tighten bolts, check joints, use genuine parts, report faults for ongoing safety.
Wipe with dry cloth for dusting; use mild soapy water for spills. Avoid abrasives.
Gently push or tap dowel pins into place using thumb or small hammer. Avoid excessive force.
Insert washer with curved face against hole, then screw through to engage insert.
Hand-tighten screws or use power driver on slow/low settings to prevent furniture damage.
Periodically re-tighten connector screws, especially after two months, as they may loosen.
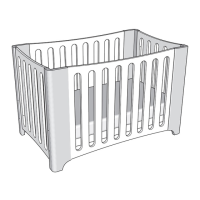
Lists side panels (x2), end panels (x2), and base (x1) as main cot parts.
Lists allen key, connector screws, dowels, and cap screws needed for cot assembly.
Keep small parts out of reach due to choking hazard. Store spare parts safely.
Secure base to one side panel using connector screws and cross dowels. Lightly tighten.
Secure remaining side panel to base using connector screws and cross dowels. Lightly tighten.
Fit double-ended cap screws to unused base locating holes for safety, preventing finger entry.
Position and attach end panels between corner posts using connector screws. Secure top screws first.
Firmly tighten all connector screws around the cot to complete the assembly.
Attach extension panels to end panels using 60mm connector screws and end cap screws.
Attach corner posts to the end panel assemblies using 50mm connector screws.
Temporarily attach bed rails to bed heads using lunar washers and connector screws.
Fit lattice base frames between bed rails, stretching slats over dowel pins.
Fit cap screws and double-ended cap screws to remaining unused holes for safety.
Firmly tighten all connector screws to complete the single bed conversion.
Instructions for converting the cot into a junior bed by removing specific panels.
Instructions for converting the cot into a chaise lounge by removing the front panel.
Details on 100% Satisfaction Guarantee and 5 Year Materials and Workmanship Warranty.
Steps for registering the product and making claims under warranty.
Information on optional furniture assembly service availability and booking.