Step4 Joining the Center bows to the A/B/C bow assemblies:
a) Continue the assembly process by laying out the frame on the ground. No tools are required
since the pieces snap together as shown in the diagram below. Compress the snap buttons and
insert, button first, into both ends of all 3 center bows (total of 6 snap buttons to install). Be sure
to push the snap buttons far enough into the tube so that the buttons pop out of the holes.
b) Next, connect 2 of the center bows to the left hand "A" and "C" bows only (do not connect a
center bow to the "B" bow yet). Connecting the center
is done by sliding the smaller diameter center bow
into the larger diameter left hand "A" and "C" bows.
(The curve of the Center bow faces down at this point).
c) Make sure the snap buttons pop out of the larger diameter "A" and "C" bows. You may need to
twist the bows slightly to get the buttons to pop out.
d) Do not connect the right hand assembly yet, this will be done after the fabric is fed onto the frame.
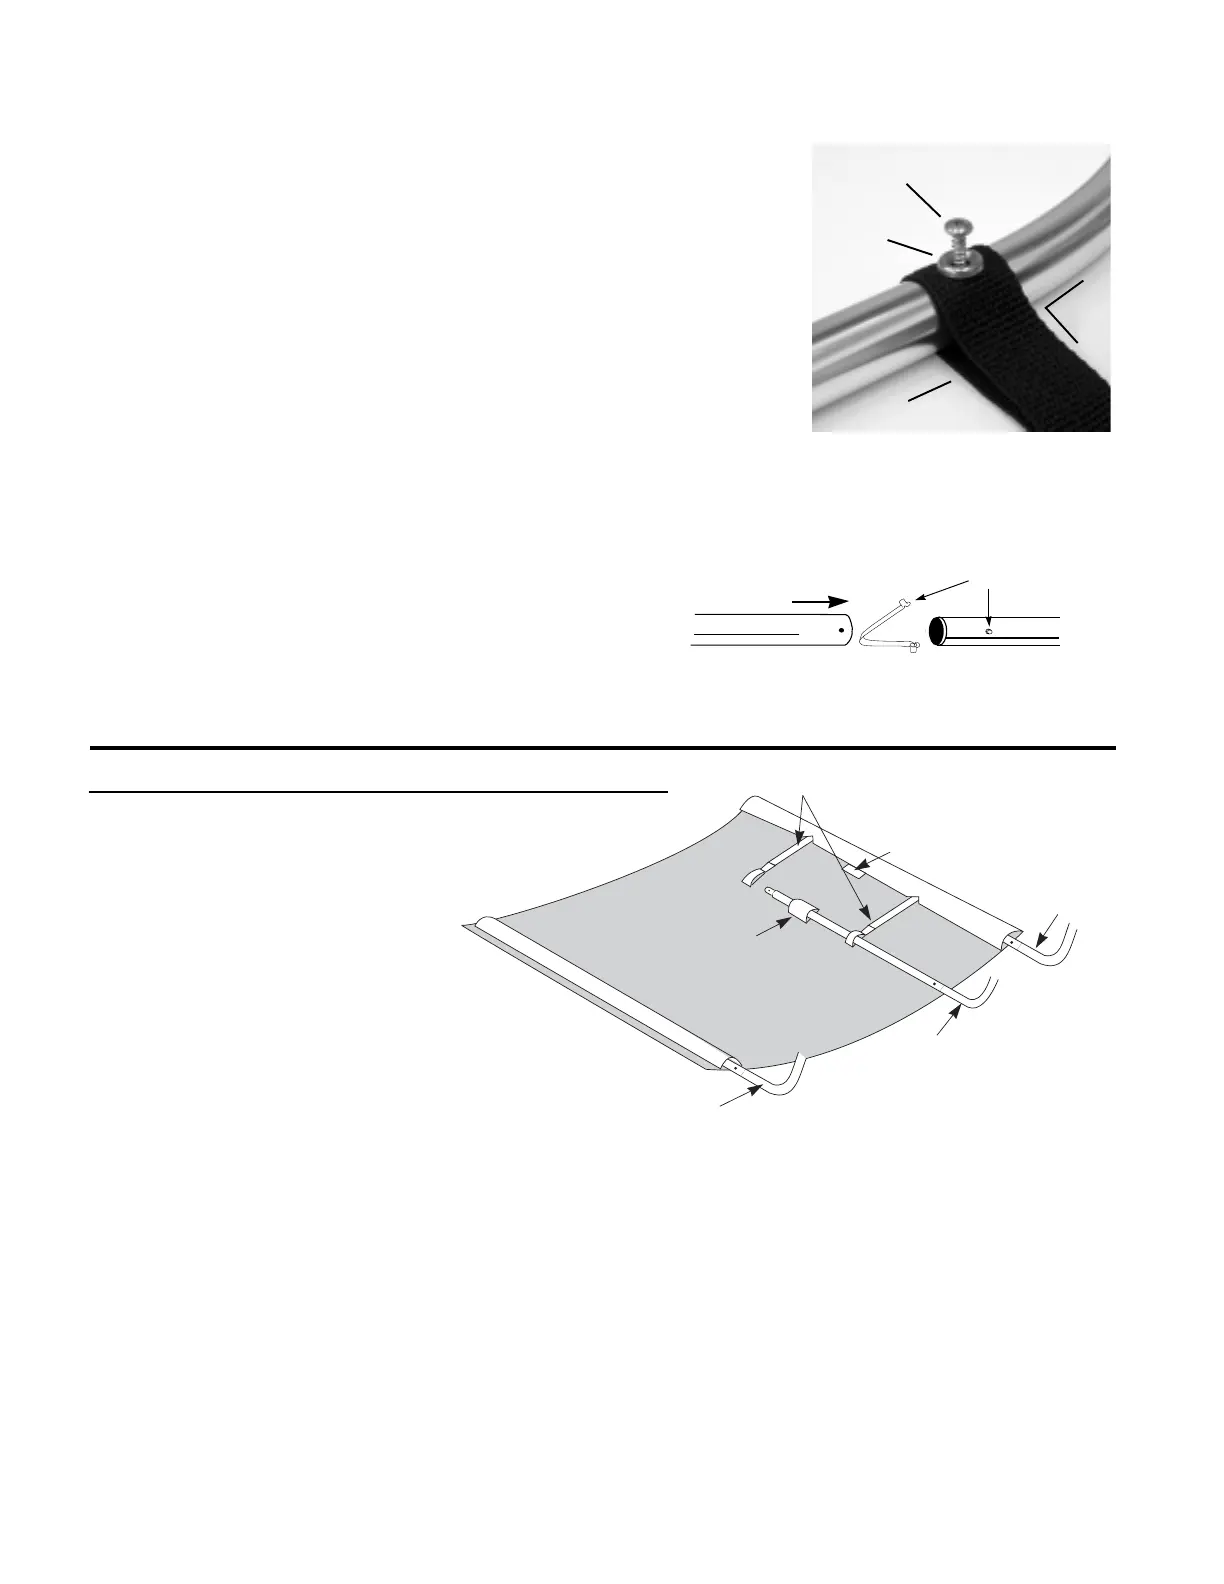
PART 2: ATTACHING THE FABRIC TO THE FRAME
Step 5 Feeding the fabric onto the frame:
a) Unpack the top itself and lay it out, upside
down, on a clean flat surface.
The label sewn into the fabric
is on the underside, so it should
be facing up. The label also
signifies the trailing edge of the
top (there is a front and back to
the top).
b) Take the left hand bow assembly and slide
one of the center bows through the sleeve
on the trailing edge (rear) of the fabric.
c) When the end of the bow reaches the first cutout,
stop. You now need to install a bow strap (loop on
both ends). Slide the non-adjustable end of the stap over the bow, making sure that the adjustable
buckle faces away from the fabric. Repeat process as you continue to feed the fabric on to the next cut
out and install another bow strap. Slide the top on the rest of the way until the center bow comes out the
other side of the top.
d) Repeat the process in part b) & c) for the (front) side of the top.
e) Slide the remaining center bow into the first bow strap (making sure the strap is straight and not twisted).
Continue on through the short center bow pocket (see diagram), and on through the next bow strap.
f) You are now ready to complete your Bimini Top
®
assembly, by laying out the left A/B/C bow assembly
and snapping those into the protruding centers on the left side of the top. It maybe necessary to
"gather" top material back onto the centers to be able to snap the bows together. Remember to twist
the bows slightly to ensure that they lock together properly.
g) Stand the frame up and straighten the top over the edges of the bows. Now it may be folded to make
handling easier. With all the above steps completed properly you are now ready to mount your Bimini
Top
®
to your boat.
Step 2 Connecting the "B" bows to the A/C bow assemblies
a) Layout the left and right A/C bow assemblies in their approximate locations.
b)
Attach the eye end from each "B" bow with strap hole facing "A" bow.
c) Repeat a) & b) for other side.
d) You now have complete left hand and right hand bow assemblies.
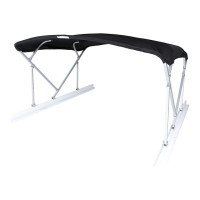
Step3 Installing the Tie-Down strap assemblies:
a) Pick up and slide the sewn-in loop end of a tie-down strap
over the open end of the A and B bow assemblies until it
aligns with the drilled mounting holes in the tubes. With the
straps oriented at 90 degrees to the bows themselves,
secure each strap with a #8 x 5/8" screw and cup washer.
Snap Button
Center Bow
Side Tube
B-Bow (L)
C-Bow (L)
A-Bow (L)
Rear
Front
Bow Pocket
Sewn in Label
Bow Strap
A & B Bows
#8 screw
Cup washer
Tie-Down
Strap - Loop end
▲
▲
▲
▲
▲
90
o

 Loading...