Step 7 Fine Tuning the Fit :
a) Step back and look at your top after having adjusted the tie down straps and bow straps in
section d) & e) step 4 above. If the top does not appear centered on the frame, you can pull the
top to the side and center it, both front and rear.
b) If your top appears to "sag" in the front or rear, it may be necessary to re-adjust the bows or
straps slightly. Usually applying more tension to the tie down straps will improve the fit. To
accomplish this, have your helper pull down slightly on the corners of the top (at the tie-down
locations) while you tighten up the buckles on the strap. Do this on all corners of the top.
c) After re-tightening the straps, if your top still needs more adjustment, you may need to re-position
the jaw slide for the "C" bow (on the "A" bow). Loosen the set screw on the back side of the jaw
slide. Move the jawslide upward (on the "A" bow) one or two inches and retighten the jaw slide
set screw. Repeat this for the "C" bow on the other side of the top. Once the bows have been
repositioned, retighten the (2) bow straps from underneath.
These steps should ensure the proper adjustment of your top for the best function and best looks possible.
PART 3 - MOUNTING ASSEMBLED TOP TO BOAT
Step 6
Preparations to boat and installation of top:
a) Locate the exact point on the tower where the center of the top will be, this is where the mounting
hinges should be mounted. The frame is designed to flex, somewhat to the proper mounting
width.
b) Secure the vertical to both sides of the boat using the (4) 3/4" self tapping Phillips head screws
provided. A small pilot hole using a 1/8" drill may be used to aid allignment. Be sure that deck
mounts are directly in line with one another across the boat.
c) Position the rear of the top toward the rear of the boat and attach the eye end on the "A" bows
to the deck mounts using the screws provided in the deck mounts themselves. Secure but DO
NOT overtighten.
d) Have another person hold the top in open position and locate the places where you will attach
the four eye straps for the tie down straps. Eye straps should be placed as far out as practical so
that the top spreads out and is parallel to the boat deck or slightly lower in the front, when the tie
down straps are tightened. At the same time, make sure there is enough adjustment in the straps
to loosen and tighten. Use the eye strap to locate position for 1/8" pilot holes and drill them.
Screw the eye straps into the boat, using the (8) 5/8" phillips screws.
e) Attach tie down dog snap to eye straps. Tighten the adjustment buckle until the top is taut and
does not sag.
f) Adjust the bow straps (between A & C bows) by pulling on the adjustment buckles, so that
the center bow is approximately 2" higher than the front and rear bows.
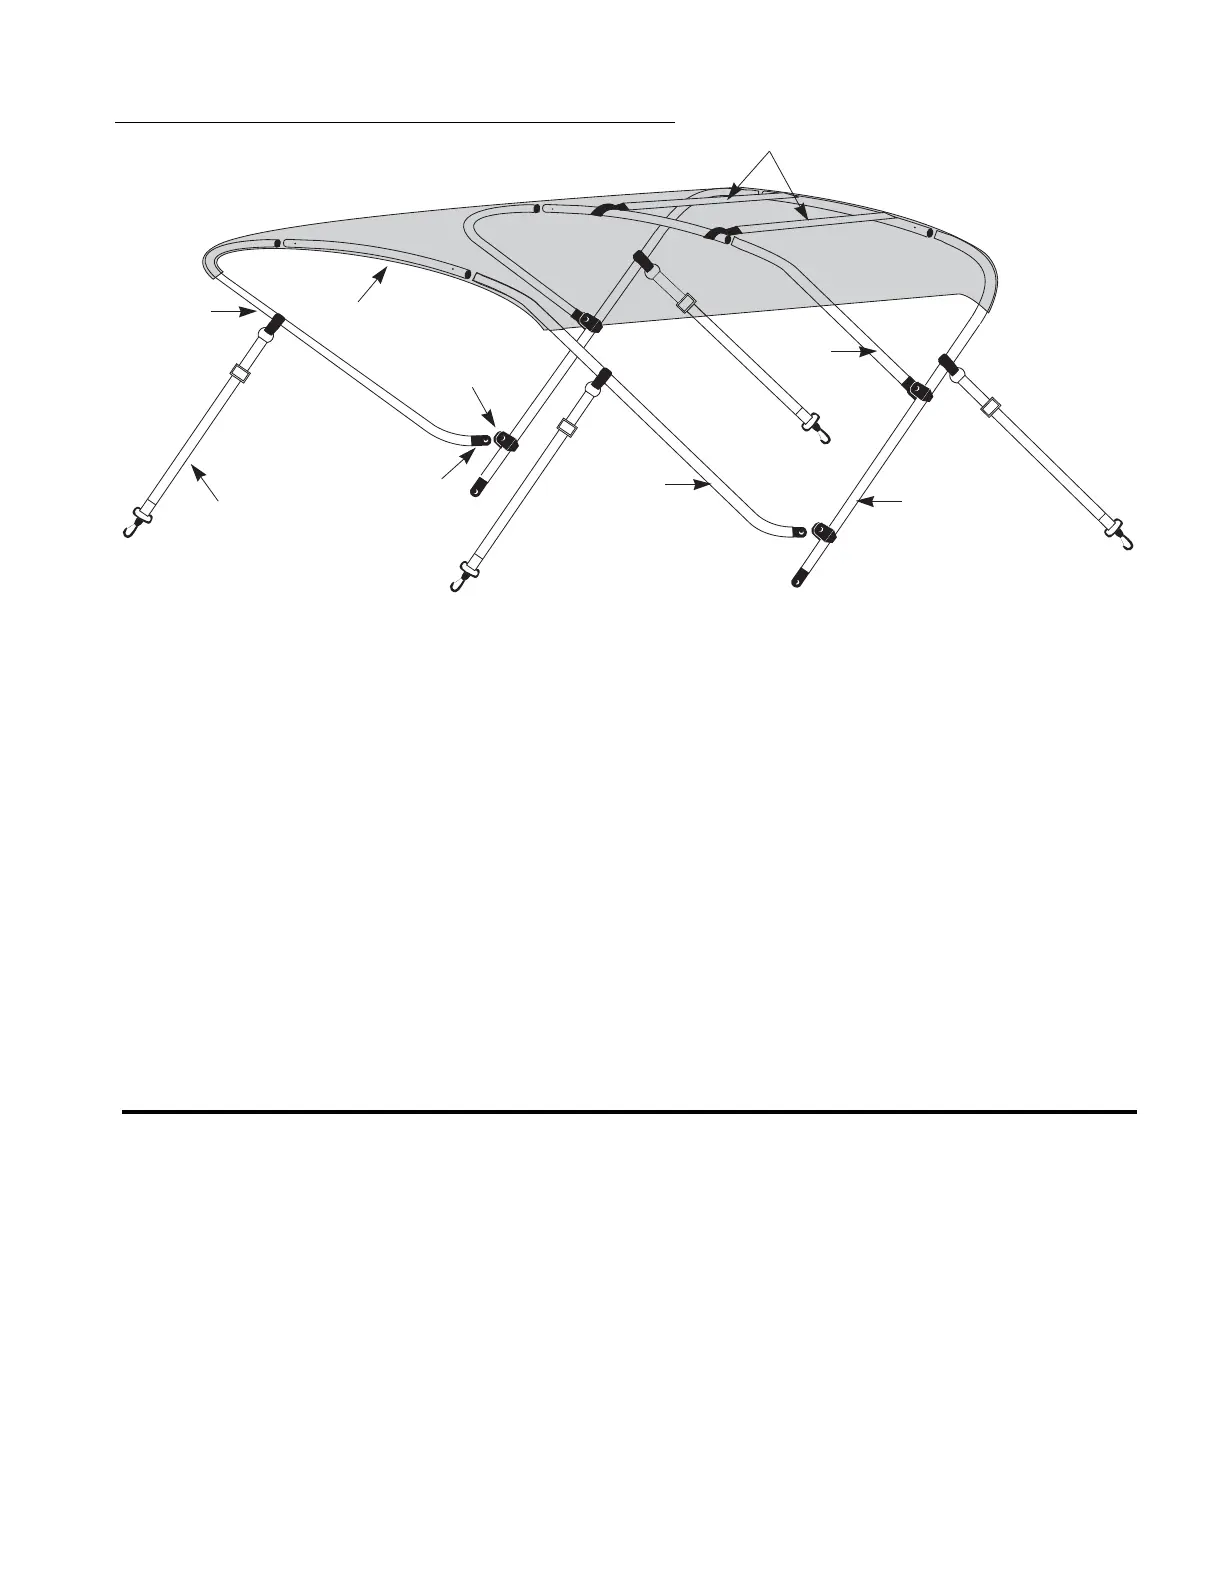
C -Bow
(Left)
Front Back
B-Bow
(Left)
A-Bow (Left)
Jaw Slide
Centers
Bow Straps
Eye End
B-Bow
(Right)
Tie-Down Straps
(4) Places

 Loading...