TC-IVL Ventures Inc.
TC Electronic A/S
Sindalsvej 34
DK-8240 Risskov
Denmark
Phone: +45 8742 7000 Fax: +45 8742 7010 E-Mail: www.service@tcelectronic.com
www.tc-helicon.com
Troubleshooting
If there was a power failure, transmission error, or any other reason the upgrade did not complete
properly, turn the VoicePrism off and on. If the old software is still present, you should see the
main screen as usual. Simply start the upgrade process from the beginning. If the unit powers on
and nothing happens, start the upgrade procedure by resending the “ClearFlash.syx” file (Step 5)
and continuing with the upgrade procedure from there.
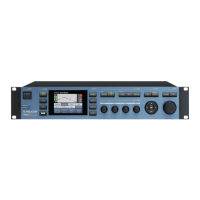
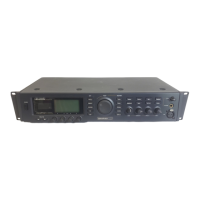
BIST (Built In Self Test)
1. Press the Power switch to turn on VoicePrism.
2. Press and hold the Left Arrow, Preview and Store buttons within 3 seconds of power up until
the LCD Display appears filled. Note: VoicePrism will not enter BIST mode if there are cables
attached to any of the MIDI jacks on the back panel.
3. Confirm LCD moves through the following stages:
• Filled
• Full screen grid
• Grid on right half of screen
• Grid on left half of screen
• Full screen grid
• Automatic BIST status
Note: If the patterns do not appear in the order indicated, or if the grid is
incomplete, the unit fails the BIST. The above criteria are only confirmed
visually. No other indication is given.
4. Confirm the Automatic BIST status screen reads “PASS” beside the following headings: FPGA,
Address Bus, Flash, Audio ROM, Bit Bus, RAM, EEPROM, 2181 DSP.
5. The LCD indication should read “VISUAL CHECK”. If any of the headings do not appear this
also indicates a failure.
6. Push the Left Arrow.
7. Confirm that the LCD now displays the Manual BIST status screen.
8. Confirm the 7 Segment Display reads “188”.
9. Confirm the MIDI and Lock indicators below the display and the input dB scale LED’s are lit.
10. Push the Right Arrow button.
11. Confirm the 7 Segment Display input dB scale and the MIDI and Lock indicators below the
display turn off.
12. Rotate Soft Knob #1 clockwise.
13. Confirm the corresponding value on the LCD Display increases.
14. Rotate Soft Knob #1 counter clockwise.
15. Confirm the corresponding value on the LCD Display decreases.
16. Push Soft Knob #1 until it clicks.
17. Confirm ‘OK’ appears on the corresponding line on the LCD Display.
18. Repeat steps 12 through 17 for Soft Knob #1, #2 and #3.
19. Rotate the Data Wheel clockwise.
20. Confirm the corresponding value on the LCD increases.
 Loading...