Do you have a question about the TCL MOVETIME MT40X and is the answer not in the manual?
Details the requirement for a nano-SIM card.
Provides instructions on how to insert the SIM card.
Instructions for downloading the TCL Connect app on a smartphone.
Explains two ways to pair the watch with your phone: QR code and IMEI.
Steps to connect the watch to a Wi-Fi network via your smartphone.
Instructions for making a phone call.
Steps to make a video call.
How to send a voice message.
How to send a photo via message.
Details the IP65 rating and water usage restrictions.
Information on supported SIM card types and bands.
Troubleshooting steps for pairing problems.
Explains the SOS operation and recommends practice.
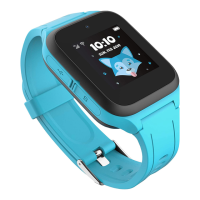
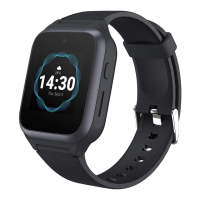
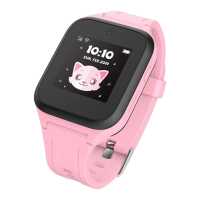
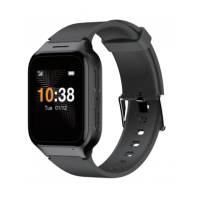
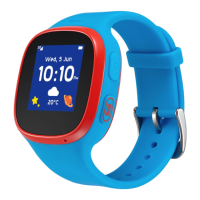
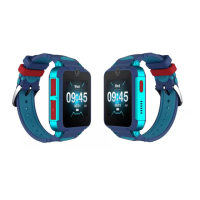
This document serves as a Quick Start Guide for the MOVETIME Family Watch MT40X, a wearable device designed for family use. It provides essential information on setting up, using, and maintaining the watch, ensuring users can quickly get started with its various functionalities.
The watch features a camera, a Micro USB port for charging and data transfer, a SIM card slot, and a power key. The power key is a multi-functional button that allows users to power the device on and off, initiate an SOS call, force restart the watch, end calls, wake up the device, and navigate back to the Home screen. A long press of 3 seconds powers the watch on, or initiates an SOS call if a SIM card is inserted and paired with a smartphone. In other scenarios, a 3-second long press will power the device off. A 15-second long press forces a restart. A short press ends a call when dialing, wakes up the device, or returns to the Home screen from any other screen. Pressing it again from the Home screen will turn off the display.
Setting up the watch involves inserting a nano-SIM card (not included). The guide clarifies that standard and micro SIM cards are not compatible, emphasizing the need for a nano-SIM with voice and data plan. To insert the SIM card, the user must remove the SIM card cover, insert the SIM card, and then gently push it using the provided card remover to secure it. Charging the watch is straightforward: plug the micro-USB cable into the watch and connect it to a USB charger or any 1A/5V USB port. The watch is powered on by long-pressing the power key for 3 seconds.
Upon first power-on, users will be prompted to select the system language. The language can be changed later by swiping right twice from the Home screen and navigating to Settings > Language. To fully utilize the watch's features, users need to download and install the "TCL Connect" app on their smartphone, available on Google Play Store (Android 5.0 and above) or App Store (iOS 10.0 and above). A QR code is provided in the guide for easy app download.
Creating an account in the TCL Connect app involves touching "Sign up," entering an email address and setting a password, entering a verification code sent to the email, and then touching "Done." Users must also agree to the "Terms of use" and "Privacy and security." Existing users can log in with their email and password or use their Facebook/Twitter accounts.
Pairing the watch with a smartphone is a crucial step. Before pairing, ensure the SIM card is correctly inserted and the watch can connect to the internet, indicated by a network icon (4G, 3G, or 2G) on the top left of the Home screen. The guide explains various network icons: 4G, 3G, 2G, Data roaming network, No network but can make calls, and No network and can't make calls. There are two methods for pairing: scanning a QR code or entering the IMEI number. The QR code can be accessed by swiping left from the Home screen and touching "Contacts" (for first-time pairing) or by swiping right twice from the Home screen and navigating to More > QR code. The IMEI number is found on the device packaging label or by navigating to More > Settings > About watch. After entering the IMEI number in the app and touching "Done," the user must touch "OK" on the watch. The app then prompts for the child's personal information (profile picture, name, birthday, phone number of the watch, etc.), which is completed by touching "Done." Once paired, the MOVETIME Family Watch's location will be displayed on the application's main screen.
Connecting the watch to a Wi-Fi network via the smartphone is also detailed. Users open the "TCL Connect" app, select the watch, go to More > Wi-Fi, and touch "Add." They then select the wireless network and enter the password. If the network is hidden, they can touch "More" to enter the SSID and password. A Wi-Fi icon will appear on the top left of the watch once connected, and more Wi-Fi settings can be viewed by navigating to More > Settings > Wi-Fi on the watch.
Using the watch involves several intuitive gestures. Pressing the Power key wakes up the Home screen. Touching the screen selects an application or confirms an action. Touching and holding the Home screen allows users to swipe left to view different watch face options and select one. Swiping left or right navigates through applications, settings, and functions, while swiping right returns to the previous page. Swiping up from the Home screen displays notifications, and swiping down reveals volume and brightness controls, as well as the option to turn the wireless connection on/off.
The camera function is accessed by swiping left/right from the Home screen to select the "Camera" application. Users can then move the watch to find a good angle and touch the camera icon to take a photo.
Making phone calls is initiated by swiping left from the Home screen and touching "Contacts." Users then touch the desired contact and choose the phone icon to place a call, or the red phone icon to end a call. Video calls follow a similar process: touch the contact, choose the video call icon, and touch the screen to reveal the control icon, then the red video icon to end the call. To place a video call, the app must be downloaded on the smartphone, or the watch must have a camera.
Messaging features include sending voice messages, emojis, and photos. To send a voice message, touch "Chat," select a contact or group, hold the microphone icon to record, and release to send. For emojis, touch "Chat," select a contact or group, then touch + > emoji icon to select and send. Photos can be sent by touching "Chat," selecting a contact or group, then touching + > gallery icon to select and send a photo from the Gallery, or + > camera icon to take a new photo. If a message fails to send, an exclamation mark icon will appear, allowing the user to resend it.
The watch also supports adding and deleting friends and creating group chats. To add new friends, swipe left from the Home screen, touch Contacts > + Friend, keep both watches close, shake them, and touch "OK." To delete a friend, swipe left on their name in the contact list, touch the trash can icon, then touch the checkmark to confirm or the 'X' to cancel. Group chats are created by first adding friends, then swiping left twice from the Home screen, touching Chat > Create a group, choosing a group picture, inviting friends, and touching the checkmark to create or 'X' to cancel.
The "Sports" feature allows users to view statistics like steps, distances, and calories burned. If a SIM card is inserted, users can view daily step rankings for themselves and their friends. They can "praise" friends' steps by touching the heart icon and will receive notifications when their steps are praised. Swiping up on the Sports page reveals "Who praised me" to view friends who have praised their steps.
Straps are available in various colors, styles, and materials, and can be purchased from retailers. The guide includes visual instructions for removing and attaching new straps.
Maintenance features include a waterproof notice. The product has an IP65 rating, making it suitable for everyday use and protected against dust and low-pressure water jets. However, it should not be used for swimming, diving, scuba diving, or taking showers.
The FAQ section addresses common concerns. It confirms that the MT40X supports 2G (GSM 900/1800), 3G (UMTS B1/B8), and 4G (LTE B1/B3/B7/B8/B20) Nano-SIM cards. The "TCL Connect" app supports Android 5.0 and above, and iOS 10.0 and above. Troubleshooting steps are provided for pairing issues, including checking SIM insertion, network display (4G, 3G, 2G), overdue network charges, and restarting the watch. Similar steps are given for issues with obtaining the watch's position. If verification codes are not received during registration, users are advised to check junk emails or try again. Instructions are also provided for adding family members to contacts (via QR code or manually), adding/deleting Geofences, and adding/deleting Alarms and Reminders. Setting school time involves choosing a family watch, touching More > School time, setting a name, start/end times, and active days, then touching "Save." Multiple school times can be added and deleted. The guide also mentions that positioning accuracy varies across the 7 modes (GPS, AGPS, Beidou or Glonass, G Sens, Wi-Fi, and Base Station) and may deviate in urban environments. Data service uses mobile data for messages and location, incurring charges from the network operator. The SOS function is highlighted, with a recommendation for all family members to practice using it. All materials used in the product are confirmed to have passed safety tests. Finally, the guide states that location data queries are used solely for user-submitted requests and not for commercial applications or development without authorization. More information can be found in the TCL Connect app's help section or on www.tclcom.com/wearables/.
| Display Size | 1.3 inches |
|---|---|
| Resolution | 240 x 240 pixels |
| Battery Capacity | 600 mAh |
| Operating System | Proprietary OS |
| Display Type | TFT |
| SIM Card | Nano-SIM |
| Compatibility | Android, iOS |
| Strap Material | Silicone |
| Connectivity | 4G LTE, Bluetooth |
| Sensors | Accelerometer |
| Battery Life | Up to 2 days |