Do you have a question about the TCL TAW10CRNW0W and is the answer not in the manual?
Details on voltage, amperage, and fuse/breaker requirements for safe operation.
Instructions for registering the appliance online for warranty purposes.
Warning against mixing different types of batteries for safety and performance.
Emphasizes the importance of proper grounding and avoiding extension cords for electrical safety.
Lists the necessary tools for assembly, primarily a Phillips screwdriver.
Procedure to test the AC unit's power and cooling function before installation.
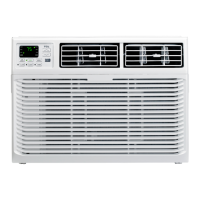
Initial steps for installation, including panel removal and filter removal.
Locate and remove the four faceplate screws for subsequent panel detachment.
Gently pull the faceplate away from the AC cabinet after screw removal.
Rotate the detached faceplate to access the control panel and remove its screw.
Steps to carefully remove the AC chassis from its cabinet by unscrewing and lifting.
Instructions for attaching the top angle rail to the AC unit using screws.
Slide window filler panels into side brackets and secure them with screws.
Position the AC cabinet in the window sill and temporarily secure it with the window.
Secure the AC cabinet to the window sill using specified round head screws.
Install support brackets flush against the window sill and assemble with angle brackets.
Extend accordion panels to fill the window width and tighten locking screws.
Trim and install the sash seal between window sashes and attach the window lock.
Carefully slide the AC chassis into the cabinet and reattach front components.
Basic controls for power, temperature/timer adjustment, display functions, and operating modes.
Detailed explanations of Cool, Eco, Fan, and Dry modes and their functionalities.
Instructions for setting the timer and utilizing the Sleep mode for comfort.
Information on the filter check indicator and normal operational sounds.
Solutions for issues like the unit not starting or not cooling effectively.
Troubleshooting steps for freezing coils, water dripping, and base pan water collection.
Resolving problems with the remote control and interpreting digital display error codes.
Instructions to download and install the TCL Home Comfort App from the app store.
Activate the TCL Home Comfort App using a QR code or manual activation code.
Create a user account using email or mobile number for app access.
Log in to the app using your registered credentials, including SMS verification for phone numbers.
Steps to recover a forgotten password by verifying identity and setting a new one.
Add the AC unit to the TCL Home Comfort App by selecting the product type.
Connect the AC unit to a 2.4 GHz Wi-Fi network using CF or AP mode.
Follow prompts to start the CF mode connection process for Wi-Fi setup.
Choose your Wi-Fi network, enter the password, and proceed with the connection.
Note on granting Location permission for Wi-Fi network connection troubleshooting.
The app pairs with the AC unit after network connection, indicating status like 'PP' or 'SA'.
View connection success or failure, and options to reset setup to CF or AP mode.
Switch the AC unit to AP mode from the CF mode screen via the remote control.
Press 'Next Step' to continue the AP mode setup process on the app.
Confirm switching to AP mode by pressing 'Display' on the remote, observing screen indicators.
Enter the password for your selected Wi-Fi network to continue AP mode setup.
Open your mobile device's Wi-Fi settings to find available networks.
Connect your mobile device to the 'TCLHOMECOMFORT-XXXX' hotspot network.
Return to the TCL Home Comfort App to resume the setup process after connecting to the hotspot.
The AC unit automatically syncs with the mobile device after initial connection.
AC unit LED screen displays 'PP' or 'SA' indicating network search during connection.
The app confirms connection status; displays success with a checkmark or failure with options to retry.
Once connected, you are ready to control the AC unit via your mobile device.
Click the AC unit name in the app to access and adjust settings on the control panel.
Select and adjust operating modes like Cool, Heat, Dry, Fan, or Auto via the app interface.
Note on the Heat mode's limited functionality on cooling-only AC units.
Choose desired fan speed (Low, Med, High, Auto) for Fan mode within the app.
Use the 'Function' button to access and select Sleep or Eco modes.
Access and configure timer settings for scheduled ON/OFF operations via the app.
Set timer ON/OFF, specifying hour, minute, mode, fan speed, and temperature.
Notes on preset temperatures for Dry, Fan, and Auto modes, and adjustable Cool mode.
View and change options like device name, sharing, feedback, and firmware updates.
Manage account details, scan QR codes, share devices, view messages, feedback, and app version.
Note on primary device control and country restrictions for shared accounts.
Configure a pattern lock for the app to enhance security and prevent unauthorized access.
Troubleshoot issues with the app losing AC connectivity during the setup process.
Resolve problems where the app fails to detect the AC unit on the network.
Solutions for failed connections using CF mode, including network or router issues.
Address issues finding or connecting to the wireless network, including location permissions.
| Brand | TCL |
|---|---|
| Model | TAW10CRNW0W |
| Category | Air Conditioner |
| Language | English |