409-10204
Rev G
1. Adjust the manual precision adjustment lever to “0" by pulling the lever away from the pivot pin. Lock
the lever in place by releasing it.
2. Install the applicator into the machine as described in paragraph 4.2.
3. Cycle the machine to crimp three sample terminations. Check the crimp height of the samples. If the
crimp heights are not correct, adjust the crimp height according to Step 4.
4. Adjust the crimp height by moving the precision adjustment lever (see Figure 12):
a. to the right to increase the crimp height; or
b. to the left to decrease the crimp height.
NOTE
Moving the precision adjustment lever in either direction will change the crimp height by approximately 0.013 mm [.0005 in.]
per step.
5. Repeat Steps 3 and 4 until the appropriate crimp height is obtained.
CAUTION
To avoid damaging the applicator, ALWAYS return the manual precision adjustment lever to the “0" position when finished
using the applicator.
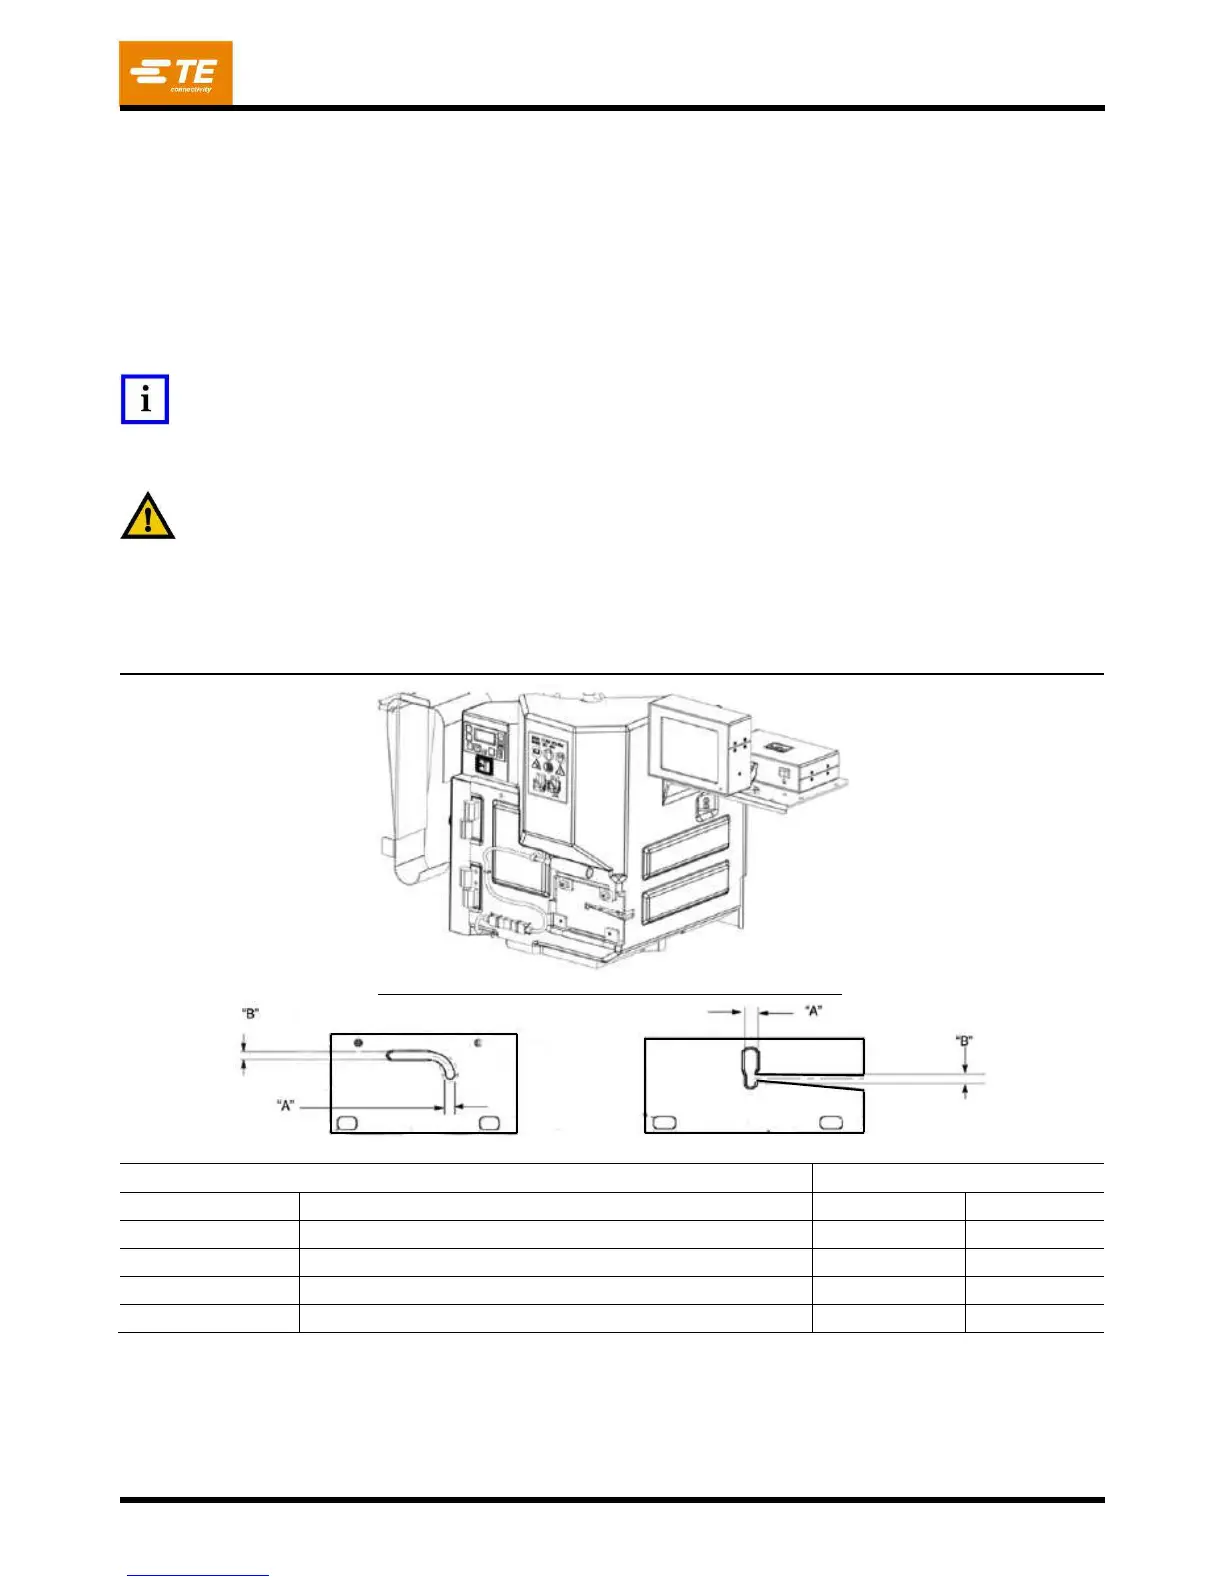
6.4. Guard Insert Adjustment
A guard insert is supplied with the machine. Some applications may require a special insert. See Figure 13 for
available guard inserts.
Standard (Away from the Applicator)
Standard (Close to the Applicator) – Shipped with the Machine
Figure 13
Tape Guard Insert Standard Guard Insert