EasyManua.ls Logo

TeachLogic CPS-121 - User Manual

TeachLogic CPS-121
6 pages
Print Icon
To Next Page IconTo Next Page
Loading...
TeachLogic LLC | 541 Main St, Suite B, Longmont CO 80501 | P 760-631-7800 | E support@teachlogic.com | teachlogic.com
CPS-121
Wall Mount Control Panel
Firmware versions 1.0 and 1.1
User Manual
This is the functional description of CPS-121 operation with the firmware versions listed above.
Power ON/OFF
Long-press the - Mute key 3-4 seconds
The same long-press will switch the amplifier into OFF
mode from the ON mode. And it will switch the amplifier
from OFF mode to the ON mode.
Standby (sleep mode)
TeachLogic
®
Matrix™ (IMA-121 and IMA-120) amplifiers
have a standby (or sleep) energy saving mode that
causes the amplifier to enter a standby mode after two
hours without audio activity. At this point, the CPS-121
control panel display will go dark (not just dim) and it will
repeat the word “Standby” on the display every minute.
The panel is still powered, however, and will respond to
the command to change the amplifier power mode to ON
(or wake the amplifier).
Using Control Panel Buttons
Press any button to activate the control panel. If the panel display is dim, the panel is not active and
pressing any button is required. When a button is pressed, the screen will brighten. Once the screen is
bright, the panel is active.
Setting Volume Levels
The channels adjustable are
MICA, MICB, AUXIN1 AUXIN2, LINEOUT, BT (for Bluetooth
®
), and AUX3, a 3.5mm
input port on the control panel.
To change the volume level of any input or the Line Out output, first select the channel to be adjusted by
pressing its labeled button. For example, Press MICA to change the volume of the wireless microphone
on channel A.
Press the VOL and VOL buttons to control the level.
Press MUTE to silence the channel. Press MUTE again will un-silence it.
The amplifier’s front panel power LED
(see below) is Blue when ON, Red
when OFF, and Amber when in
Standby.
Question and Answer IconNeed help?

Do you have a question about the TeachLogic CPS-121 and is the answer not in the manual?

Summary

Control Panel Operation

Power ON;OFF

Details on how to turn the amplifier on and off using the control panel's mute key.

Standby (Sleep Mode)

Explains the amplifier's energy-saving standby mode and how to wake it.

Using Control Panel Buttons

Instructions on activating and interacting with the control panel buttons.

Setting Volume Levels

Guide to adjusting volume levels for various input channels.

Bluetooth Connections

How to Pair

Step-by-step guide to pairing a Bluetooth device with the control panel.

Daily Bluetooth Behavior

Describes how the Bluetooth receiver automatically connects and manages devices.

Bluetooth Receiver (BTR) Indicators

Display Screen Indicators

Explains the meaning of symbols (STOP, PAUSE, PLAY) on the screen for BTR.

Previously Paired Devices

Details on reconnecting and managing previously paired Bluetooth devices.

Classroom Security and Troubleshooting

Classroom Strategy for Securing Bluetooth Connections

Recommendations to prevent unauthorized Bluetooth connections in a classroom.

Additional Functions in Firmware Release 1.1

Information on RS-232 connection loss detection in firmware release 1.1.

Troubleshooting Tips

Common issues and solutions, including amplifier response and screen dimming.

Changing Passcode for Bluetooth Pairing

Overview

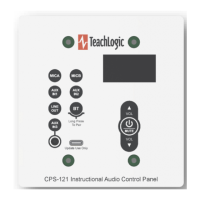
The TeachLogic CPS-121 is a wall-mount control panel designed for use with TeachLogic Matrix™ (IMA-121 and IMA-120) amplifiers, operating with firmware versions 1.0 and 1.1. Its primary function is to provide a user interface for controlling various audio inputs, volume levels, and Bluetooth® connections within a classroom audio system.

Function Description:

The CPS-121 serves as a central control point for managing audio in a classroom environment. It allows users to power the amplifier on and off, adjust the volume of multiple audio sources, mute channels, and manage Bluetooth® pairing and connections. The panel features a display screen that provides visual feedback on the current status, selected channels, and Bluetooth® connection information.

Important Technical Specifications:

  • Compatibility: Designed for use with TeachLogic Matrix™ (IMA-121 and IMA-120) amplifiers.
  • Firmware Versions: Compatible with firmware versions 1.0 and 1.1.
  • Connectivity: Connects to the amplifier via an RJ-45 connectorized cable, utilizing RS-232 communication.
  • Bluetooth®: Integrated Bluetooth® receiver (BTR) for wireless audio streaming.
  • Passcode: Bluetooth® pairing uses a configurable 8-position DIP switch for a passcode ranging from 8200 to 8455. The factory default passcode is 8247.
  • Power Management: Supports amplifier ON, OFF, and Standby (sleep) modes. The amplifier enters Standby after two hours of no audio activity.
  • Display: Features a screen that can be dim (inactive) or bright (active), and displays status messages like "Standby" or "Amplifier Offline."
  • LED Indicator (on amplifier): Blue when ON, Red when OFF, Amber in Standby.

Usage Features:

  • Power ON/OFF: A long-press (3-4 seconds) of the & - Mute key toggles the amplifier between ON and OFF modes.
  • Standby Mode: The amplifier enters a low-power standby mode after two hours of inactivity. The CPS-121 display goes dark and repeats "Standby" every minute. The panel remains powered and can be woken by a power mode change command.
  • Activating the Control Panel: Pressing any button will activate the control panel, brightening the screen if it was dim.
  • Setting Volume Levels:
    • Adjustable channels include MICA, MICB, AUXIN1, AUXIN2, LINEOUT, BT (for Bluetooth®), and AUX3 (a 3.5mm input port on the control panel).
    • To adjust a channel, press its labeled button (e.g., MICA).
    • Use the VOL ▲ and VOL ▼ buttons to control the level.
    • Press MUTE to silence the channel; pressing MUTE again will un-silence it.
  • Bluetooth® Connections (Pairing and Connecting):
    • Pairing:
      1. Activate the control panel by pressing any button.
      2. Press the BT button to select Bluetooth.
      3. Long-press the BT button (3-4 seconds) until a STOP block blinks once, then release. This puts the panel into pairing mode.
      4. The screen will display two arrows and the control panel's serial number (e.g., SN...0168- TeachLogic) for identification.
      5. Any Bluetooth device can then pair with the BTR. Users will be prompted for a passcode (factory default: 8247, spelling T-C-H-R).
      6. Once connected, the PAUSE (II) symbol displays, indicating a paired device not currently playing content.
    • Daily Bluetooth® Behavior:
      • The BTR attempts to connect to the most recently paired device.
      • Previously paired devices can connect by initiating the connection if no device is currently connected. Non-paired devices cannot connect or pair unless the panel is in pairing mode.
      • New devices can only pair if the BT button is long-pressed (4-5 seconds) to enter pairing mode, which also disconnects any currently connected devices.
    • Display Screen Indicators for BTR:
      • STOP (■): BTR is not connected to any device. Non-paired devices cannot pair unless in pairing mode. Displays after a connected device disconnects via a command.
      • PAUSE (II): Displays after a paired device connects (e.g., automatic reconnection). The screen shows the serial number's last 4 digits (e.g., SN...####-Teachlogic) for identification.
      • PLAY (►): Displays when a device sends audio to the BTR and remains for 12 seconds after audio stops, then reverts to PAUSE.
    • Reconnecting Previously Paired Devices:
      • Apple/Android devices that move out of range or have Bluetooth turned off can reconnect by manually selecting the TeachLogic panel's BTR when back in range.
      • If an Android device was connected, then another paired device connected, the Android device can reconnect if the panel is put into pairing mode again.
      • If an Apple device was previously paired, then another device paired and connected, the Apple device will not reconnect. The user must put the panel in BT pairing mode, "forget" the panel BTR in Apple's Bluetooth settings, then re-pair and connect.
    • Disconnecting a Device: Long-press the BT button (3-4 seconds) until the BT Stop icon blinks once. This disconnects the current device and allows other devices to pair/connect.
  • Classroom Strategy for Securing Bluetooth® Connections:
    • Maintain control of access to the control panel to prevent unauthorized pairing.
    • Immediately connect your (teacher's) Bluetooth device after putting the panel into pairing mode to prevent other devices from connecting.
    • If an unauthorized device has paired, require its owner to "forget" the TeachLogic system's Bluetooth pairing identity.
    • Mute the BT input channel when not actively using it to prevent unauthorized audio from being heard through classroom speakers.

Maintenance Features:

  • RS-232 Connection Loss Detection (Firmware 1.1+): If the electronic communication link between the control panel and amplifier is disrupted for a minute or more, the control panel will display "Amplifier Offline."
  • Changing Bluetooth® Passcode:
    • Requires removing the CPS-121 from the wall by unscrewing the front panel.
    • Locate the 8-position DIP switch on the circuit board.
    • Each switch position corresponds to a value (1, 2, 4, 8, 16, 32, 64, 128) if ON, and 0 if OFF.
    • Sum the values of all ON switches and add 8200 to get the new passcode. The passcode can be any number between 8200 and 8455.
    • The factory default switch positions (1-8): ON, ON, ON, ON, OFF, ON, OFF, OFF, resulting in a sum of 47, and a passcode of 8247.
  • Troubleshooting Tips:
    • Amplifier Not Responding: Check that the RS-232 switch on the amplifier is in the ON position. If OFF, the amplifier only responds to its own front panel controls.
    • Dark/Dim Screen or Unresponsive Panel: If dark, long-press the & - Mute button (about 4 seconds) to turn the amplifier ON. If merely dim, press any button momentarily to brighten the screen and activate the panel.
    • No Audio from Input: Select the audio source button (e.g., MicA or BT) and adjust the volume up. Check if it was muted or turned down to minimum. Independently verify the audio source device is sending audio successfully.
    • "Standby" Blinking: Indicates the amplifier is in standby (sleep) mode. Long-press the power button or use a microphone/audio source to activate it.

TeachLogic CPS-121 Specifications

General IconGeneral
BrandTeachLogic
ModelCPS-121
CategoryControl Panel
LanguageEnglish