Connect your System
DC12V
AUDIO OUT
SUB
VGA
HD-port
WAN USB
MAIN
OFFON Power
Router Display Device for Remote ViewWiFi IP Camera
Display Device(TV/Monitor with VGA/HDMI Port)Power Supply Power Supply
HDMI Cable
VGA Cable
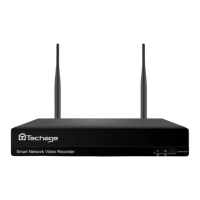
WiFi NVR
Mouse
How to install the camera system?
Step 1 : Install antennas for camera if the antennas of camera are split.
Step 2 : Power on the cameras with power adapters (12V 1A) and press reset button if it has.
Step 3 : Connect the NVR to router with an Ethernet cable.
Step 4 : Plug the mouse (included) into the USB port at the rear panel of the NVR.
Step 5 : Power the NVR with its power adapter (12V 2.5A or bigger).
Step 6 : Connect the monitor to the NVR with VGA/HDMI Cable.
Step 7 : Switch on the NVR through the power switch button on the NVR.
How to mount the camera?
Step 1 : Mount the cameras where within the WiFi range and then plug the power adapters
into the camera.
Step 2 : The cameras start to stream videos to NVR within 1 minute.
Step 3 : If display device does not display video, the reasons may be: there are too many
obstacles between the camera and the NVR or the camera is too far from the NVR. Please
try to move the cameras closer to the NVR or try to extend the wireless WiFi range.
04