The product is compliance with European Directive EMC 2004/108/EC.
SERIAL ATA HDD RACK
QUICK INSTALLATION GUIDE
IT
In compliance with EU Directive WEEE this product is marked with this symbol. It means that used electrical and electronic products
should not be mixed with general household waste. There is a separate collections system for these products in compliance with WEEE
directive, otherwise contaminative and hazardous substances can pollute the environment.
Pull the hard drive spring lock to unlock
hard drive.
Mounting screw x4 pcs
Miniature keys x2 pcs
1. Key lock
2. Hard drive spring lock
1. S-ATA power connector (15pin)
2. S-ATA data connector (7pin)
Power 15pins
Data 7pins
A: Non-removable
B: Removable
IMPORTANT NOTICE
Hard disk is a precise and accurate device, need to care specially. Please
read the manual of hard disk for precaution.
Do not eject e hard disk while it is busy.
Please hold the hard disk by edge, not to touch the PCB on it.
We will only provide repair service to our product malfunction problems, not
be responsible for any software, hardware or data stored within that resulted
in damaged to the product.
To protect your HDD, please always plug & unplug it while the computer is
switched off.
For the possible loss of data due to improper use of the product, Techly assumes no
responsibility.
INTRODUCTION
This HDD Rack consists of a bay portion that fits into your 5.25” drive bay and
holds your hard drive. This allows you to quickly swap 3.5” Serial ATA hard
drives in and out of a computer without having to open the computer case.
CONTENT DESCRIPTION
Check this package is completed with these contents;
- One hdd-rom,
- 4 screws and 2keys.
- Sata 15p 1pcs / sata7p 1pcs
SPRING LOCK
Pull the hard spring lock to unload hard drive
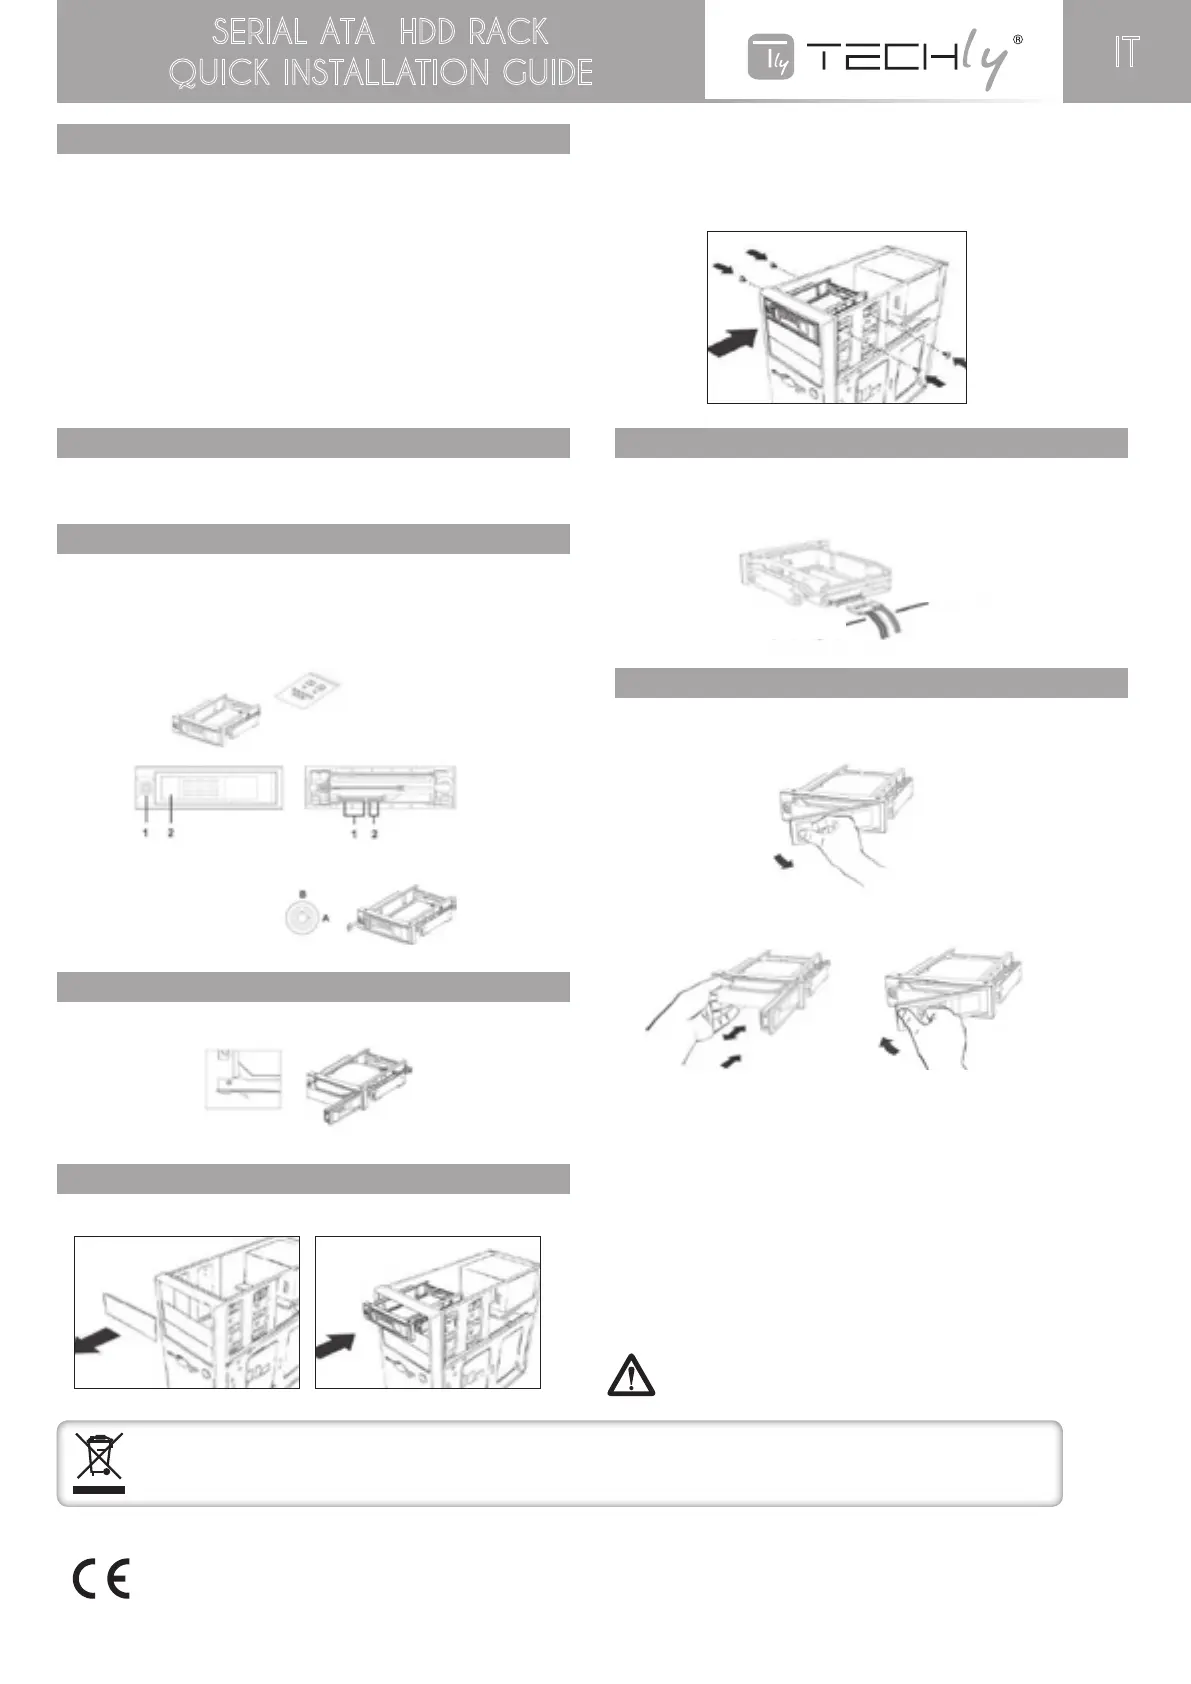
INSTALLING HDD-ROM
1. Remove e cover of an empty drive bay.
2. Smoothly insert HDD-ROM into the bay and push it inward until the
HDD ROM screw hole is aligned with the hole of the bay.
3. Secure HDD-ROM with screws. Use two screws on each side will be good
for HDD-ROM safety function.
CONNECTING THE HDD-ROM CABLE
1. Connect the S-ATA power cable by plugging to S-ATA power connector
on the rear panel.
2. Connect the S-ATA data cable by plugging to S-ATA data connector on
the rear panel
HDD-ROM BASICS
Inserting hard drive into HDD-ROM
1. Pull the spring lock to open the front door.
2. Place the hard drive into HDD-ROM with the hard drive label (printed)
side up and be sure the hard disk Connectors side is inserted into HDD-ROM.
The front panel door will not be closed firmly if hard disk is being
inserted in wrong direction
HDD-ROM will get damaged if closed by force
3. Press the door to push hard drive into HDD-ROM until door lock
Ejecting a hard drive from the HDD-ROM
1. Smoothly pull the spring lock to open the door, the key lock should
be onthe Removable position.
Otherwise, the locks would be damaged.
2. Carefully take the hard drive out form HDD-ROM
Hard Disk may be reach over 50°C when ejected from HDD-Rom,
it will not burn the fingers, but please handle it carefully
 Loading...