2. Track / Folder Searching Knob:
* Turn this knob clockwise to search through all of the tracks inside the USB flash drive / SD Card. Each track
will appear by the name of the track. It will show the tracks or folders chronologically (from when the files were
loaded onto the USB flash drive / SD Card). Press the knob to begin playing the desired track.
First the tracks on the root file will be displayed and then the tracks that are in folders.
* Press this knob to activate the folder searching function. Once pressed the word “ FOLDER” will begin flashing
on the display screen. Then, turn this knob clockwise to search the folders inside the USB flash drive / SD Card.
Press the knob to begin playing the tracks from that folder.
3. Level Meter: The VU-meter (with LED indicators) will display the strength of the output signal.
4. Power Button: Press this button to power the unit on and off.
5. Microphone Echo Volume Control Knob: Turn this knob to adjust the microphone echo volume level.
6. Microphone Volume Control Knob: Turn this knob to adjust the volume of microphone
7. Channel 1 Input Selector: Use the selector to choose the desired inputs source. Channel 1 has three different
input sources, AUX1 (Red and White RCA inputs on the rear of the unit), MP3 (1/8” input on the rear of the unit)
and USB1 & SD1 (USB flash drive / SD Card inputs for Channel 1).
8. Treble Control: Turn this knob to adjust the high frequencies of Channel 1& Channel 2.
9. Bass Control: Turn this knob to adjust the low frequencies of Channel 1 & Channel 2.
10. Cue Selector: Press this button to monitor the audio via the headphone connector.
11. Channel Fader: Move the fader up and down to adjust the volume of each channel.
12. Master Volume Fader- Move the fader up and down to adjust the master volume.
13. Channel 2 Input Selector: Use the selector to choose the desired inputs source. Channel 2 has two different input
sources, AUX2 (Red and White RCA inputs on the rear of the unit) and USB2 & SD2 (USB flash drive / SD Card
inputs for Channel 2).
14. Microphone Talkover: When this button is pressed, all signal sources except the microphone will be reduced to
20dB. The Microphone Talkover is ideal for making announcements without stopping the music.
15. CH1 / CH2 Crossfader: Slide the crossfader to determine the balance between Channel 1 and Channel 2. To
only play the audio from Channel 1 push the crossfader slider all the way to the left. To only play the audio from
Channel 2 push the crossfader all the way to the right. To have an even balance of audio from Channel 1 and
Channel 2 set the crossfader to the center position.
16. Headphones Volume Control Knob: Turn this knob to set the volume of the headphone output.
17. Power Supply: Connect the DC5V adaptor here
18. RCA Audio Output Terminals: Connect this output to the input on your equalizer, preamplifier or amplifier.
19. RCA Audio Input Terminals for AUX2: Connect the audio output from your signal source (DVD player, MP3
player, etc.) to this audio input for Channel 2.
20. RCA Audio Input Terminals for AUX1: Connect the audio output from your signal source (DVD player, MP3
player, etc.) to this audio input for Channel 1.
21. 1/8” (MP3) Input Terminal: Connect the audio output from a MP3 player/ computer to this audio input for Channel
1.
22. ¼” Microphone Input: Connect the microphone to this input terminal.
23. Headphone Input: connect the headphone to this output terminal.
24. Grounding Connector
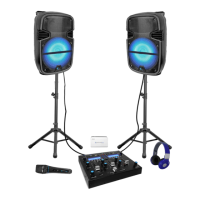
DJPACK2GO
 Loading...