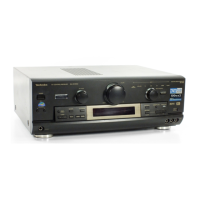
Do you have a question about the Technics SA-DX1050 and is the answer not in the manual?
Covers placement, voltage, foreign matter, and service advice to prevent electric shock or damage.
Specific precautions for the moulded three-pin mains plug, including fuse replacement and wiring.
Connect video sources like DVD players and VCRs using S-VIDEO or standard VIDEO terminals.
Connect audio sources like turntables, CD players, and tape decks using RCA or digital connections.
Connect digital audio sources via optical fiber or coaxial cables for high-quality sound.
Connect FM and AM antennas for radio reception, including indoor and outdoor options.
Connect the AC mains lead after all other cables are connected, ensuring proper ventilation.
Connect front, center, surround, and subwoofer speakers to the receiver's terminals.
Adjust speaker size (LARGE/SMALL) and distance for optimal sound staging and timing.
Set bass cut-off frequency (FILTER) and adjust dynamic range compression (DR COMP) for listening clarity.
Configure digital input terminals (D-INPUT) and adjust display brightness (DIMMER).
Step-by-step guide to changing receiver settings for speakers and inputs.
Enable 'LOW IMP' mode if front speakers have an impedance under 6 Ω.
Select STEREO for two-speaker playback or SURROUND for digital/analogue surround sources.
Change recognition mode (AUTO, PCM FIX, DTS FIX) if digital signals are not recognized properly.
Choose SFC modes (HALL, CLUB, LIVE, THEATER, SIM SURR) for enhanced sound experience.
Fine-tune sound field by adjusting speaker levels and surround speaker delay times.
Start playing sources and adjust volume. Monitor signal and program format indicators.
Switch between DVD 2-channel and 6-channel analogue input for DVD sources.
Connect and use a second set of speakers with the B terminals for stereo sound.
Adjust bass, treble, and balance for STEREO mode or analogue/PCM input.
Connect headphones for private listening or use VCR 2 terminals on SA-DX1050.
Control audio muting, adjust subwoofer volume, and use TAPE MONITOR for recording or equalizer.
Tune stations manually by frequency or directly enter frequency using remote buttons.
Enhance reception by switching to MONO or disabling DSP. Avoid interference from other devices.
Preset up to 30 FM/AM stations automatically or manually for easy channel selection.
Display RDS information (PS, PTY, RT) and perform PTY searches for specific program types.
Tune to related programs via EON and view available program types (PTY).
Record audio sources (except TAPE/MD) to a tape deck or VCR using analogue connections.
Check recorded sound quality on a 3-head tape deck using the TAPE MONITOR function.
Set the sleep timer to turn the unit off or the wake timer to turn it on after a specified time.
Turn off the sleep or wake timer by pressing the timer button until 'OFF' is displayed.
Displays information to remedy operational mistakes or sound output issues.
Clean the unit's exterior with a soft, dry cloth or a mild soap-and-water solution.
Addresses problems like no power, no sound, or input selection errors with solutions.
Resolves issues with DSP sound modes, radio tuning, noise, and interference.
 Loading...