Readtheseinstructions.
Keeptheseinstructions.
Heedallwarnings.
Followallinstructions.
Donotusethisapparatus near water.
Cleanonlywithaslightlydamp cloth.
Donotblockanyventilationopenings.
Installinaccordancewiththemanufacturer's instructions.
Do not install or operate near any heat sources such as radiators,
stoves,orotherapparatusthat produce heat.
Unplug this apparatus during lightning storms or when unused for
longperiodsoftime.
Refer all servicing to qualified service personnel. Servicing is
required when the apparatus has been damaged in any way, suchas
the power-supply cord or plug is damaged, liquid hasbeenspilledor
objects have fallen into the apparatus, the apparatus has been
exposed to rainor moisture, doesnot operate normally,or has been
dropped.
Warning: To reduce the riskof fire or electrical shock, do not expose
thisproducttorainormoisture. The product must not be exposed to
dripping and splashing and no object filled with liquids such as a
vaseofflowersshouldbeplacedon the product.
No naked flame sources such as candles should be placed on the
product.
Changes or modifications not expressly approved by the
manufacturercouldvoidtheuser'sauthority to operate this device.
Usage of controls or adjustments or performance of
procedures other than those specified herein may result in
hazardousexposure.
These labels tell you that the unit contains a Laser component. Do
notstareatthelaser lens.
This equipment generates, uses and can radiate radio frequency
energy and, if not installed and used in accordance with the
instructions, may cause harmful interferencetoradio ommunication.
However, this is no guarantee that interference will not occur in a
particular installation. If this equipment does cause harmful
interference to radio or television reception, which can bedetermined
by turning theequipment off andon, the useris encouraged to try to
correctthe interference by one of the following measures:
-Reorientorrelocatethereceivingantenna.
-Increasetheseparationbetweenthe equipment and receiver.
- Connect the equipment into an outlet on a circuit different from
thattowhichthereceiveris connected.
-Consultthedealeroran experienced radio/TV technician for help.
The mains operating voltage of this unit is on the
ratingplateontherear.In the UK this is 230/240 V.
he appliance cord is terminated with a UK approved mains plug
fitted with a 3A fuse.If
DO NOT connect either of these wires to the terminal marked E, or
colouredgreenorgreenandyellow,ormarked by the earth symbol.
Class II constructiondouble insulated. This productmust
notbeconnectedtoearth.
Caution:
Caution:
IMPORTANT
Mains Supply:
ELECTRICAL INFORMATION
T
the fuse needs to bereplaced,an ASTA or BSI
approved BS1362 fuse rated at 3A must be used. If you need to
change the mains plug, remove the fuse and dispose of this plug
safelyimmediately after cutting it from the cord.
The wires in the mains lead are coloured in accordance with the
code:Blue:NEUTRAL; Brown:LIVE:
As these colours may not correspond to the coloured markings
identifyingtheterminalsinyourplug,proceed as follows:
The BLUE wire must be connected to the terminal marked with the
letter N or coloured BLUE or BLACK. The BROWN wire must be
connected to the terminal marked with the letter L or coloured
BROWNorRED.
CAUTION!
RISK OF ELECTRIC SHOCK
DO NOT OPEN
TO REDUCE THE RISK OF ELECTRIC SHOCK DO
NOT REMOVE COVER (OR BACK)
This symbol indicates that there are important
operating and maintenance instructions in the
literatureaccompanyingthisunit.
This symbol indicates that dangerous voltage
constituting a risk ofelectric shockis presentwithin
thisunit.
3A FUSE
BS 1362
BROWN
(Live)
BLUE
(Neutral)
IMPORTANT SAFETY INFORMATION
2
FM RECEPTION
AM RECEPTION
!
!
!
!
!
!
!
Set the CD/RADIO Switch to ‘ ’
Set the AM/FM selector to ‘ ’
Select the desired station using theTuning Knob.
Switch the AM/FM switch to ‘ ’ This sets the radio to
mono and will eliminate most ofthe noise.
Move the antenna cable round for the best
reception.
Set the CD/RADIO Switch to ‘ ’
Set the AM/FM selector to ‘ ’ (Medium Wave)
Select the desired station using theTuning Knob.
RADIO
FM STEREO
FM .
RADIO
AM
The display shows the station frequency. If the station is in
stereo the FM stereo indicator lights.
In a bad signal area, stereoreception may benoisy.
The antenna is required only forFM reception.
Medium Wave (AM) reception is liable to interference from
cars, etc. so position the mainunit for bestreception.
NOTE:
ADVANCED CD PLAY
REPEATING A TRACK OR A COMPLETE DISC
PROGRAMMED DISC PLAY
Playing the Program:
To cancel and erase a program from the memory:
!
!
!
!
!
!
!
!
!
!
!
!
!
!
!
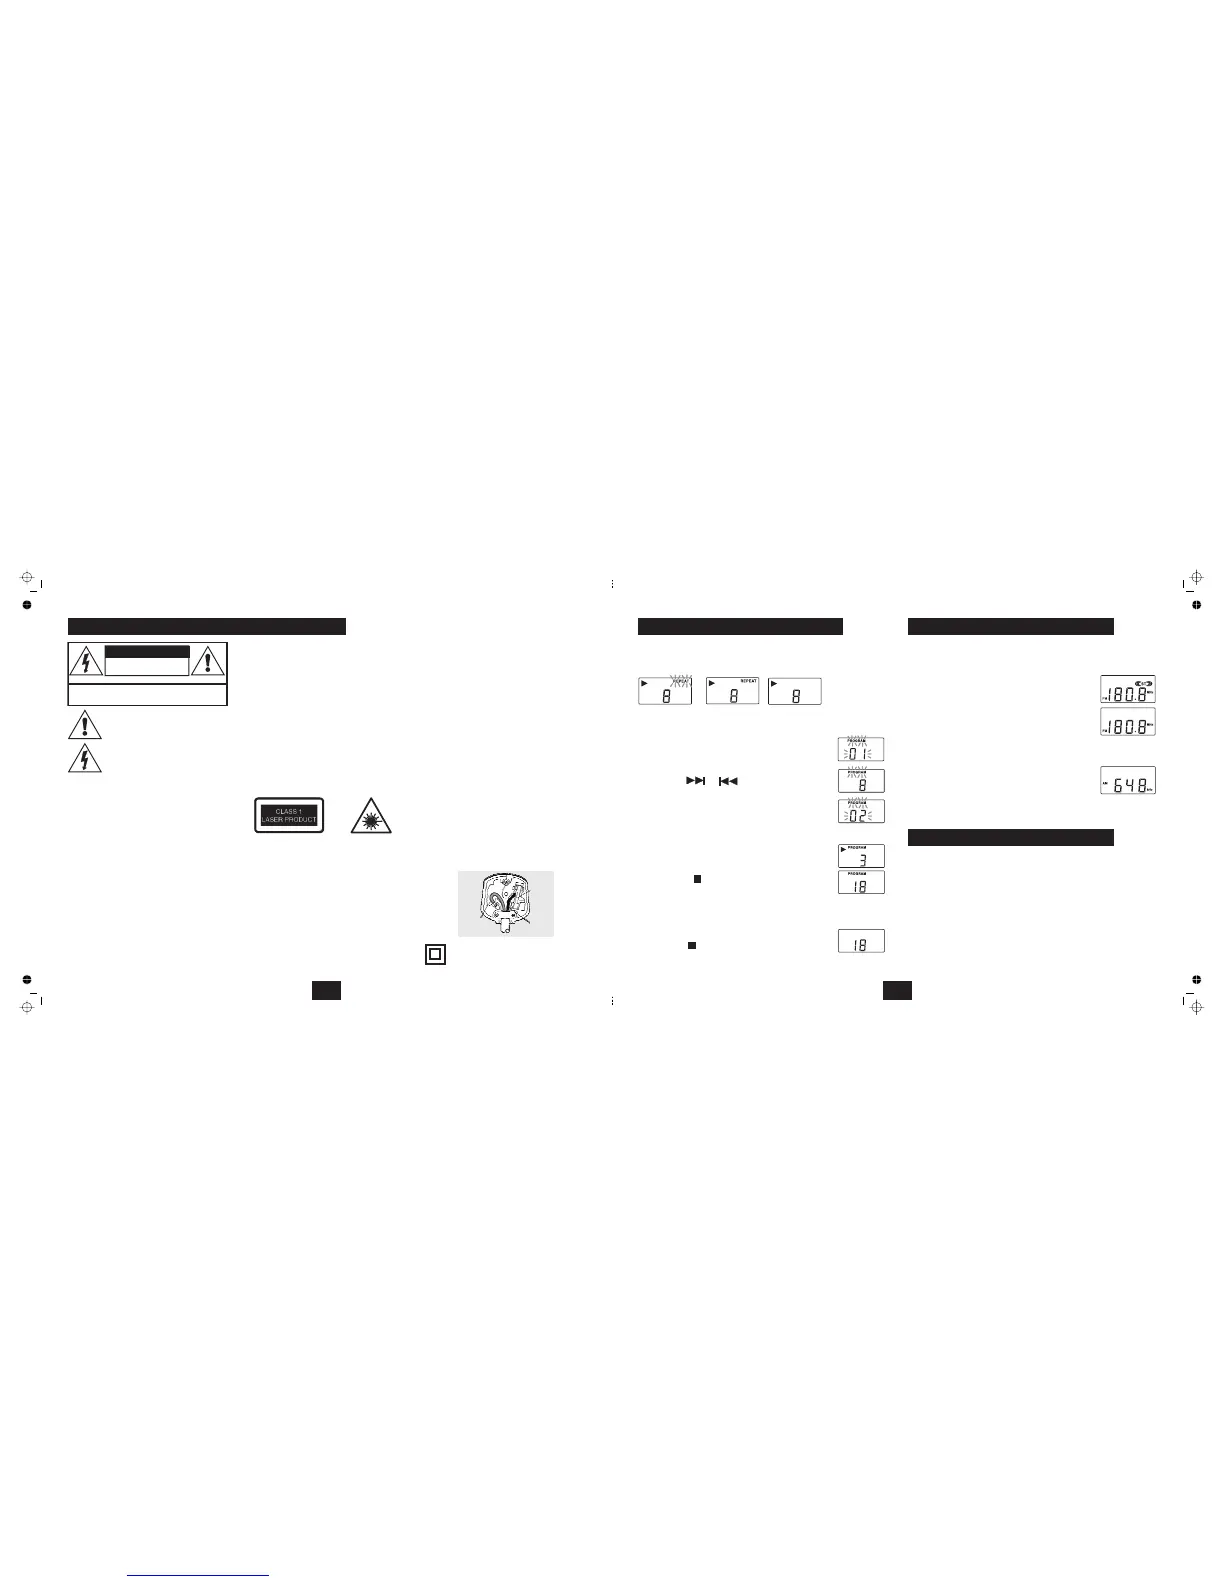
Press the REPEAT button tocycle the repeat mode:
REPEATTRACK REPEAT ALL REPEATOFF
Press STOP to cancel Repeat and stop the disc.
Program play can only be selected when the CD is
stopped. Youmay program up to 30 tracks.
Press the PROGRAM Button.
PROGRAM
Press SKIP or to select atrack
Press PROGRAM to store the selection.
0
Choose another track(or the same track).
Press PROGRAM to storethe selection.
Press PLAY/PAUSE The program will play once and
stop.
Press STOP to interrupt a program.
Press PLAY/PAUSE to re-instate the program.
You can change tracks and search for passages within
the program. REPEAT mode is also available.
Press STOP twice; or liftthe CD lid.
twice
once
The display flashes 01
and the indicator lights up.
The display flashes 2
.
The display indicates the current trackin play.
The
display indicates the numberof tracks on thedisc.
USING THE RADIO
ALTERING THE VOLUME AND TONE
VOLUME
BASS BOOST
!
!
Press to increase or decrease the volume.
To increase the bass effect set the BASS switchto ON.
PLAYINGTHE SYSTEM AT VERY HIGH LEVELS CAN DAMAGE YOUR HEARING!
VOLUME UP/DOWN
Do not set the volume too high. If the sound begins to distort or break up, reduce
the volume IMMEDIATELY. If you set the BASS switch to ON at high volumes you
increase the likelihood of distortion.
7
 Loading...