LOUDSPEAKER CONNECTIONS
FINAL CONNECTIONS
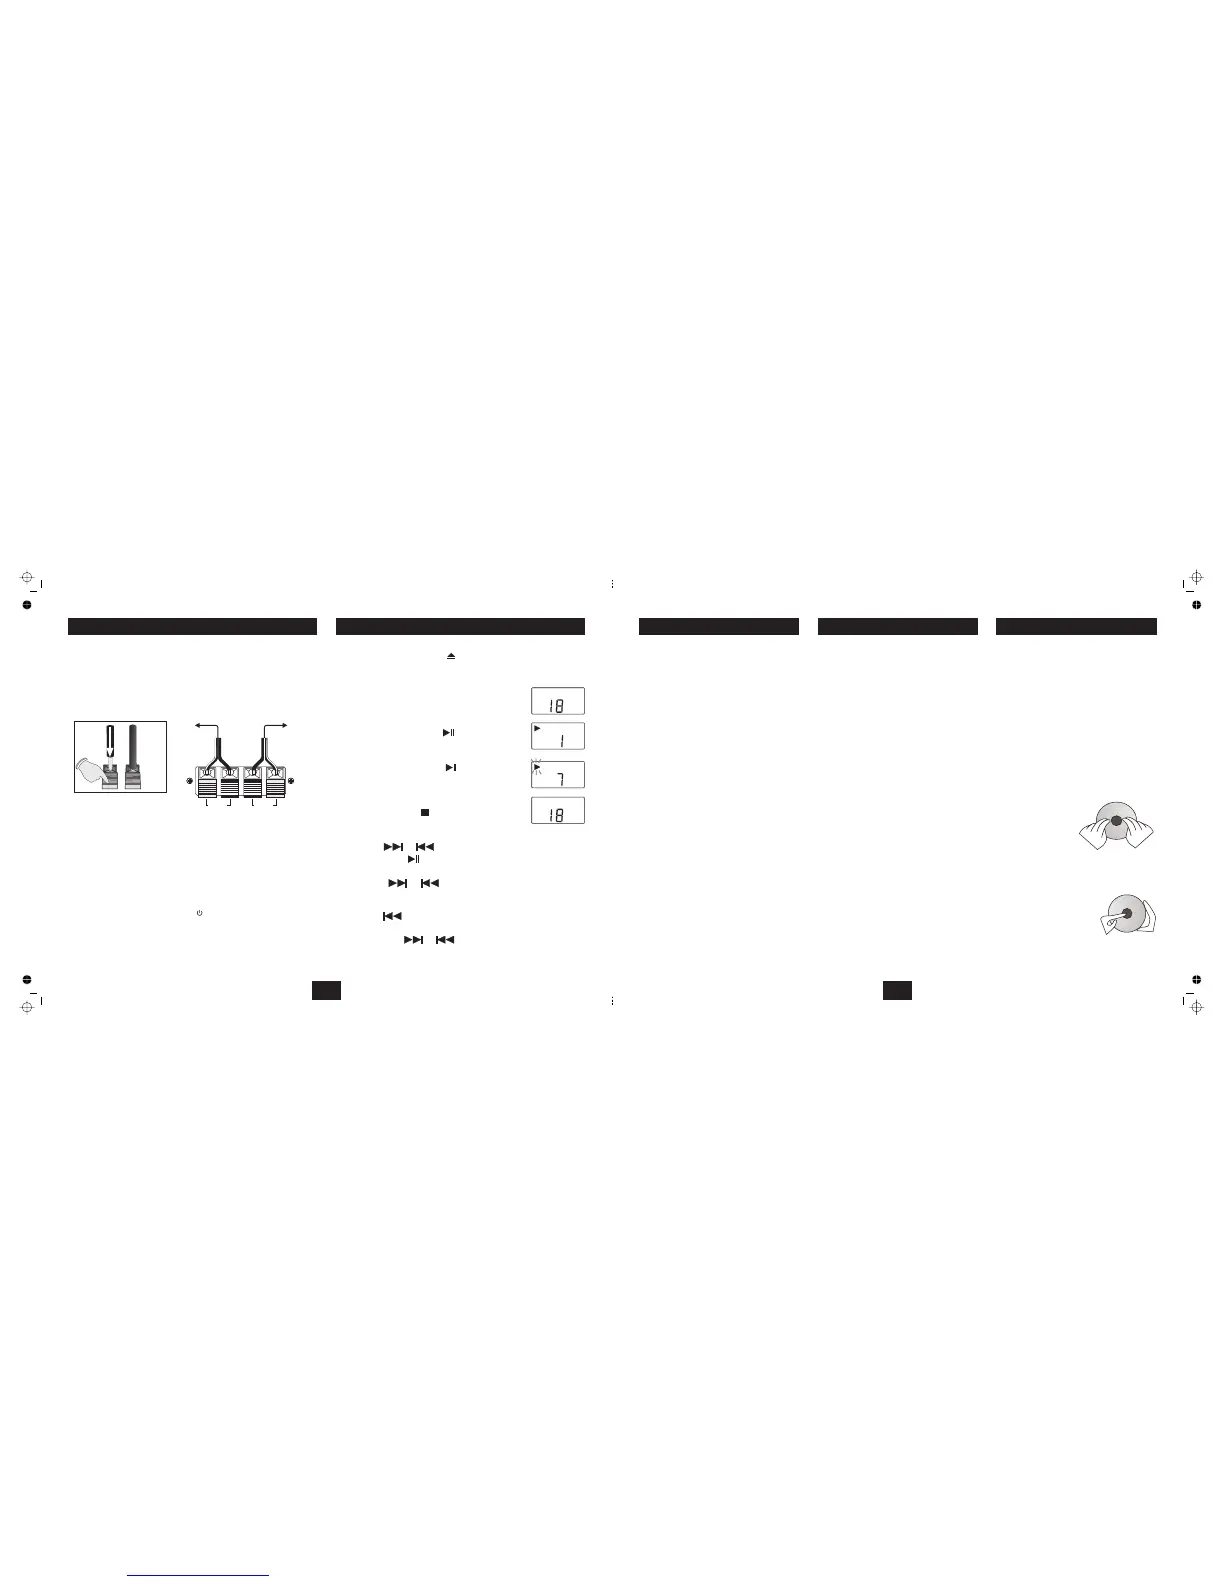
The speaker terminals are spring loaded. To connect, press the terminal down to
open it. Insert the bare end of the cable into the hole in the socket. Release the
terminal. Make sure the terminal trapsthe bare wireand not the insulation.
Connect the loudspeakers as shown n the diagrams The cable has a stripe
on one core. Connect this to the Positive (RED) terminal. Connect the plain
core to the Negative (BLACK) Terminal.
Extend the FM antenna. Do NOT cut it short!
When running speaker cables, keep them well away from areas whey they
could cause a danger to peopleor pets.
Connect the power cord to themains point butdo not switch on.
Plug in the mains plug andswitch the systemon at the mains point.
The system will respond and go into Standby. The RED standby light will glow
on the front panel.
Press the button on the unit.
!
!
!
!
!
!
!
SWITCHING ON
POWER/STANDBY The unit switches on and
the display lights up. In normal use the system will revert to the mode and
volume as last used.
CONNECTION AND OPERATION
Press
Insert
Release
RIGHT LEFT
RIGHT SPEAKER
LEFT SPEAKER
!
!
!
!
!
!
!
!
!
!
!
Set the switch to
Press the button
Place a CD (label side up)onthe central spindle lock
Press gently to securethe CD in place.
Close the CD door.
Press the PLAY/PAUSE button
The disc will play from Track1
Press the button
The disc will pause. In Pause mode the sound mutes
and the display flashes.
Press the STOP button
Insert the CD
Press SKIP or to select the track.
Press PLAY/PAUSE to play from the track.
Press SKIP or repeatedly, to select and
then play from the desired track.
Press SKIP once.
Press and hold SKIP or until the passage is
located. Release thebutton to return to normal play.
CD/RADIO CD
DOOR OPEN .
TO PLAY A CD FROM THE START
TO PAUSE A CD WHILE PLAYING
PLAY/PAUSE
TO STOP A CD WHILE PLAYING
TO PLAY A CD FROM A SELECTED TRACK
TO CHANGE TRACKS DURING PLAY
TO RETURN TO THE START OF A TRACK DURING PLAY
RAPID SEARCH FOR A PASSAGE DURING PLAY
The disc will spin briefly, then stop. The display will
indicate the number of tracks onthe disc .
During rapid search the volume isreduced
!
!
!
!
!
PLAYING A CD
6
UNPACKING
PREPARATION
T
he carton contains:
The MC 307 AM/FM/CD receiver:
One pair of loudspeakers:
Remote handset andbatteries
Unpack and inspect the components carefully. If
any item is damaged or missing, contact the Tesco
store from where you purchased this product, or if
that is not possible, your nearest Tesco store. Please
have your receipt ready when youcall.
Retain the packaging. If you dispose of it, do so in
accordance with recycling regulations in yourarea.
Retain the User Handbook. If you pass the unit on to
a third party make sure youpass on the handbook.
CD COMPARTMENT
Remove the twostrips of tape over the CD door.
Press the DOOR OPEN button to openthe CD lid.
Carefully remove the protective card from the CD
mechanism.
Close the CD door and discard the card and the
pieces of tape.
Check that the mains voltage on the rating plate
which is located at the rear of the unit matches the
mains voltage in your area.
Unwrap the power cord
Uncoil the FM antenna and extendit fully.
Make sure there is a suitable power point within
easy reach.
The means of disconnection of the appliance is the
mains plug. This must not be obstructed and must
be freely operable at all times.
Site the system on a stable surface (ideally a stout
shelf) where it is unlikely to fall or get knocked over.
This is specially important in the case of the
speakers which should be placed on either side of
the main unit with at least150mm between each
speaker and the main unit.
The radio performance of the system is dependent
on the aerial.
The FM aerial should be moved around to get the
optimum results.
The AM aerial is internal to the system, so if you
need good medium wave reception, try the system
in different locations before making afinal choice.
Make sure that you position the unit where the
remote handset can easily be operated in direct line
of sight and no more than3 metres away.
Dirty, scratched or warped discs may cause
skipping or noise.
Handle the disc only by the edges. To keep discs
clean, do not touch the surface.
Discs should be stored in their cases after use to
avoid scratches.
Do not exposediscs to direct sunlight, high humidity,
high temperature, dust, etc. Prolonged exposure to
extreme temperatures canwarp the disc.
Do not stick or write anything on the disc. Sharp
writing instruments or the inks used in some felt tip
pens may damage its surface.
Positionthe disc over the centre spindle
Make sure the printed side facesout
Press the CD gently into place
NEVER use force
Press lightly on thecentre spindle
Gently ease the CD off byholding it atthe edges.
Do not touch the playing surface
NEVER use force
!
!
!
!
!
Do not extend or cut the FM
antenna lead.
When loading a CD into the player:
When removing a CD from the player:
PRELIMINARIES
CD TOPICS
SITING AND PLACEMENT
3
 Loading...