GB 2
OVERVIEW
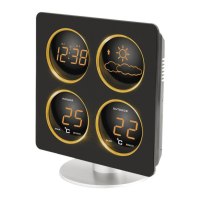
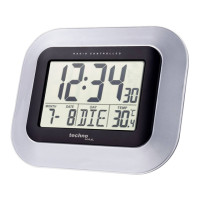
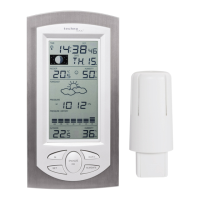
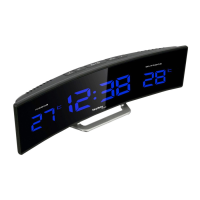
A – Front view
A1 – Indoor temperature A4 – Outdoor temperature
A2 – Alarm On A5 – RCC indicator
A3 – Time A6 – Stand
B – Top view
B1 – DOWN / WAVE button B4 – ALARM ON / OFF button
B2 – SET button B5 – UP button
B3 – SNOOZE / DIMMER button
C – Back view
C1 – Battery compartment cover C4 – DC socket
C2 – RESET button C5 – Insert 1 x CR2032 battery
C3 – AC/DC adapter C6 – Insert adapter jack
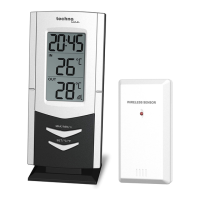
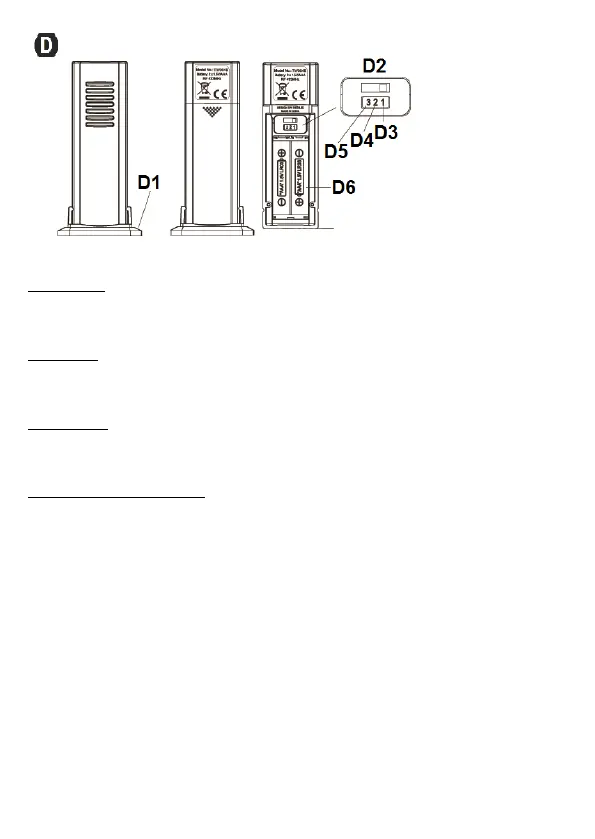
D – Outdoor temperature sensor
D1 – Stand D4 – Channel 2
D2 – Fix at channel 1 D5 – Channel 3
D3 – Channel 1 D6 – Insert 2 x AAA batteries
QUICK SETUP
1) Place your clock face down on a flat and soft surface. Use screw driver to open the backup battery
compartment cover located on the back of the clock.
Slide open the battery cover at the back of your clock, then insert 1 x CR2032 Lithium battery to the
battery compartment. Make sure +ve polarity of the battery is facing up. Then replace the battery
cover and tighten the battery cover screw.
2) Insert the AC/DC adaptor to any 230V AC household outlet. Then insert the DC jack to the back
case of your unit.
3) Keep your clock and wireless sensor next to each other. Slide open the battery cover at the back
of your wireless outdoor sensor, make sure the channel selector is set at position
1 (top position), then insert 2 x AAA batteries (not included) into the outdoor sensor by observing the
correct + / - polarity signs inside the battery compartment. Replace the battery door.