113
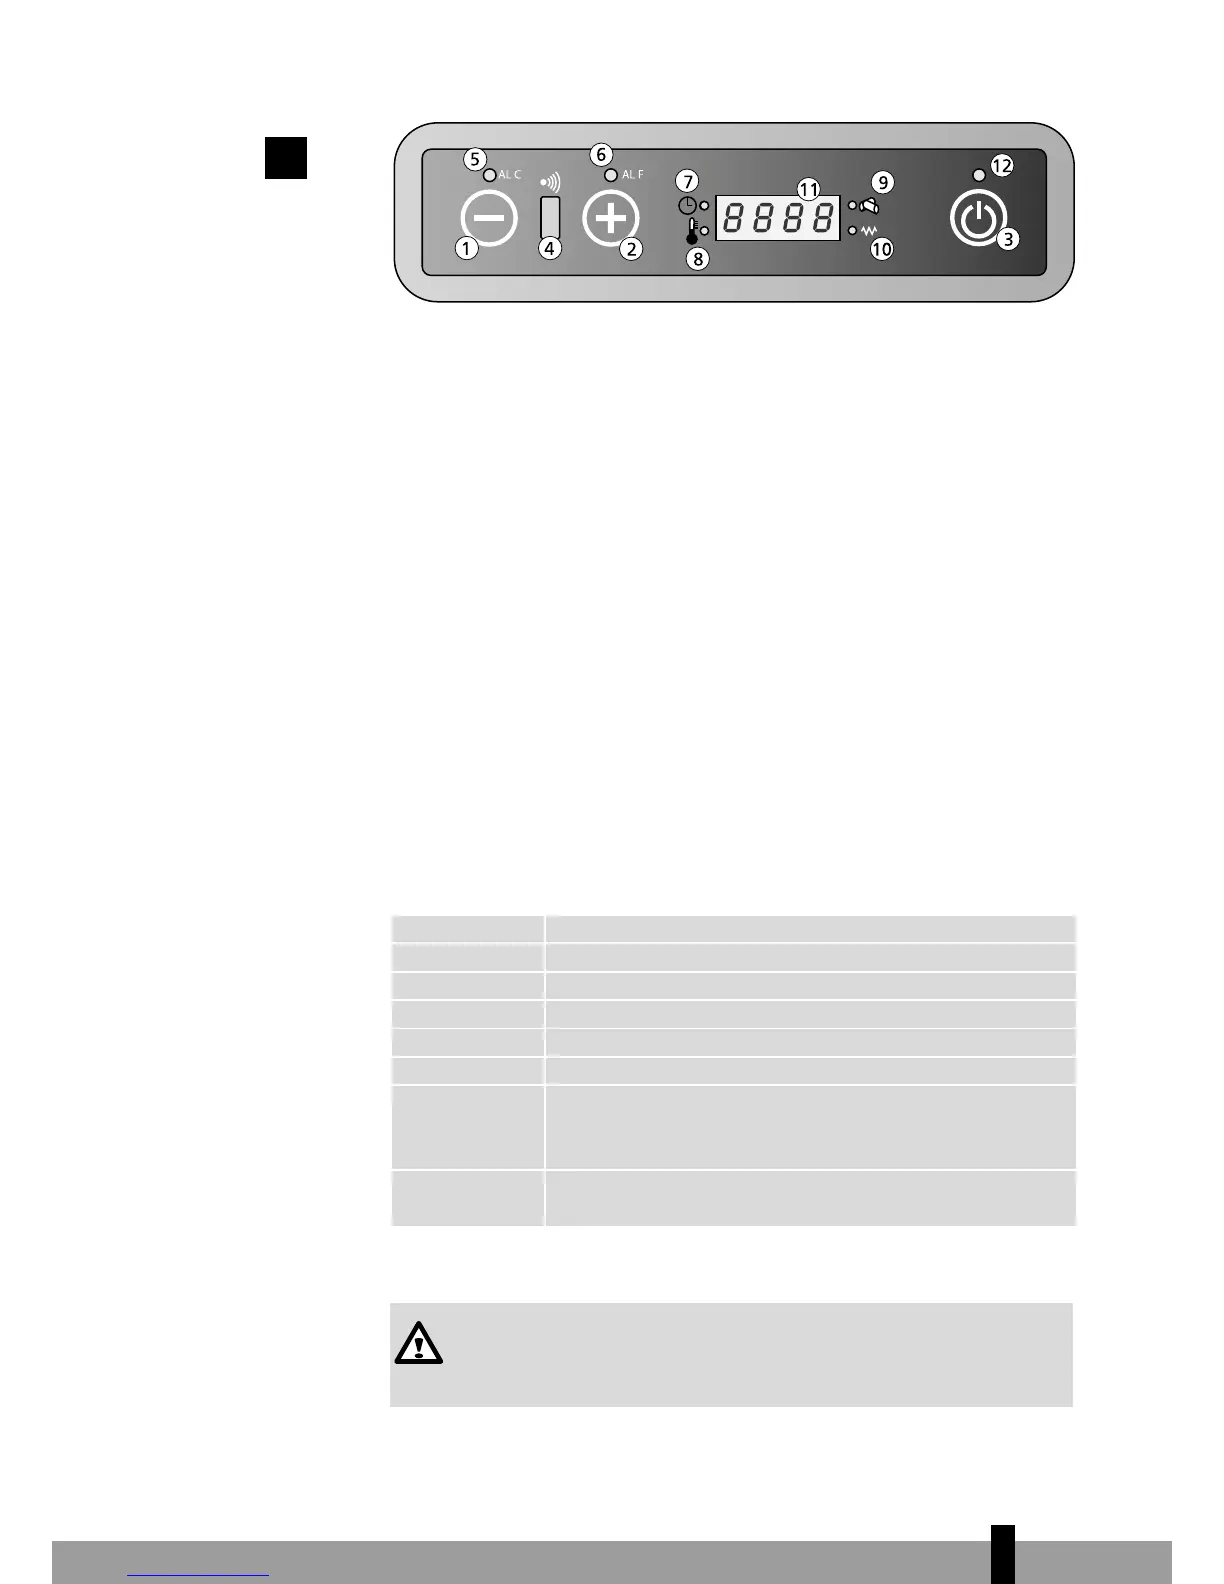
4.1 DISPLAY INFORMATION
Button 1: Lowers the room temperature desired by the user. Button 1 can also
be used to show and alter the level of heat output.
Button 2: Raises the room temperature desired by the user.
Button 2 can also be used to show and alter the level of heat output.
Button 3: Is used to turn the stove on and off.
Receiver 4: Remote control receiver.
LED 5: Indicates an Alarm C (C stands for temperature) error. For more in-
formation, see section 8.2 “error list”.
LED 6: Indicates an Alarm F (F stands for flue gases) error. For more infor-
mation, see section 8.2 “error list”.
LED 7: The stove features a clock for setting the start-up and switch-off
times. When this LED is lit, the clock mode is active. Timer function
not activated for the models TBH 558 / TBH 564 / TBH 565 / TBH 570.
LED 8: Indicates that the set temperature has been reached. The text ECO
and the set temperature will also be shown on the display.
LED 9: Indicates that the pellet feed auger is active.
LED 10: Indicates that the hot rod igniter is active.
Display 11: Indicates the room temperature and the heat output In the event of
a fault, the error code is displayed.
LED 12: ON/OFF indicator.
Off The stove is off or switching off.
Fan The stove is in preheating mode.
Load The pellet supply is operating. LED 9 is also on (see figure 2)
Fire On The stove is in the ignition phase.
On 1 The stove is on and burning at the lowest heat output level 1.
Eco The stove has reached the set temperature.
StoP The stove is in automatic brazier-cleaning mode. The flue
blower is running at maximum speed and the pellet supply
motor is running at its lowest speed.
Atte This alert appears when an attempt is being made to start the
stove while it is cooling down.
4.2 STANDARD START-UP PROCEDURE
The brazier must be cleaned before each start-up. If the timer mode is
being used, the brazier must be cleaned before the automatic start-up.
The normal start-up and operating procedure is as follows:
2.
4