Note that the Stretch-and-Grip Base (A-Frame) has NOT been fully assembled.
Follow these directions carefully to ensure safe handling of this part.
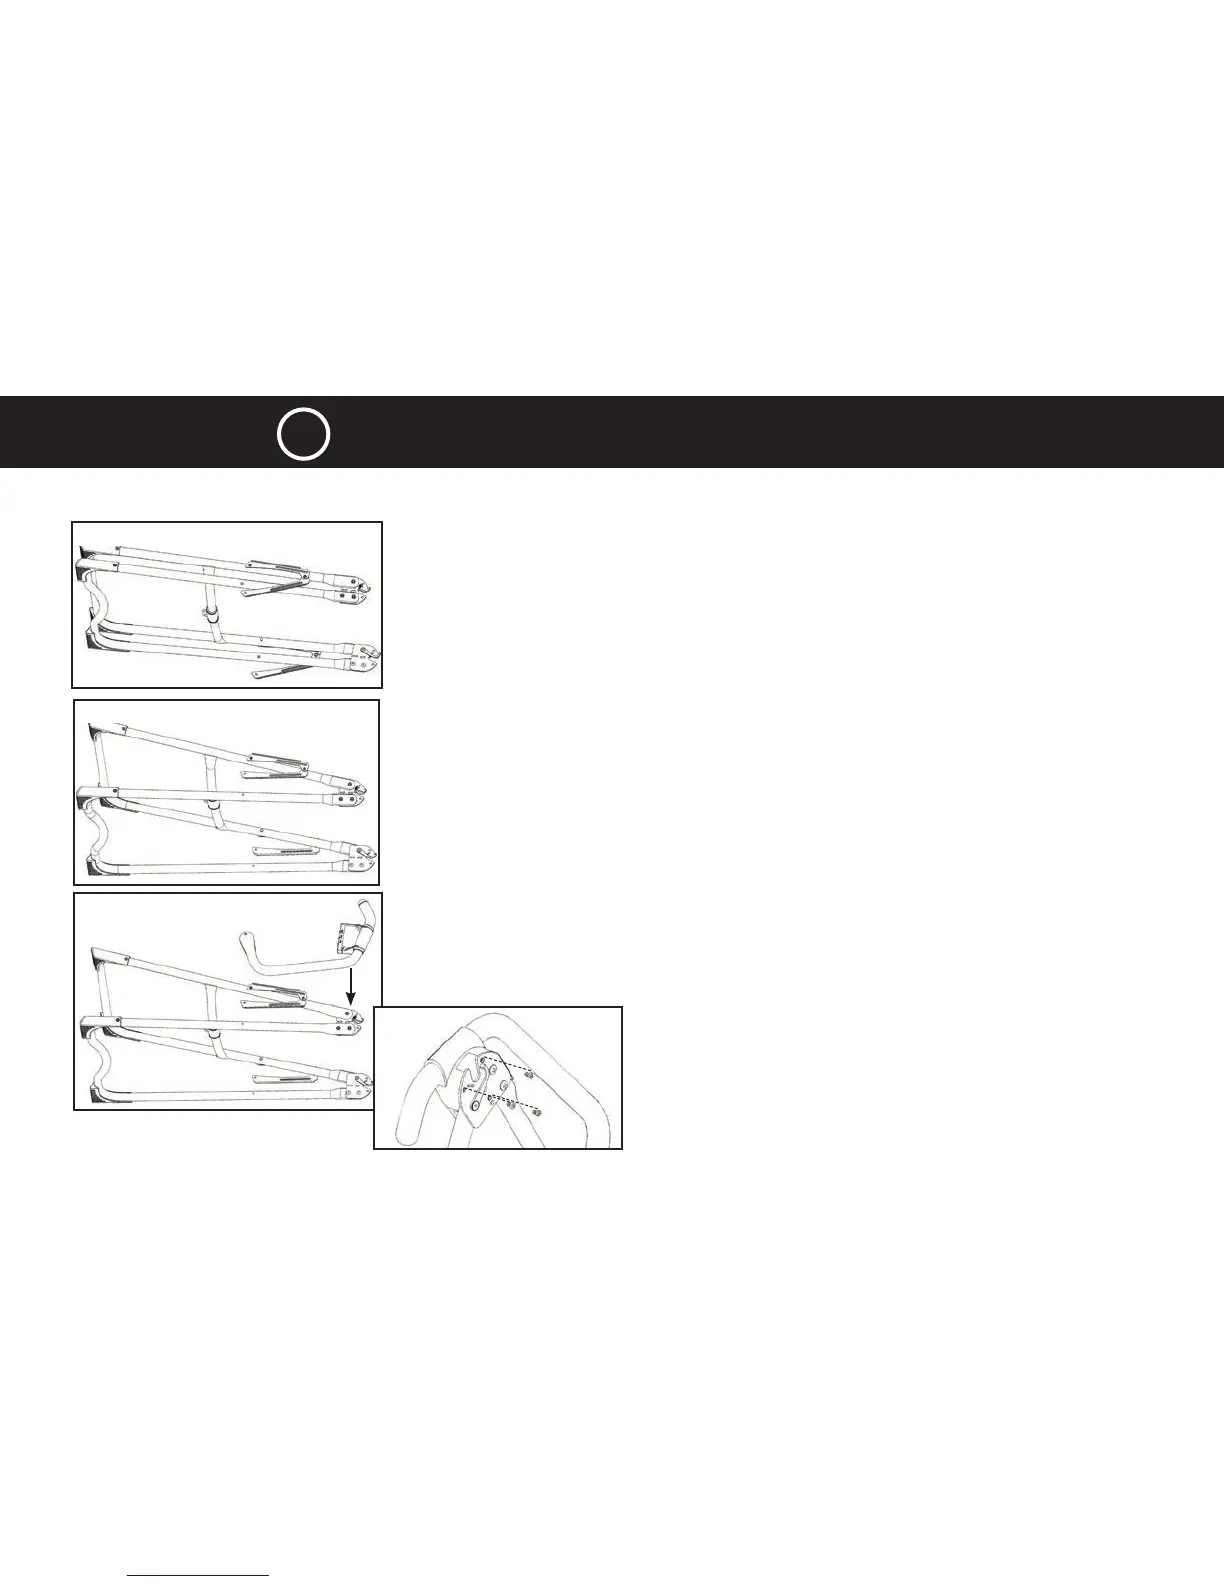
Open the A-Frame
• On a level surface, remove the zip-ties that secure the two legs of the A-frame together.
• Keeping the legs of the A-Frame together, lay the A-Frame on its side (Figure 1).
• Open the A-Frame legs so that it creates a V-shape on the floor (Figure 2).
NOTE: This will stabilize the unit so that you can assemble the Stretch Max
TM
Handles to the
A-Frame and secure the Spreader Arms.
Assemble the Upper Handle Portion
NOTE: Fully assemble the upper/lower portion of one handle before assembling the other.
• Determine the left or right Handles, marked with an embossed L / R on the inside of the
black plastic part of each handle.
• Locate the Stretch Max Handle Hardware Kit (HK1007)
• Align the black plastic part of the corresponding handle (left / right) over the outside edge of
the Hinge Plate on the A-Frame (Figure 3). The lower handle portion will be extended down
the side of the A-Frame with the unassembled Spreader Arm.
• Insert and loosely hand-tighten three of the Allen Head Screws through the Hinge Plate into
the inside of the handle (Figure 4).
STEP 1 Stretch Max Handle Assembly - Upper Portion
FIGURE 1
FIGURE 2
FIGURE 3
FIGURE 4
DO NOT PROCEED TO THE
OTHER HANDLE YET.
RIGHT
LEFT
8