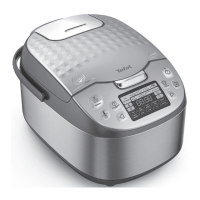
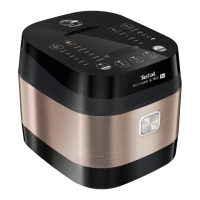
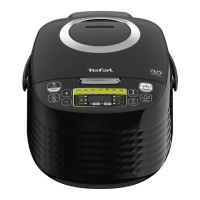
Tefal SPHERICOOK Multicooker (Model RK745840)
This document describes the Tefal SPHERICOOK Multicooker, Model RK745840, a versatile kitchen appliance designed for various cooking functions.
Function Description
The Tefal SPHERICOOK Multicooker offers a wide range of cooking programs, enabling users to prepare diverse meals with ease. The appliance features a control panel with dedicated keys for starting, selecting menus, adjusting time and temperature, and managing the "Keep Warm" function.
Key Functions:
- Start Key: Initiates the cooking process for the selected program.
- Menu Key: Allows users to cycle through various cooking functions in standby mode. These include:
- Roasting
- Soup
- Steam
- Rice
- Yogurt
- Baking
- Reheat
- Slow Cook
- Risotto
- Porridge
- Browning
- Pasta
- Jam
- My Recipe
- Delayed Start/Timer Key:
- Timer: Adjusts the cooking time for most programs (except Rice and Risotto). The default cooking time is displayed and can be modified using the +/- buttons.
- Delayed Start: Sets a preset time for the end of cooking (except Browning, Yogurt, Reheat). Users can delay the start of cooking by setting a timer for the desired delay duration. The maximum start delay is 24 hours. If the delayed start time is shorter than the cooking time, cooking will commence immediately.
- +/- Keys: Used to adjust cooking time (+/- 1, 5, or 15 minutes) and delayed start time (+/- 5 minutes). Note that cooking time cannot be adjusted for "Rice" and "Risotto" modes, and delayed start cannot be set for "Browning," "Yogurt," or "Reheat" modes.
- Keep Warm/Cancel Key:
- In standby mode, pressing this key activates the "Keep Warm" program.
- During a cooking program, pressing this key stops the cooking process or cancels all settings, returning the multicooker to standby mode.
- The automatic "Keep Warm" function can be toggled on/off by holding the key for 5 seconds. The maximum keep warm time is 24 hours.
- Temperature Key: Allows users to select and adjust the cooking temperature for specific programs (Baking, Browning, Slow Cook, and My Recipe). The default temperature varies by program and can be increased or decreased using the +/- keys. Temperature can be modified during cooking.
Specific Program Details:
- Porridge Function: Select "Porridge" via the Menu key. The default cooking time is displayed and can be adjusted. After cooking, the multicooker beeps and enters "Keep Warm" mode. For best results, serve immediately. Do not exceed maximum ingredient quantities.
- Soup Function: Select "Soup" via the Menu key. The default cooking time is displayed and can be adjusted. After cooking, the multicooker beeps and enters "Keep Warm" mode.
- Steam Function: Select "Steam" via the Menu key. The default cooking time is displayed and can be adjusted. After cooking, the multicooker beeps and enters "Keep Warm" mode. For steam cooking, pour water into the bowl, ensuring it's below the steam basket and does not exceed the 7-cup mark (2.15 litres). Add ingredients to the steam basket and close the lid.
- Roasting Function: Select "Roasting" via the Menu key. The default cooking time and temperature are displayed and can be adjusted. After cooking, the multicooker beeps and enters "Keep Warm" mode.
- Jam Function: Select "Jam" via the Menu key. The default cooking time is displayed and can be adjusted. The lid must remain open during jam making. After cooking, the multicooker beeps. There is no "Keep Warm" function for jam. Follow recipe quantities to avoid boil-overs. Reduced sugar jam is recommended and should be refrigerated and used within 3-4 weeks. Do not alter sugar or fruit quantities. Use fresh, ripe fruit. Never close the lid.
- Browning Function: Select "Browning" via the Menu key. The default cooking time and temperature are displayed and can be adjusted. After cooking, the multicooker beeps. There is no "Keep Warm" function for browning. The lid can be open or closed as per the recipe. Always use with oil and food to prevent damage or danger.
- Slow Cook Function: Select "Slow Cook" via the Menu key. The default cooking time and temperature are displayed and can be adjusted. After cooking, the multicooker beeps and enters "Keep Warm" mode.
- Yogurt Function: Select "Yogurt" via the Menu key. The default cooking time is 8 hours, adjustable from 1 to 12 hours. A longer cooking time yields more acidic and firmer yogurt, while a shorter time results in sweeter, more fluid yogurt. There is no "Keep Warm" or "Delayed Start" function for yogurt.
- Milk Choice: UHT whole milk provides firmer yogurt. Pasteurised fresh milk gives creamy yogurt but needs boiling and straining. Raw milk must be boiled. Dried skimmed milk powder makes very creamy yogurt.
- Tips: Sterilize all equipment. Sweeten yogurt after cooking or dissolve sugar in milk before. Label yogurt with the use-by date. Chill yogurt for at least 4 hours (preferably overnight) to thicken. Natural yogurts last up to 7 days, flavored yogurts up to 3 days. Homemade yogurts may be thinner and can have clear whey on top. Add fresh or cooked stewed fruit after preparation and chilling to avoid curdling.
- Baking Function: Select "Baking" via the Menu key. The default cooking time and temperature are displayed and can be adjusted. After cooking, the multicooker beeps. There is no "Keep Warm" function for baking.
- Rice Function: Select "Rice" via the Menu key. The cooking time is automatic and not displayed, varying with rice quantity and type. After cooking, the multicooker beeps and enters "Keep Warm" mode. Always add rice first, then water to the corresponding cup mark.
- Risotto Function: Select "Risotto" via the Menu key. The cooking time is automatic and not displayed, varying with rice quantity and type. After cooking, the multicooker beeps and enters "Keep Warm" mode.
- Perfect Rice Tips: Measure rice with the provided cup and rinse (do not rinse for risotto). Distribute rinsed rice evenly in the bowl. For two cups of rice, add water up to the level 2 mark. Once cooked and in "Keep Warm" mode, stir the rice for perfectly separated grains.
- Cooking Guide for White Rice: A table provides guidance on measuring cups, weight of rice, water level, and serves for various types of white rice. For sticky rice, reduce water quantity. For plain risotto with water, use the "Rice" function; for recipes with stock and additional ingredients, use "Risotto."
- Pasta Function: To cook pasta, wait for the water to reach the correct temperature before adding pasta. Fill the bowl with boiling water (or cold water, which extends heating time) to the required level. Do not add pasta yet. Close the lid. Select "Pasta" via the Menu key. The default cooking time is displayed and can be adjusted. The multicooker will beep when the water is at the ideal temperature; then add pasta and press start again. The lid should be closed during cooking. After cooking, the multicooker beeps. There is no "Keep Warm" function for pasta.
- Pasta Recommendations: For 400g dried pasta, fill to the 6-cup water level. Set cooking time for 15 minutes and check pasta before the end. Add pasta and stir when the appliance beeps. Check pasta 4 minutes before the end of cooking. Switch off, remove bowl, and drain when ready.
- Reheat Function: Intended for reheating cooked food only, not raw or frozen food. Select "Reheat" via the Menu key. The default cooking time is displayed and can be adjusted. After cooking, the multicooker beeps and enters "Keep Warm" mode.
- Caution: Cold food should not exceed 1/2 of the cooker's volume. Overfilling or repeated reheating can lead to burnt food. Avoid reheating thick porridge or food stored for a long time. Only reheat fresh, cold cooked food.
- My Recipe Function: Allows users to memorize favorite cooking choices. In standby mode, press "My Recipe" to start the setting. The default cooking time will flash. Users can define temperature and time using "Delayed Start/Timer" and "Temperature" keys. The multicooker stores the most recent temperature and cooking time settings.
Important Technical Specifications
- Model: RK745840
- Power Supply: Check that the power supply voltage corresponds to that shown on the appliance (alternating current).
- Altitude: The appliance can be used up to an altitude of 4000m.
- Removable Power Cord: If fitted, a damaged power cord must be replaced by a special cord or unit from an authorized service center.
- Fixed Power Cord: If fitted, a damaged power supply cord must be replaced by the manufacturer, their after-sales service department, or a similarly qualified person.
Usage Features
Before First Use:
- Unpack the appliance, accessories, and documents. Remove all stickers.
- Open the lid by pushing the opening button (Fig. 1).
- Remove the bowl (Fig. 2), inner lid, and pressure valve (Fig. 3a, 3b).
- Clean the bowl, valve, and inner lid with a sponge and washing-up liquid. Wipe the outside and lid with a damp cloth. Dry thoroughly.
- Reassemble all elements: inner lid on the top lid, behind the two ribs, pushed until fixed. Fit the detachable cord into the cooker base socket.
General Usage:
- Ensure the outside of the bowl (especially the bottom) is clean and free of residues or liquid before placing it in the appliance (Fig. 5).
- Place the bowl correctly into the appliance (Fig. 6).
- Ensure the inner lid is correctly positioned.
- Close the lid until a "click" is heard.
- Plug the power cord into the cooker base and then into the power outlet. The appliance will emit a long "Beep," indicators will light up briefly, then the screen will show "----" and indicators will switch off, entering standby mode.
- This appliance is for indoor use only.
- Always use on a flat, stable, heat-resistant work surface, away from water splashes.
- Do not allow the base of the appliance to come into contact with water.
- Never operate the appliance when the bowl is empty or without the bowl.
- Do not remove the bowl while the appliance is working.
- Do not place the appliance directly on a hot surface or near a heat source.
- Ensure the bowl and heating plate are in direct contact.
- Do not put food or water into the appliance until the bowl is in place.
- Respect recipe quantities.
- If any part catches fire, smother flames with a damp tea towel; do not use water.
- Do not touch the heating element when plugged in or after cooking.
- Do not carry the product while in use or just after cooking.
- Keep face and hands away from steam outlet during cooking (Fig. 10). Do not obstruct the steam outlet.
- The maximum quantity of water + ingredients should not exceed the highest mark inside the bowl (Fig. 7).
On Completion of Cooking:
- Open the lid (Fig. 1).
- Use oven gloves when handling the cooking bowl and steam basket (Fig. 11).
- Serve food with the provided spoon and reclose the lid.
- Press "Keep warm / Cancel" to stop the keep warm status.
- Unplug the appliance.
Maintenance Features
General Cleaning and Maintenance:
- Ensure the multicooker is unplugged and completely cooled before cleaning.
- Clean the appliance after each use with a sponge (Fig. 12).
- The bowl, steam basket, measuring cup, rice spoon, and soup ladle are all dishwasher safe (Fig. 13).
Bowl and Steam Basket:
- Do not use scouring powders or metal sponges.
- If food sticks, soak the bowl in water before washing.
- Dry the bowl carefully.
- Do not cut food in the bowl to maintain its quality.
- Ensure the bowl is properly placed back in the multicooker.
- Use the plastic spoon or a wooden spoon to avoid damaging the bowl surface (Fig. 14).
- Do not pour vinegar into the bowl to prevent corrosion.
- Color changes on the bowl surface due to steam and water are normal and do not affect appliance use or health safety.
Micro Pressure Valve:
- Remove the valve from the lid (Fig. 15).
- Open it by rotating in the "open" direction (Fig. 16a, 16b).
- Wipe dry after cleaning.
- Align the two triangles in the two parts, rotate to "close," and reinsert into the lid (Fig. 18a, 18b).
Inner Lid:
- Clean after each use to prevent lingering food smells.
- Remove by pushing outwards with both hands.
- Clean with a sponge and washing-up liquid (Fig. 17).
- Wipe dry and reinsert behind the two ribs, pushing until fixed.
Other Parts:
- Clean the outside of the multicooker (Fig. 19), the inside of the lid, and the cord with a damp cloth and wipe dry.
- Do not use abrasive products.
- Do not use water to clean the interior of the appliance body, as it can damage the heat sensor.
Troubleshooting:
- Control panel lights off, no heating: Check if the appliance is plugged in and switched on.
- Control panel lights off, heating: Send to an authorized service center for repair (problem with indicator light).
- Steam leakage during use:
- Lid badly closed: Open and close the lid again.
- Micro pressure valve incorrectly positioned/assembled: Unplug, check valve assembly (2 parts locked together), and reposition.
- Lid or micro pressure valve gasket damaged: Send to an authorized service center for repair.
- Rice undercooked or overcooked: Refer to the rice cooking table for water quantity. Always add rice first, then water to the level mark.
- Automatic keep warm function fails:
- Function cancelled by user: Refer to "Keep Warm" function paragraph.
- Function not operating after Baking, Yogurt, Jam, Pasta, My Recipe programs: Send to an authorized service center for repair.
- E0 (Temperature sensor in lid damaged): Unplug, wait a few seconds, restart. If problem persists, send to an authorized service center.
- E1 (Temperature sensor under bowl damaged): Unplug, wait a few seconds, restart. If problem persists, send to an authorized service center.
- E3 (High temperature detected): Unplug, wait a few seconds, restart. If problem persists, send to an authorized service center.
- Deformed inner bowl: Do not use; get a replacement from an authorized service center.
Environmental Protection:
- The appliance is designed for long-term use. When replacing, consider environmental protection.
- Before discarding, remove the battery from the timer (if applicable) and dispose of it at a local civic waste collection center.
- The appliance contains valuable, recoverable, and recyclable materials. Leave it at a local civic waste collection point.