4
ChargeTime USB-C Installation Guide
5
ChargeTime USB-C Installation Guide
Inside The Box
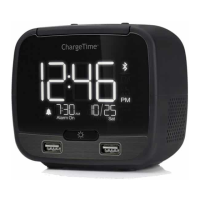
• TA-7835 Clock.
• AC power adapter with US, EU, UK, Australia tips.
• Screws (4X).
• Plastic wall plug.
• Security tether.
• DC power jack locking bracket.
• AAA batteries (2X).
Turning On The Clock
1. Plug the AC power adapter into the wall socket
2. Plug the DC power jack into the DC socket at the back to turn
the unit on.
3. Secure the DC power jack with screw into the DC power lock
screw hole.
4. When the clock is powered on, press the TIME button to stop
the display from ashing and to set the time.
* Unscrew the DC power lock bracket and unplug the DC jack
in order to turn the unit off.
* A 1.5m security tether is provided. Screw one end to the clock
and securely attach the other end to furniture or a wall.
Setting The Time
1. Press and hold the TIME button and SNOOZE together for 3
seconds, the display will ash.
2. Set the year by pressing HOUR /MINUTE buttons, then press
TIME button to conrm.
3. Set the month by pressing HOUR /MINUTE buttons, then
press TIME button to conrm.
4. Set the date by pressing HOUR /MINUTE buttons, then press
TIME button to conrm.
5. Set Auto-DST feature to on or off by pressing HOUR /MINUTE
buttons, then press TIME button to conrm.
6. Press HOUR to set hours.
7. Press MINUTE to set minutes.
8. Press TIME button again for conrmation.
NOTE: If during the time set no key is pressed for 10 seconds, the
previous time will be automatically stored.
NOTE: When Auto-DST is enabled, the time will automatically be
adjusted at 2:00AM on the designated date (based on US
standard) one hour forward in the spring and one hour back in the
fall.
Adjusting The Brightness
There are three (3) levels of display brightness. Repeatedly press
the SNOOZE/DIMMER button to select the desired setting.
Setting The Alarm And Snooze Time
1. Slide the switch to alarm SET, the time display will ash.
2. Press HOUR and/or MINUTE button to set the wake up time.
3. Slide the switch to alarm ON to conrm the alarm time. The
alarm LED with light up conrming that alarm is set.
4. Press and hold SNOOZE for 3 sec to set the snooze time
(5/10/15 min).
5. Press SNOOZE again to conrm the snooze setting.
Turning Off The Alarm
1. To silence the alarm with snooze, press the SNOOZE button.
The alarm will stop, and will sound again after 5/10/15 minutes
(based on the snooze time setting). The alarm indicator will
ash.
2. To turn the alarm off slide the switch to OFF.
NOTE: Sliding the alarm switch to OFF, the alarm will be turned off
and will not will not go off the next day.
Nap Function
To set the nap function to wake after a short period of time:
1. Press the NAP button to select the desired nap times between
15-90 minutes or OFF. The indicator for nap will light up.
2. To stop the alarm, press SNOOZE or NAP button