© 2011 TeleType Co.
11
Getting Started
2.2 Quick Start Guide
TeleType offers commercial truck drivers the ability
to specify the characteristics of the vehicle and type
of load being carried in order to provide suitable
routing taking into account road restrictions such as
bridge clearances, load limits, dangerous turns,
hazmat, and more. If you have purchased a device
which offers the commercial truck routing feature,
you can follow the information below to learn more
about the features designed for truck drivers. For
complete details on how to enter addresses
continue reading this user guide. The GPS
navigation devices are available in three screen
sizes, 7 inch, 5 inch and 3.5 inch (measured
diagonally). The GPS software operates the same
way on all three devices.
1. Attach your GPS system to the windshield by
putting the suction cup on the window. It is
best to allow the device to rest on the dash
(while also mounted to the windshield) so as to
minimize the possibility of damage to the
device or mount.
WorldNav Navigation Software
12
© 2011 TeleType Co.
2. Turn the device on, press the <Navigation>
button.
3. Press the <I Agree> button to begin using your
GPS.
4. The WorldNav GPS will automatically lock into
your current position provided that the device
has clear view of the sky; no configuration is
required. The GPS will know your direction of
travel once you begin to move.
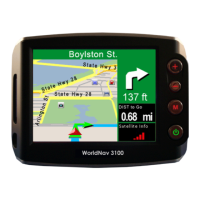
5. If the GPS has not yet locked into position, you
will see <Where To> and <Menu> at the top of
the map screen. The map will display the last
known position centered into the target area.
Press <Where To> on the screen to create new
route.
6. Notice the bright pink lines on the map
indicating restricted roads for trucks. When you
are in any of the truck routing modes, the GPS
will attempt to avoid these areas.
 Loading...