6
7
8
• Plug a headset into each BeltStation.
• To set Mic Gain, Press MENU and scroll down to Set Controls.
• Scroll to Mic Gain and Press ENTER.
• Set the Mic Gain for the headset you are using; speak loudly into the
microphone and adjust the setting so that the blue TALK LED ashes red at
your loudest point and then adjust down slightly. Press ENTER to save.
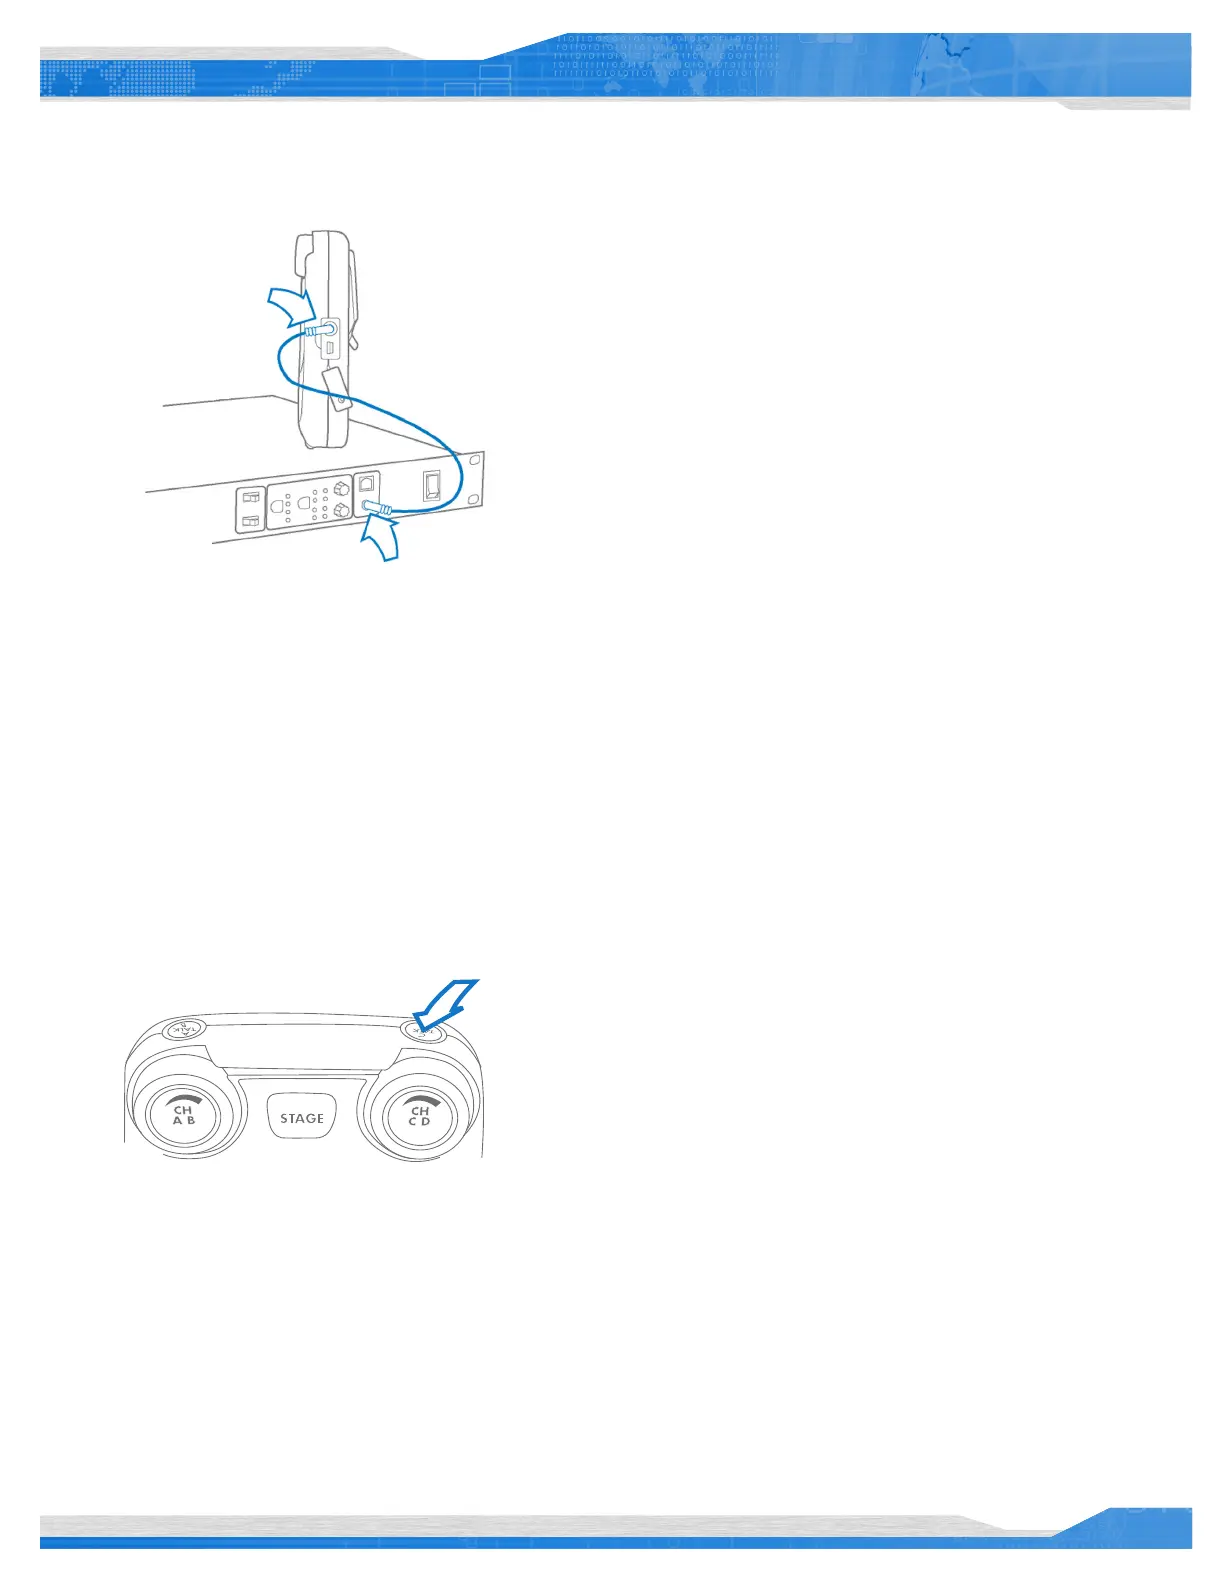
• Select the desired communication channel by pressing the A/B or C/D
channel selector.
• Adjust the headset listening volume by turning the A/B or C/D rotary
control.
• Press the TALK button to talk to others on the selected channel (the
blueashing LED will remain lit when talk is enabled on that channel).*
• Conrm the desired talk channel and talk status by observing the
BeltStation LCD screen.
• Select the correct intercom type on the front of the BaseStation.
» Intercom type select switch A&B controls intercom channels A and B; C&D
controls both intercom channels C and D.
» CLEAR-COM is used for Clear-Com and Clear-Com compatible 2-Wire
systems.
» RTS is used for RTS and RTS compatible systems.
» BAL is used for Telex AudioCom & AudioCom compatible systems.
• Connect 3-PIN XLR cables to the back of the BaseStation for the
appropriate channel.
• Press the left SEL button twice to select an intercom channel (A through D);
press the right SEL button to select 2-Wire operation.
• Use the IN and OUT rotary controls to set the IN (from 2-Wire to
BaseStation and OUT (from BaseStation to 2-Wire) levels.
• Perform Auto Null from the BaseStation.*
• Connect RJ-45 cables to the back of the BaseStation for the appropriate
channel.
Note: The intercom type select switches do not apply to
4-Wire operation.*
• Press the left SEL button twice to select an intercom channel (A
through D
).
• Press the right SEL button to select 4-Wire operation.
• Use the IN and OUT rotary controls to set the IN (from 4-Wire to
BaseStation and OUT (from BaseStation to 4-Wire) levels.
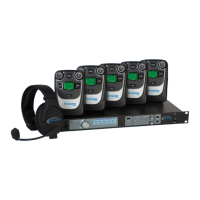
Pair BeltStations to the BaseStations
Start Communicating
Connecting to External 2-wire
Intercom Systems
Connecting to External 4-wire
Intercom Systems
5
• Conrm the BaseStation is powered ON.
• Conrm the BeltStation is powered OFF.
• Connect the 3.5mm data pairing cable from the BaseStation to the BeltStation.
• Power ON the BeltStation while observing the BeltStation LCD screen; the
BeltStation will vibrate and “Pairing Complete” will appear momentarily on the
LCD screen if pairing was successfull.
• The BeltStation will return to the operational screen and log into the
BaseStation.
• The BeltStation will appear in the rst available slot on the LCD screen.
• Repeat for each BeltStation.
Note: BeltStations are named to their default setting name.
They can be renamed.
QuickStart Guide
Useful tips
TALK buttons can be set to three different modes: Latch, Momentary, or
Disable.
Mic gain, sidetone, and volume levels can all be set based on each user’s
needs.
Set a single BaseStation to Split or Shared mode and use an unlimited
number of BeltStations that operate in a push-to-talk/momentary talk
mode.
When syncing multiple BaseStations, it is important to power ON one
BaseStation at a time, starting with the rst BaseStation in the sequence.
*For more information on these features and other advanced settings
please refer to the Tempest Reference Manual.
3
Quick Start Guide
 Loading...