EasyManua.ls Logo

Tenda A23 - User Manual

Tenda A23
2 pages
Print Icon
To Next Page IconTo Next Page
Loading...
-renda
Quick Installation Guide
Wi-Fi 6 Range Extender
A23
Please read this guide before you Start With the quick setup upon the first use.
This guide instructs how to install and Connect the device, For more information, such as the description Of symbols displayed
on relevantmaterials, visit www.tendacn.com or scan the Product Documents QRcode of this guide.
Connect to the internet
Method 1: Set up the extender by web UI
Power on the extender
Plug the extender into a power outlet near the router, and wait until the LED indicator of the extender
Setup by smartphone
O Connectthe smartphoneto the WiFi
network of the extender: Tenda_EXT and
when the web UI of the extender is
displayed automatically, tap Start Now.
Thanks for Choosing Tenda WiFi Range Extender
Start Now
* If the above pagedoes not appear, starta web
browser, and access re.tenda.cn in the address
bar to manually log in to the web If the web IJI
still does not appear, refer to QI in FAQ.
O Read the extension message, and tap
Extend.
Internet Settings
Before you start, record the following information
for confirmation after extension.
@LEDindicatorlightingsolidonindicates
successful extension. You can connect to the
following WiFi network to access the internet
WiFi Name Tenda_l
WiFi password XXXXXXXX
Solid green: Proper position ortoo
close to the router
Solid yellow: Fair position. Move
towards the router
Solid red: Poor position. Move
towards the router
@LEDindicatorblinkingredindicates
extension failed. Please connect to the
following network to extend again
WiFi Name Tenda_EXT
Blinking red: Extension failed
Please connect to the WiFi
network Of the extender
(Tenda_EXT) and extend again
Extend
Setup by computer
O Set Login Password, and tap Next.
Set Login Password
SetExtender Login Password
For network security, please set a login password
for logging in to the web
blinks red slowly.
LED indicator blinks red slowly
O Choose the WiFi network to be extended and
enter its WiFi password, and then tap 0K.
-OTips
If the WiFi network you want to extend does not have
a 5 GHZ band, you can tap Skip in the upper-right
corner to skip it.
InternetSettings
Please the cyti_vadcd
Tenda_1 2 uc
WiFi metwork password
Please enter the WFi password
Cancel
Login Password
Confirm Password
Not now
O ChangetheWiFinameandWiFipasswordof
the extender as required, and tap Next.
-Q-Tips
TO use the same password for the upstream device
andextender, tick Same as the superior WiFi
password.
Internet Settings
Upstream WiFi Name
Tenda_1 2.4G
xxxxxxxxx
Extender WiFi Name
Tenda_XXXXXX
Extender WiFi Password
xxxxxxxxx
e
Same as the superior WiFi password
Next
Next
Wait a moment until the extension finishes.
Now you can connect to the WiFi network
you set.
Internet Settings
Before you start, record the following informatio
tor confirmation atter extensiorm
@LEDindicatorlightingsolidonindicates
successful extension. You can connect tot
following WiFi network to access the internet
WiFi Name Tenda I
WiFi Password XXXXXXXX
Extending WiFinetwork Pleasewait
Blinking red: Extension tailed
Please connect to the WiFi
network ot the extender
{Tenda_ÉXT) and extend again
Extend
Method 2: Set up the extender by WPS button
This method is applicable for the router having a WPS button or supporting Tenda Wi-Fi+Mesh technology.
O Press the WPS onthe router to enable its WPSfunction.
O Within 2 minutes, press the WPS button on the extender, and its LED indicator blinks green fast.
When the LED indicator lights solid green, the setup is successful.
vvps
1. Connect your laptop to the WiFi network Of the extender: Tenda_EXT, or use an Ethernet cable to
connect the computer to the Ethernet port Of the extender.
2. Enter the re.tenda.cn in the address bar to access the web UI Of the extender. Click Start Now.
3. FOIlow the onscreen instructions to complete the setup.
* If the web UIstill does not appear, refer to QI in FAQ
Question and Answer IconNeed help?

Do you have a question about the Tenda A23 and is the answer not in the manual?

Overview

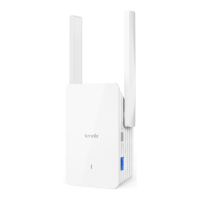
This document describes a Wi-Fi 6 Range Extender, model A23, designed to expand the coverage of an existing Wi-Fi network. It provides instructions for quick installation and setup, as well as information on device appearance, relocation tips, troubleshooting, and safety precautions.

Function Description

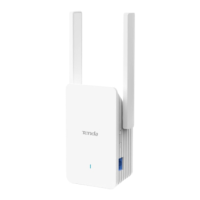
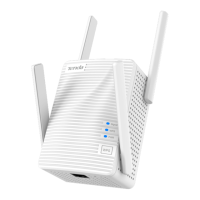
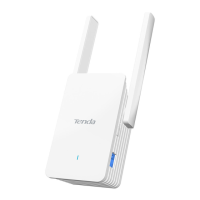
The Wi-Fi 6 Range Extender functions by receiving the signal from an existing Wi-Fi router and rebroadcasting it, effectively extending the wireless coverage area. It supports Wi-Fi 6 technology, indicating enhanced performance and efficiency for modern wireless networks. The device aims to eliminate Wi-Fi dead zones and provide a stable internet connection in areas previously experiencing weak or no signal. It can be set up using a smartphone via a web user interface (UI) or through a WPS (Wi-Fi Protected Setup) button for quick configuration. Once set up, the extender creates a new Wi-Fi network, or it can adopt the same name as the upstream router's network, allowing devices to seamlessly connect to the strongest available signal. The extender includes an Ethernet port, enabling wired connections for devices such as computers, game consoles, or switches, thus offering flexibility in network connectivity.

Usage Features

The extender offers two primary methods for setup:

  1. Web UI Setup (Smartphone/Computer):
    • Initial Connection: Users connect their smartphone or computer to the extender's default Wi-Fi network (Tenda_EXT). The web UI should automatically display; if not, users can manually access it by entering "re.tenda.cn" in a web browser.
    • Login Password: A login password needs to be set for security purposes to access the extender's web UI.
    • Network Selection: The user selects the existing Wi-Fi network to be extended from a list and enters its password. There's an option to skip if the upstream network lacks a 5 GHz band.
    • Extender Wi-Fi Configuration: Users can customize the extender's Wi-Fi name and password. An option is available to use the same password as the upstream router for convenience.
    • Extension Confirmation: After configuration, the extender processes the settings, and a confirmation message is displayed. The LED indicator provides visual feedback on the extension status.
  2. WPS Button Setup:
    • Router WPS Activation: Users first press the WPS button on their existing Wi-Fi router to enable its WPS function.
    • Extender WPS Activation: Within two minutes, the WPS button on the extender is pressed. The extender's LED indicator will blink green rapidly during this process.
    • Successful Setup: The setup is successful when the LED indicator on the extender turns solid green, signifying a proper connection.

Relocation Tips:

To optimize performance, the extender should be placed strategically:

  • Optimal Placement: Position the extender between the main router and the Wi-Fi dead zone, ensuring it is within the router's coverage area.
  • Interference Avoidance: Keep the extender away from electronic devices that emit strong interference, such as microwave ovens, induction cookers, and refrigerators.
  • Elevation and Obstruction: Place the extender in a high position with minimal physical obstructions to ensure better signal propagation.
  • LED Indicator Feedback: The LED indicator provides crucial feedback on the extender's position relative to the router:
    • Solid Green: Indicates a proper position or that it's too close to the router.
    • Solid Yellow: Suggests a fair position, prompting the user to move it closer to the router.
    • Solid Red: Signifies a poor position, indicating the extender is too far from the router.

Troubleshooting (FAQ):

The manual addresses common issues:

  • Cannot Log In to Web UI:
    • Wireless Client: Ensure connection to "Tenda_EXT" and disable mobile data.
    • Wired Device: Verify the computer is set to obtain IP and DNS addresses automatically.
    • Reset: Reset the extender and try again.
    • After Extension: If the extender's Wi-Fi name is the same as the router's, connect to the extender's network while standing nearby (not too close to the router).
  • Resetting the Extender: Press the RESET button with a needle-like item for 1-3 seconds until the LED indicator blinks yellow fast.
  • Extender Cannot Find Router's Wi-Fi:
    • Verify the smartphone can detect the router's Wi-Fi.
    • Change the router's Wi-Fi channel.
    • Adjust the router's encryption type (e.g., WPA-PSK, WPA2-PSK, WPA3-SAE).
  • Cannot Find Extender's Wi-Fi Name After Successful Extension (Solid Green LED): This likely means the extender's Wi-Fi name was not customized and is now the same as the upstream router's Wi-Fi name.

Maintenance Features

The manual outlines several safety precautions and environmental considerations for proper device maintenance and longevity:

  • Environmental Conditions:
    • Temperature: Operate within 0°C to +40°C.
    • Humidity: Maintain 10%-90% RH, non-condensing.
    • Storage: Store within -40°C to +70°C, 5%-90% RH, non-condensing.
  • Physical Handling:
    • Do not use the device in areas where wireless devices are prohibited.
    • Avoid using near water.
    • Clean only with a dry cloth.
    • Do not block ventilation openings (e.g., with newspapers, tablecloths, curtains).
    • Do not insert objects into ventilation openings to prevent electrical shocks.
    • Avoid installing near heat sources (radiators, stoves, etc.).
    • Unplug during lightning storms or long periods of disuse.
    • If there is no power button, the mains plug serves as the disconnect device and should remain readily operable.
  • Damage and Servicing:
    • Refer all servicing to qualified personnel if the device is damaged (e.g., power-supply cord/plug damage, liquid spills, objects falling into the device, exposure to rain/moisture, device not working normally, or if it has been dropped).
    • To reduce the risk of fire or electric shock, do not expose the apparatus to rain or moisture, and it should not be exposed to dripping or splashing.
    • Do not remove the cover to reduce the risk of electric shock, as there are no user-serviceable parts inside.
  • Cable Recommendations: To avoid unnecessary radiation interference, it is recommended to use a shielded RJ45 cable for wired connections.
  • Antenna Orientation: Unfold the antennas and point them vertically upwards for optimal signal reception and transmission.

The device is designed for indoor usage only and complies with relevant regulatory standards (FCC, CE, EAC) to ensure safe and reliable operation.

Tenda A23 Specifications

General IconGeneral
Wireless SecurityWPA-PSK/WPA2-PSK
Antenna Gain3dBi
Ports1 x 10/100Mbps Ethernet Port
WPS SupportYes
TypeWi-Fi Extender
Wireless StandardsIEEE 802.11b/g/n
Frequency BandDual Band
Frequency2.4 GHz, 5 GHz
AntennaExternal Antennas
ButtonReset Button, WPS Button
Power Supply100-240V, 50/60Hz
Maximum Wireless Speed1200 Mbps (300 Mbps at 2.4 GHz, 867 Mbps at 5 GHz)

Related product manuals