INS741-2 16/25
A tamper state is signified by a pulsing orange LED (see Fig.2c).
To enable the LED after the first 10 minutes, initiate walk test mode from
the panel - see Premier Elite Control Panel Installation Manual.
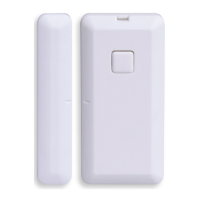
The magnet can be installed either side of the device. However
greater sensitivity is achieved by placing the magnet to the left of the device
and aligning the notches in the plastic (see Fig.2d).
3. Mounting surfaces
Suitable mounting surfaces include uPVC, wood and aluminium*.
Avoid ferrous material such as steel (see Fig.3).
*Range may be reduced.
4. Wireless range test
The wireless range test is available for the first hour after power up or
while the system is in commission mode - see Premier Elite 8XP-W/32XP-
W Installation Manual.
With the device in position, press and hold the button on the front of
the device for 3 seconds (see Fig.4a).
The LED will flash pink and turn green when a wireless connection
is confirmed (see Fig.4b).
Should the LED turn red (see Fig.4c) move the device away from
metal objects, closer to the receiver or add more devices to the mesh
network.
Once the installation is complete, the device will not show any status LED’s.
5. Mounting with adhesive pads (for non graded installation)
The device can be stuck to the mounting surface using the double
sided adhesive pads provided (see Fig.5).
6. Mounting with screws (required for compliance with EN50131 Grade 2)
Select the intended mounting position. Open the device cover and
magnet cover using a screwdriver (see Fig.6a).
Fix the bases onto the mounting surface using the screws provided
(see Fig.6b) and replace covers.
 Loading...

