Do you have a question about the Texecom Premier 24 and is the answer not in the manual?
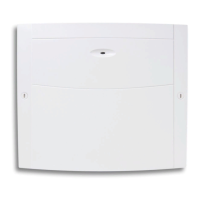
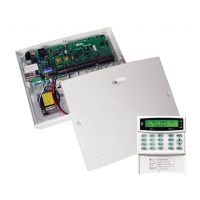
The alarm system consists of a control panel, keypads, and detectors.
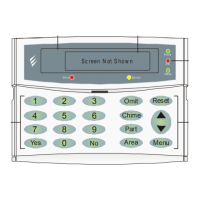
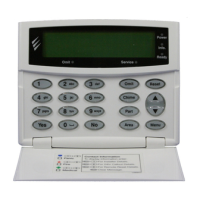
Details the 32-character LCD display for system status.
Built-in reader for Proximity TAGS on specific keypads.
Explains the meaning of the five system status LEDs.
Used for entering codes and programming data.
Used to accept or cancel actions and edit data.
Used to omit zones from arming.
Used to control the chime facility and exit tones.
Used for part arming the system.
Used to arm/disarm specific areas.
Used to exit menus or reset the system.
Used to scroll through menus and slow down display.
Used to select Arming or User menu.
Combinations for Panic, Fire, and Medical alarms.
Steps to fully arm using quick arm keys.
Steps to part arm using quick arm keys.
Procedure to lock keypad keys.
Procedure to unlock keypad keys.
How to access system messages.
What happens if the system fails to arm.
Explains the function of the Ready LED.
System operation divided into Arming and User menus.
Steps to access the system menus.
Day-to-day operations via the Arming menu.
Table of functions available in the Arming Menu.
Step-by-step guide to fully arm the system.
Step-by-step guide to part arm the system.
Guide to selecting and arming specific areas.
How to disarm when entering the premises.
How to disarm when not in an entry period.
Steps to cancel the exit mode.
Steps to clear an arming failure.
Procedure to silence an ongoing alarm.
How a user can reset the system after an alarm.
Instructions for engineer reset.
Instructions for anti-code reset.
Steps to omit zones during arming.
Steps to enable the chime function.
Steps to disable the chime function.
Guide to checking zone status.
Steps to omit 24-hour zones.
Guide to selecting areas for chime function.
Steps to view faults related to zone activity.
Guide to viewing zone activation counts.
Steps to send SMS messages from the system.
Overview of advanced system operations.
Accessing and reviewing system event history.
Procedure for users to change their access code.
Configuring which zones trigger the chime.
Performing system tests.
Performing zone tests.
Granting temporary access for engineers.
Adjusting the system's internal clock.
Adjusting the system's internal calendar.
Manually turning control timers on/off.
Programming specific on/off times for control timers.
Process for creating new user accounts.
Configuring pre-programmed zones for partial arming.
Initiating a connection to a remote computer.
Setting special dates to affect timer operations.
Setting volume levels for system speakers.
Outputting system event logs to a printer.
Updating numbers for SMS alerts.
Detailed steps to access and navigate the event log.
Table listing event log codes and their descriptions.
List of hotkeys for quick event log access.
Step-by-step guide to changing a user's code.
Guide to configuring zones to trigger chime.
Steps for testing alarm outputs like sounders and strobes.
Guide to performing walk tests on system zones.
Steps to grant temporary engineer access.
Guide to setting the system's time.
Guide to setting the system's date.
Steps to manually override control timers.
Guide to programming control timer schedules.
Details on programming new user accounts.
Identification of users within the system.
Requirements for user access codes.
Assigning areas to users for access control.
Defining user roles and permissions.
Restricting user access by time.
Assigning names to users.
Enabling door opening/unlocking.
Using proximity tags for access.
Permissions and capabilities of Master users.
Permissions and capabilities of Manager users.
Permissions and capabilities of Standard users.
Permissions and capabilities of Local users.
Permissions and capabilities of Duress users.
Permissions and capabilities of Arm Only users.
Permissions and capabilities of Door Strike users.
Permissions and capabilities of Vacation users.
Permissions and capabilities of Custom users.
Table of options available for User Options 1.
Table of options available for User Options 2.
Table of options available for User Config.
Allows user to arm assigned areas.
Allows user to disarm assigned areas.
Allows user to omit zones.
Allows engineer reset of programmed areas.
Local arming on Premier 24.
Local disarming on Premier 24.
Skips confirmation step for next action.
Displays disarm option first when armed.
Disables TAG when PGM2 is active.
Disables Code when PGM3 is active.
Disables TAG/Code when PGM4 is active.
Reports open/close events to ARC.
Grants access to the User Menu.
Grants access to engineer programming.
Requires a second code to access an area.
Special user type for temporary access.
Activates door strike outputs.
Allows initiating calls to remote PCs.
Activates duress outputs.
Reports open/close events to ARC.
Allows user to change their own code.
Allows selection of zones for chime.
Access to timer override and alteration menus.
Allows access to system test functions.
Allows adding or altering users.
Allows authorization of engineer access.
For engineers to add engineer codes.
For engineers to manage NVM locking.
Assigning names to users via keypad input.
Choosing a user to program.
Inputting a new user code.
Assigning areas to the user.
Assigning a user type.
Steps to program proximity tags.
Steps to delete user codes.
Guide to configure part arm settings.
Steps to initiate a call to a remote PC.
Guide to setting holiday dates.
Steps to adjust volume levels for speakers.
Guide to printing the event log.
Steps to edit mobile numbers for SMS alerts.
Compliance with EU directives and safety standards.
Details on the product's warranty coverage.
Fields for recording area installation details.
Fields for recording keypad installation details.
Fields for zone number and description.
Fields for zone type and areas.
Fields for zone omit and part arms.
Fields for user number and name.
Fields for user type and default code.
Fields for new code, area, and time lock.
Fields for engineer and company details.
Table for recording service dates and comments.
Sections for contact numbers.
Fields for control panel model and location.
| Brand | Texecom |
|---|---|
| Model | Premier 24 |
| Category | Control Panel |
| Language | English |
