3) Select a suitable location for the DVR in the car;
Note: Never put it in places where it can block the driver’s view. It is recom-
mended to install the device on the windshield inside the vehicle at or just below
the mirror.
4) Clean the surface of the glass at the place where it will be installed mount with
a soft cloth using detergent if necessary;
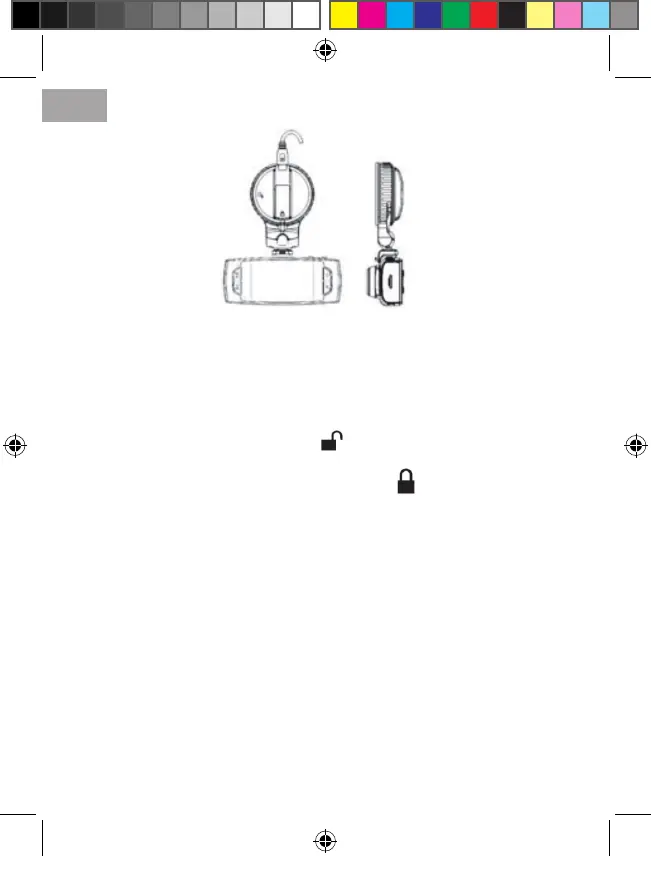
5) Turn the mount knob in the position ;
6) Fix the mount at the windshield of the car;
7) Holding the mount, turn the knob to the position to secure the device;
8) Choose the angle and rotation the device for optimal image;
Note: USB-slot on the mount can be used for power supply. Changes in tempera-
ture and humidity can cause disconnection of the sucker from the glass.
9) Connect the USB plug of the power adapter to the USB connector (step 5 in
Fig.) on the device (or on the mount).
Video Recording mode
1) Video recording mode is automatically activated when the device is turned on.
To manually switch between modes, press the MODE button until the appropriate
one;
2) Press the REC/OK button to start recording video, repeated pressing the but-
ton REC/OK stops recording;
3) Shortly press the Power button to switch between the LED backlight mode;
4) In the video mode, by MODE button you can lock the current le from being
overwritten. Use repeated pressing to unlock the le;
5) To make screenshots (pictures) during video recording, use the SNAP button.
View mode
1) To switch modes, press the MODE button to switch to playback mode;
ENG
4
DVR.indd 4 16.01.2014 13:31:32
 Loading...