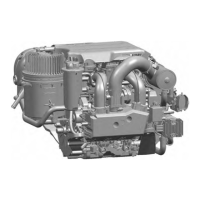
TEXTRON LYCOMING OPERATOR'S MANUAL
SECTION 5 0-540 & 10-540 SERIES
c. Timing Magnetos to Engine (Slick) -
(1) Remove a spark plug from No. 1 cylinder and place a thumb over
the spark plug hole. Rotate the crankshaft in direction of normal rota-
tion until the compression stroke is reached; this is indicated by a
positive pressure inside the
cylinder tending to push
the thumb off
the spark plug hole. Continue rotating the crankshaft until the ad-
vance timing mark on the front face of the starter ring gear is in align-
ment with the small hole located at the two o'clock position on the
front face of the starter housing. (Refer to Specification chapter or
to engine name-plate
for designated number of degrees
of spark ad-
vance.) At this point, the engine is ready for assembly of the
magnetos.
(2) Remove the ignition harness from the left (retard breaker)
magneto, if installed.
Insert the Slick T-118 timing pin
in the hole mark-
ed "L" on the
face of the distributor block.
Apply a slight inward
pressure to the pin and slowly rotate the magneto drive shaft
clockwise until the shoulder of the pin seats against the distributor
block. When properly engaged, the timing pin will be inserted 7/8
inch into the distributor block.
NOTE
If the magneto shaft cannot be rotated and if the timing pin is not seated
7/8 inch into the distributor block, remove the pin, rotate the drive shaft 1/8
turn and repeat the insertion procedure.
CAUTION
Do not rotate the magneto rotor shaft with the timing pin inserted into the
distributor block. This could damage the internal components of the magneto.
(3) Inspect the left magneto accessory housing mounting pad to en-
sure that magneto drive dampers, adapter, and gaskets are there and
installed properly. Position the magneto on its side with the top of
the magneto located outboard away from the accessory housing ver-
tical centerline. Install the magneto onto the mounting pad. Be sure
the drive dampers remain in place when the magneto drive is inserted
into the drive gear. Secure the magneto to the accessory housing
with the proper clamps, washers, and nuts. Tighten nuts only finger
tight.
5-6
 Loading...