– 20 – – 21 –
2120
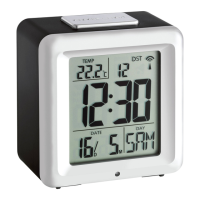
MELODY – Radio-controlled alarm clock with various alarm sounds
• Low batteries should be changed as soon as possible to prevent damage caused by leaking. Never use a combination of
old and new batteries together, nor batteries of different types. Wear chemical-resistant protective gloves and safety
glasses when handling leaking batteries.
Important information on product safety!
• Do not expose the device to extreme temperatures, vibrations or shocks.
• Protect it from moisture.
5. Elements
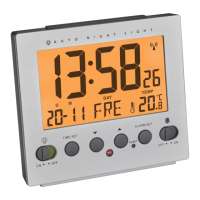
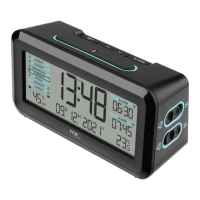
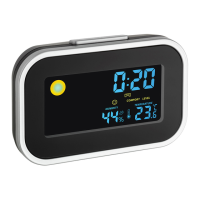
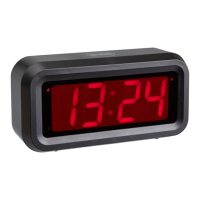
A: Display (Fig. 2):
A 1: Time A 2: Radio-controlled time symbol with DCF reception symbol
A 3: DCF ON/OFF A 4: Symbol Daylight Saving Time (DST)
A 5: Alarm symbol A 6: Day of the week
A 7: Date A 8: Snooze symbol
A 9: Alarm time mode 1-3 A 10: Alarm days
A 11: Alarm time A 12: Humidity
A 13: Indoor temperature A 14: Battery symbol
MELODY – Radio-controlled alarm clock with various alarm sounds
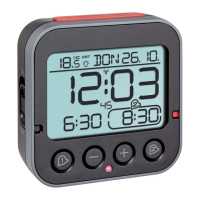
B: Buttons (Fig. 1-3):
B 1: LIGHT/SNOOZE sensor button B 2: 1/2/3 Year button
B 3: MIN/°C/°F Month button B 4: HOUR DAY/ button
B 5: MUSIC button B 6: SET-MODE switch
B 7: MODE weekdays switch B 8: switch
B 9: ON/OFF switch B 10: ON/OFF switch
C: Housing (Fig. 1+3):
C 1: Light sensor C 2: Battery compartment
C 3: Temperature probe C 4: Micro USB port
C 5: Speakers
6. Getting started
• Open the battery compartment and insert two new AA 1,5 V batteries. Make sure the polarity is correct. Close the battery
compartment again.
• Alternatively, connect the radio alarm clock with a micro-USB cable (not included).
• All segments will be displayed briefly. The display shows the current temperature and humidity.
TFA_No. 60.2540_anl_01_18 06.01.2018 10:27 Uhr Seite 11