TGI RO System Manual Series D Manual
8
© Copyright 2007 TOPWAY GLOBAL INC.PRINTED IN THE U.S.A.
INSTALLATION
STEP 1: INSTALLING THE FAUCET
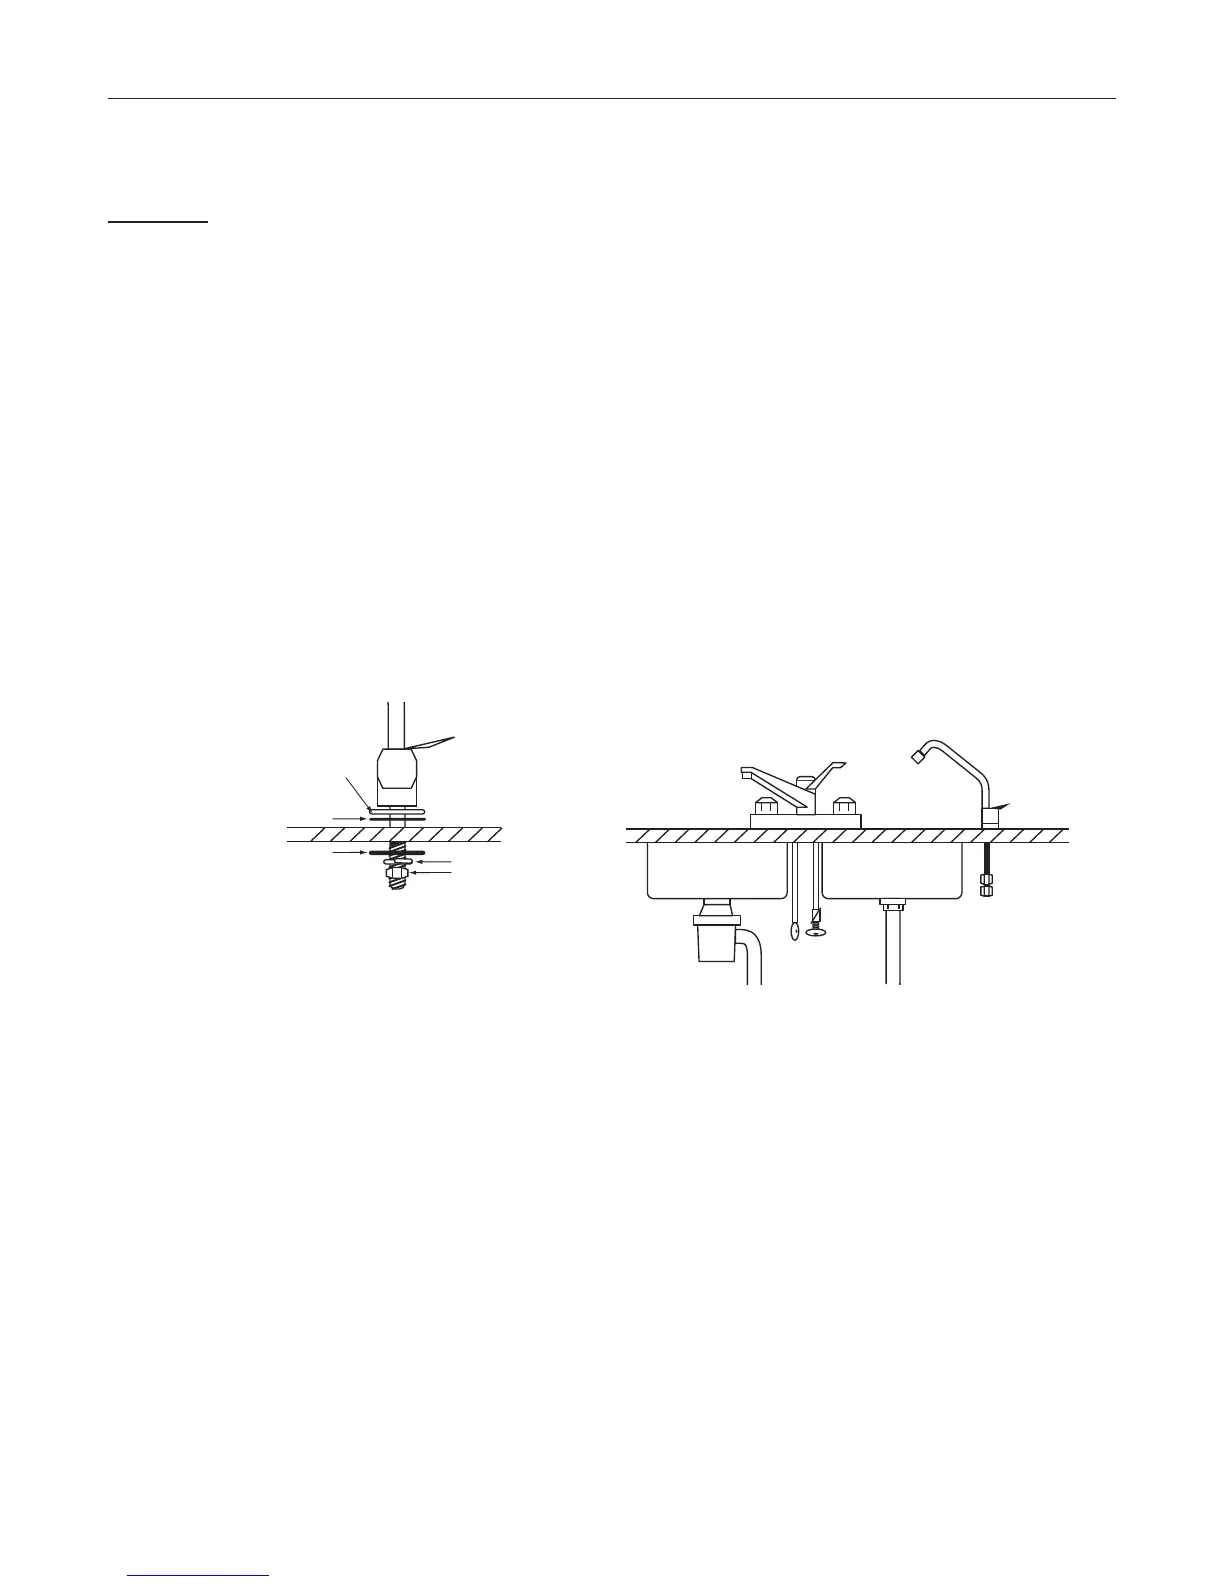
1) Determine the desired location for your RO faucet (FU-WDF-703-CP) on your sink surface.
2) Place a piece of masking tape or duct tape on the determined location where hole is to be drilled.
3) Use a variable speed drill at slow speed with a 1/8” (3 mm) drill and drill a centering hole in the
center of the desired faucet location. Use lubricating oil to keep the drill bit cool while drilling.
4) Enlarge the hole using a 1/4” (6.4 mm) drill bit. Use factory approved method or approved
plumbing practice to drill hole in sink.
5) Enlarge the hole to 7/16” (11 mm) diameter. Keep bit well oiled and drill slowly.
6) Pass the small rubber washers, the chrome base plate and the large rubber washer in that order over
the threaded mounting tube at the base of the faucet.
7) From under the sink, install the large metal (or plastic) washer and the star washer over the threaded
stem. Screw on the nut and tighten.
8) Sleeve over the brass compression nut and the white plastic ferrule (do not use the brass one) over
blue tubing and push to the end of the threaded stem. Screw on the compression nut and tighten.
9) Pull out the 3/8” O.D. red tube from RO faucet and insert the stainless steel long reach spout into the
faucet base while the 1/4" handle is in the off position.
10) The spout is 360º swivel.
11) The faucet handle can be turned for instant and continuous flow.
Please see <Fig. 1> and <Fig. 2>
<Fig. 1> <Fig. 2>
RO FAUCET
ESCUTCHEON PLATE
COUNTER TOP
LOCK WASHER
NUT
BLACK LOCATING WASHER
BLACK RUBBER WASHER



 To Next Page