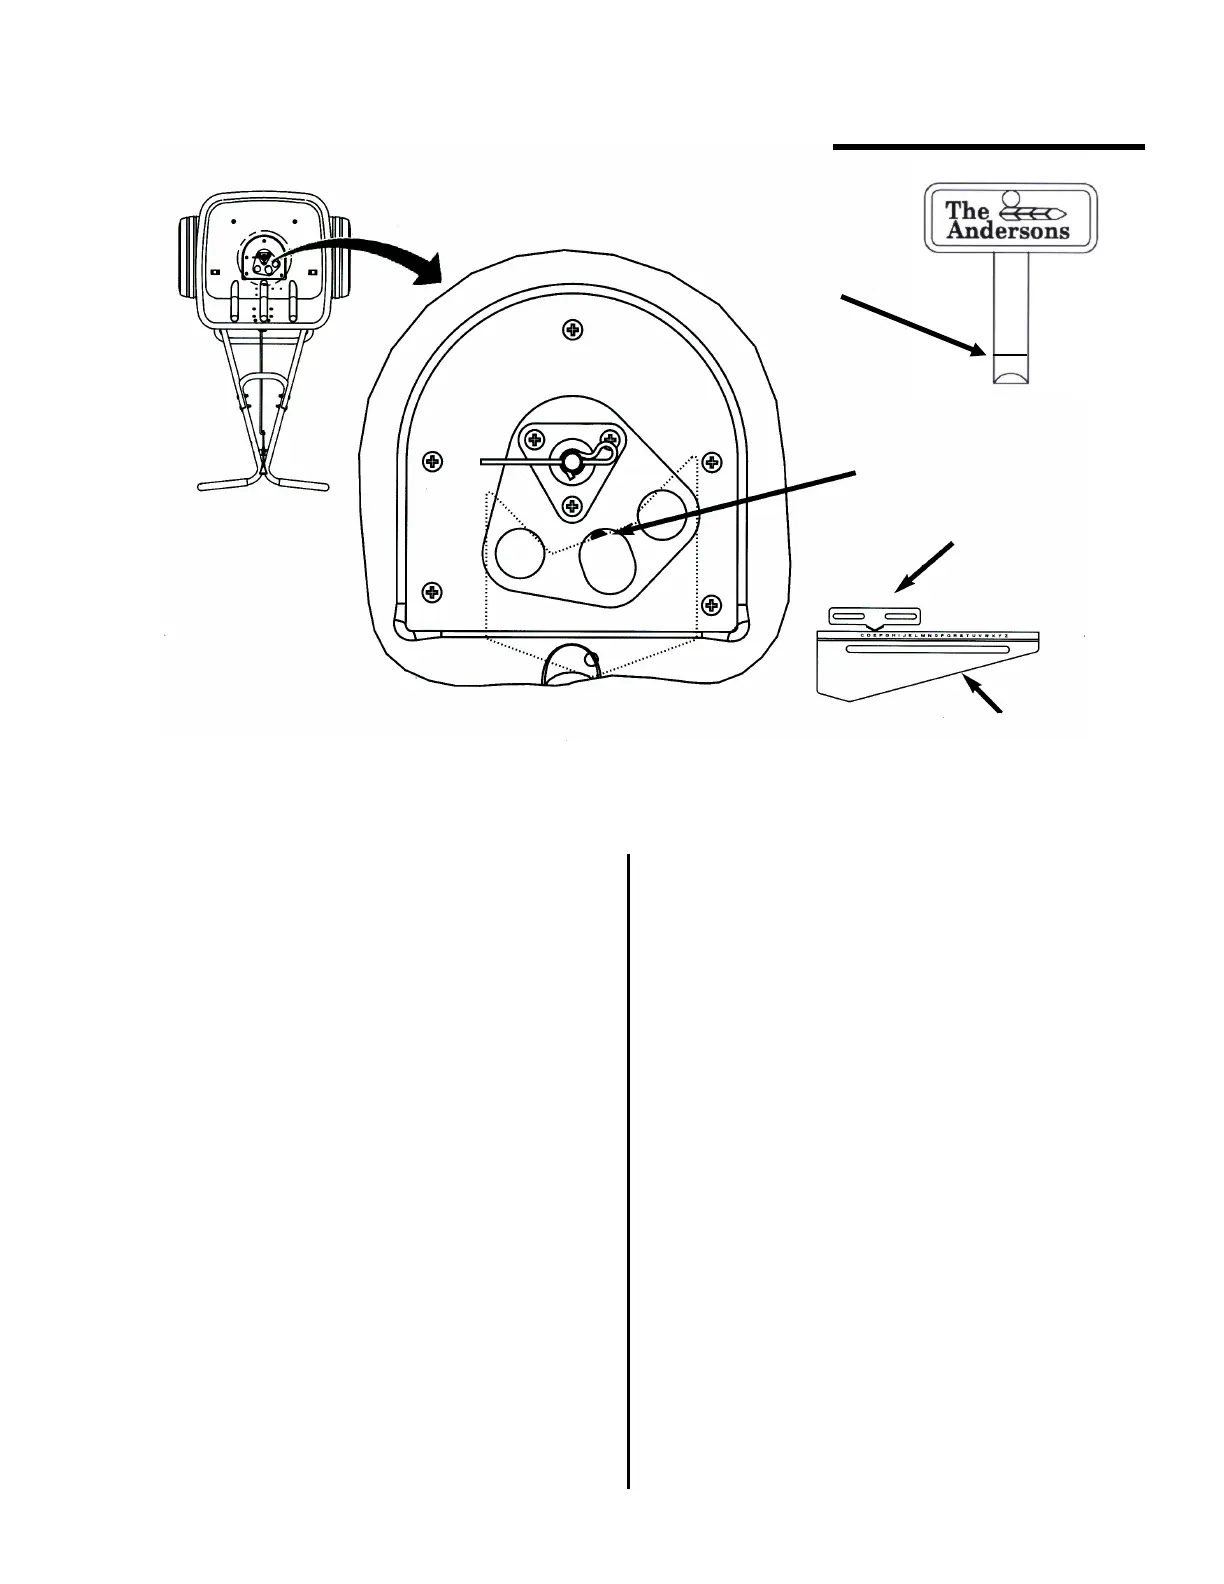
Calibration Instructions
1) Pull the main shutoff lever to the closed position.
2) Set the rate control plate to the “E” setting.
3) Push the main shutoff lever to the open position.
4) Insert the Calibration Key vertically into the
center port hole, as shown above.
5) If the calibration key fits snugly, the spreader is
properly calibrated. If not, continue with steps 6-13.
6) Loosen the rate control knob and slide the rate
plate all the way to the left.
7) Insert the calibration key as described in Step #4.
8) Pull the main shutoff lever to ease the shutoff
plate against the calibration key. Use the main
shutoff lever to hold the calibration key in place.
Your professional spreader has been factory calibrated. For best results,
occasionally check calibration and adjust if necessary.
9) Slide the rate control plate to the right until it
comes in contact with the protruding end of the
rate control rod.
10) Tighten the rate control knob.
11) Remove the calibration key and pull the
main shutoff lever to the closed position.
12) Loosen the nuts securing the rate control
pointer and slide the pointer so that it centers on
the “E” setting of the rate control plate
13) Re-tighten the screws on the pointer.
5
Calibration
depth
Calibration Key
Pointer
Setting “E”
Rate Control Plate