Pi
in
ivi
ll
Pi
ces modules M1-
cie sauteuse M
l
m
t
r M
i
t
T
r
i
our
ra
seuse vert
ca
e
ra
seuse
or
zonta
e
P
n
P
r
v
rti
l
onceuse portat
ve
erceuse portat
ve
Diff
r
nt
vit
D
f
n
Fix
ti
n
Tips pour d
butants
ec
n
que
A
iti
n
v
nt
mm
n
r
m
l
r l
m
hin
:
érifiez
au mo
en de la liste des
ièces indi
viduelles, si la livraison est compl
te.
ollez les autocollants sur les grands élé-
men
s
mm
n
z
m
l
r l
iff
r
nt
m
l
l
m
hin
.
1
ndividual
arts
o
u
parts
1-3
g-saw
5
Motor-gear M
i
-saw
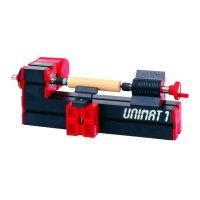
Woodturnin
lathe
urn
ng mac
ne
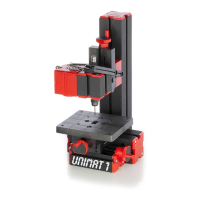
ert
ca
m
ng mac
n
or
zonta
m
n
mac
ne
andin
machine
rillin
machine
ff-hand sander
ff-hand drill
ifferent S
eed
ff-hand millin
machin
ix
ti
n
ps
or
eg
nners
ec
n
ca
at
nn
x
e
ore you star
assemblin
the machine parts:
ut the stickers on the bi
parts.
heck by means of enclosed list (pa
e
to 5
, if you have received all the parts
tart assembling the machine parts
Einz
lt
il
o
u
-
e
e
1-
tichsäge M5
t
r-
tri
M4
Stichsä
Dr
h
l
nk
re
an
ert
a
r
s
or
zonta
r
se
hl
ifm
hin
t
n
hrm
hin
an
sc
e
e
an
o
re
Geschwindi
keiten
n
-
rfr
Fixi
r
n
ps
r
nste
ge
ec
n
sc
e
aten
Anhan
evor man m
t
em
aschinenaufbau be
innt:
Über
rüfen Sie anhand der Einzelteilliste
Seite 2 bis 5), ob Sie alle Teile
eliefer
bekommen haben. Kleben
ie die Aufklebe
uf die Teile. Beginnen
ie mit de
usammen
au
er
asc
nente
e
om
onenti
omponenti moduli M1-
ra
oro
ambio motore M
r
f
r
ornio da le
n
orn
o per meta
resatr
ce vert
ca
resatr
ce or
zzonta
ttifi
tri
i
ra
ano da banco
ett
catr
c
manua
e
rapano manua
e
Velocit
s
r
tri
issa
i
ps per pr
nc
p
ant
aratteristiche techniche
endice
r
ma
n
z
are a montar
a macc
na:
ontrollate
er mezzo della lista delle com
o
enti se avete ricevuto tutte le
arti
nco
ate g
a
es
v
a
e component
gran
da U1 a U11
.
n
z
ate
montagg
o
e
pezz
macc
na.
ezas sue
ta
El
m
nt
m
l
r
M1-3
i
rr
l
r M5
otor-ca
eza
4
ierra de calar
orno
e ma
er
T
rn
m
t
Fr
r
v
rti
resa
ora
or
zonta
quina esmeriladora
á
uina taladradora vertical
Li
adora manue
E
m
ril
r
m
n
e
oc
a
es
resa
ora manue
ontaj
In
i
i
n
Inf
rm
i
n
t
ni
Ap
ndice
Ant
m
nz
r l
construcción de la má
uina:
ontrole en la lista de la piezas sueltas s
o
as
as p
ezas
es
ueron entrega
as
Aplique los autoadhesivos en las partes
ran-
des. Comienze con el ensambla
e de las
ar-
es de la má
uina.
n
r
l
n
o
uu
e
en
1-
guurzaag
5
otor-Overbren
in
M
Fi
uurzaa
t
r
i
n
etaa
raa
aan
ert
aa
rees
orizontaalfrees
h
rm
hin
K
l
m
rm
hin
an
sc
uurmac
ne
an
oormac
ne
Snelhei
n
-B
v
nfr
Fix
r
ps voor
eg
nners
ec
n
sc
e gegevens
an
angse
oor
at
met
e mac
neop
ouw
eg
nt
ntr
l
r
n
h
n
v
n
n
r
l
nli-
st o
u a
e on
er
e
en
ee
t ge
regen.
a
a
e st
c
ers op
e
e
en.
tart met de samenbouw van de machines.
I
A
-
-1
1
1
-
-
-15
1
1
-
-
-15
1
1
-
-
-1
1
1
-
-
-1
1
1
-
-
-1
1
1
-
 Loading...