21
2. Laying the Floor Tiles
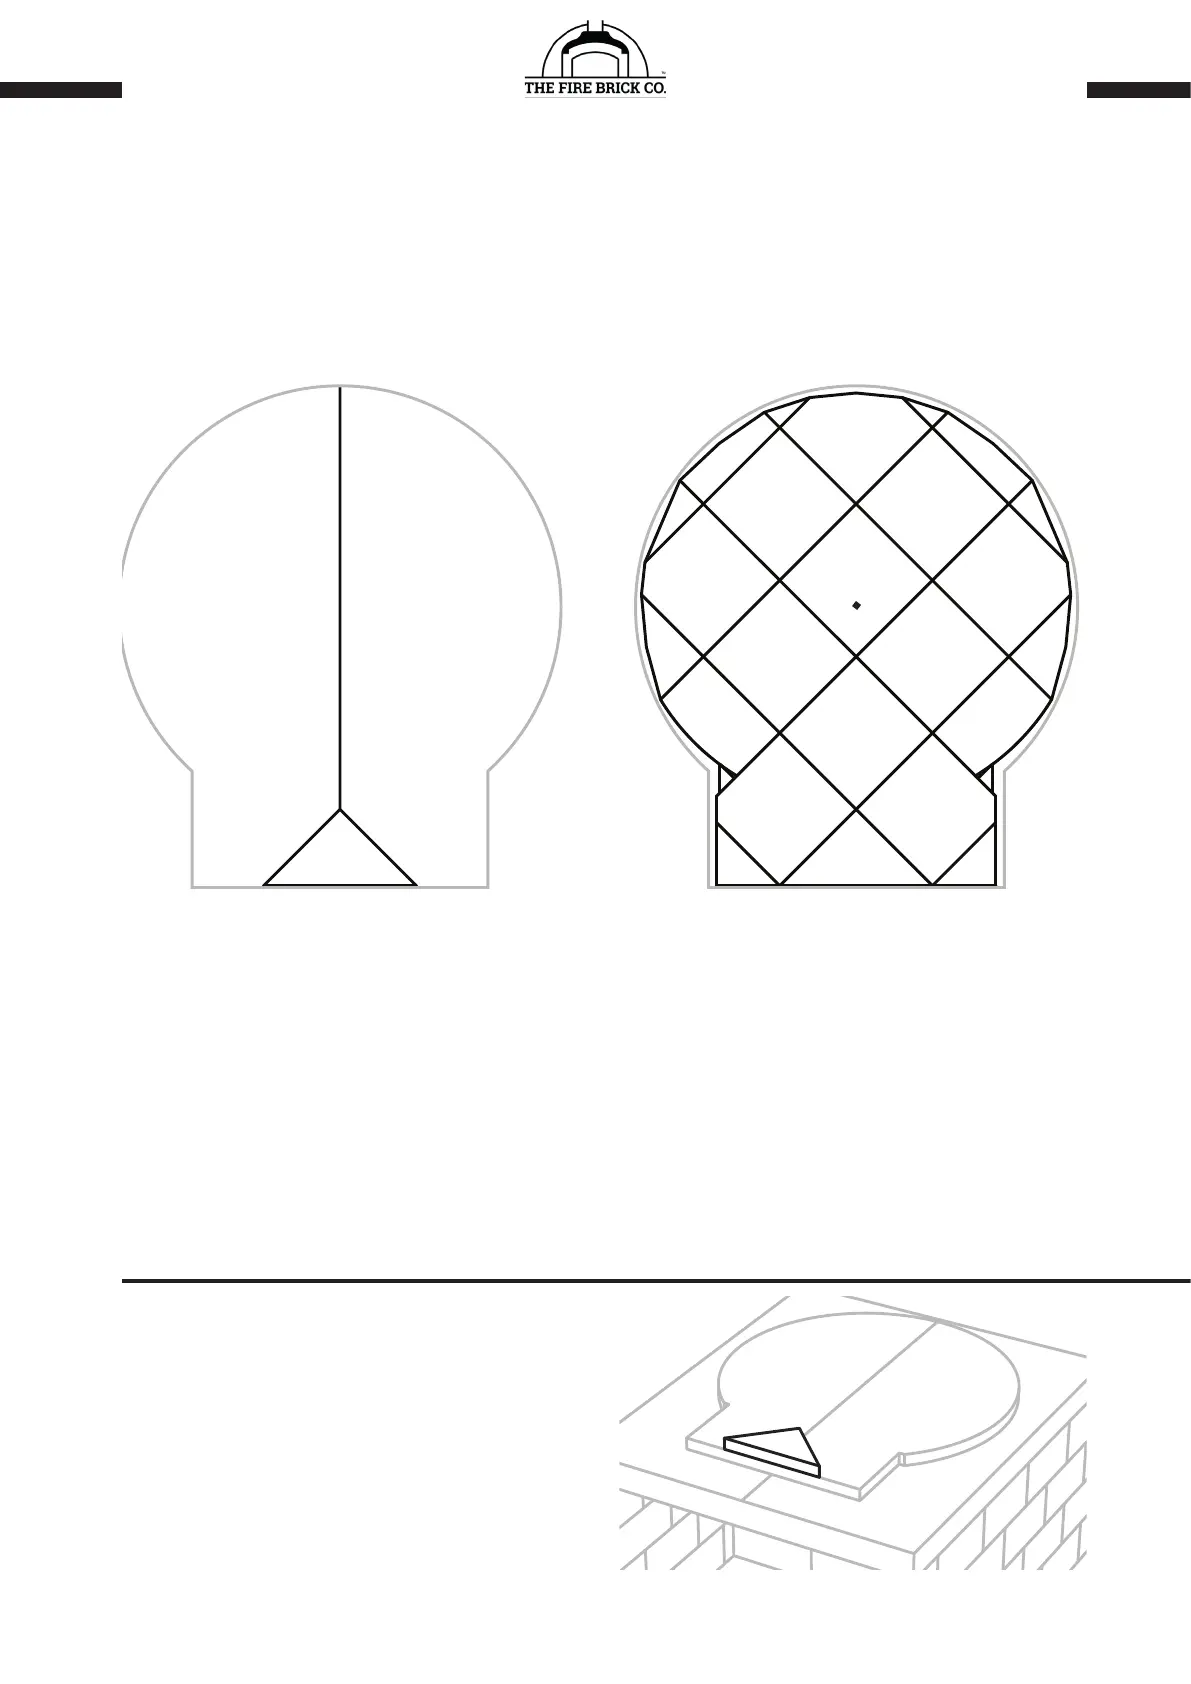
STARTING TILE
FINISHED LAYOUT
There is one square tile in your kit marked with a ‘C’ - this is the Center Tile for the D95 PreCut Brick Oven. It
as a 3mm hole drilled in it, which is forward of center. This is the hole that your Trammel Tool will lock into.
Make sure you lay this brick with the hole as close to the front of the oven as possible, as indicated in the image
above. If you lay this brick in the wrong orientation, you will have to drill a new hole for the Trammel Tool once
the mortar has set, so take your time and get it right.
2B - LAY FRONT CENTER TILE
Lay the front-center tile, making sure it’s level with
your stand so that the other tiles can be laid ush and
level with it.