30
3. Building the Dome
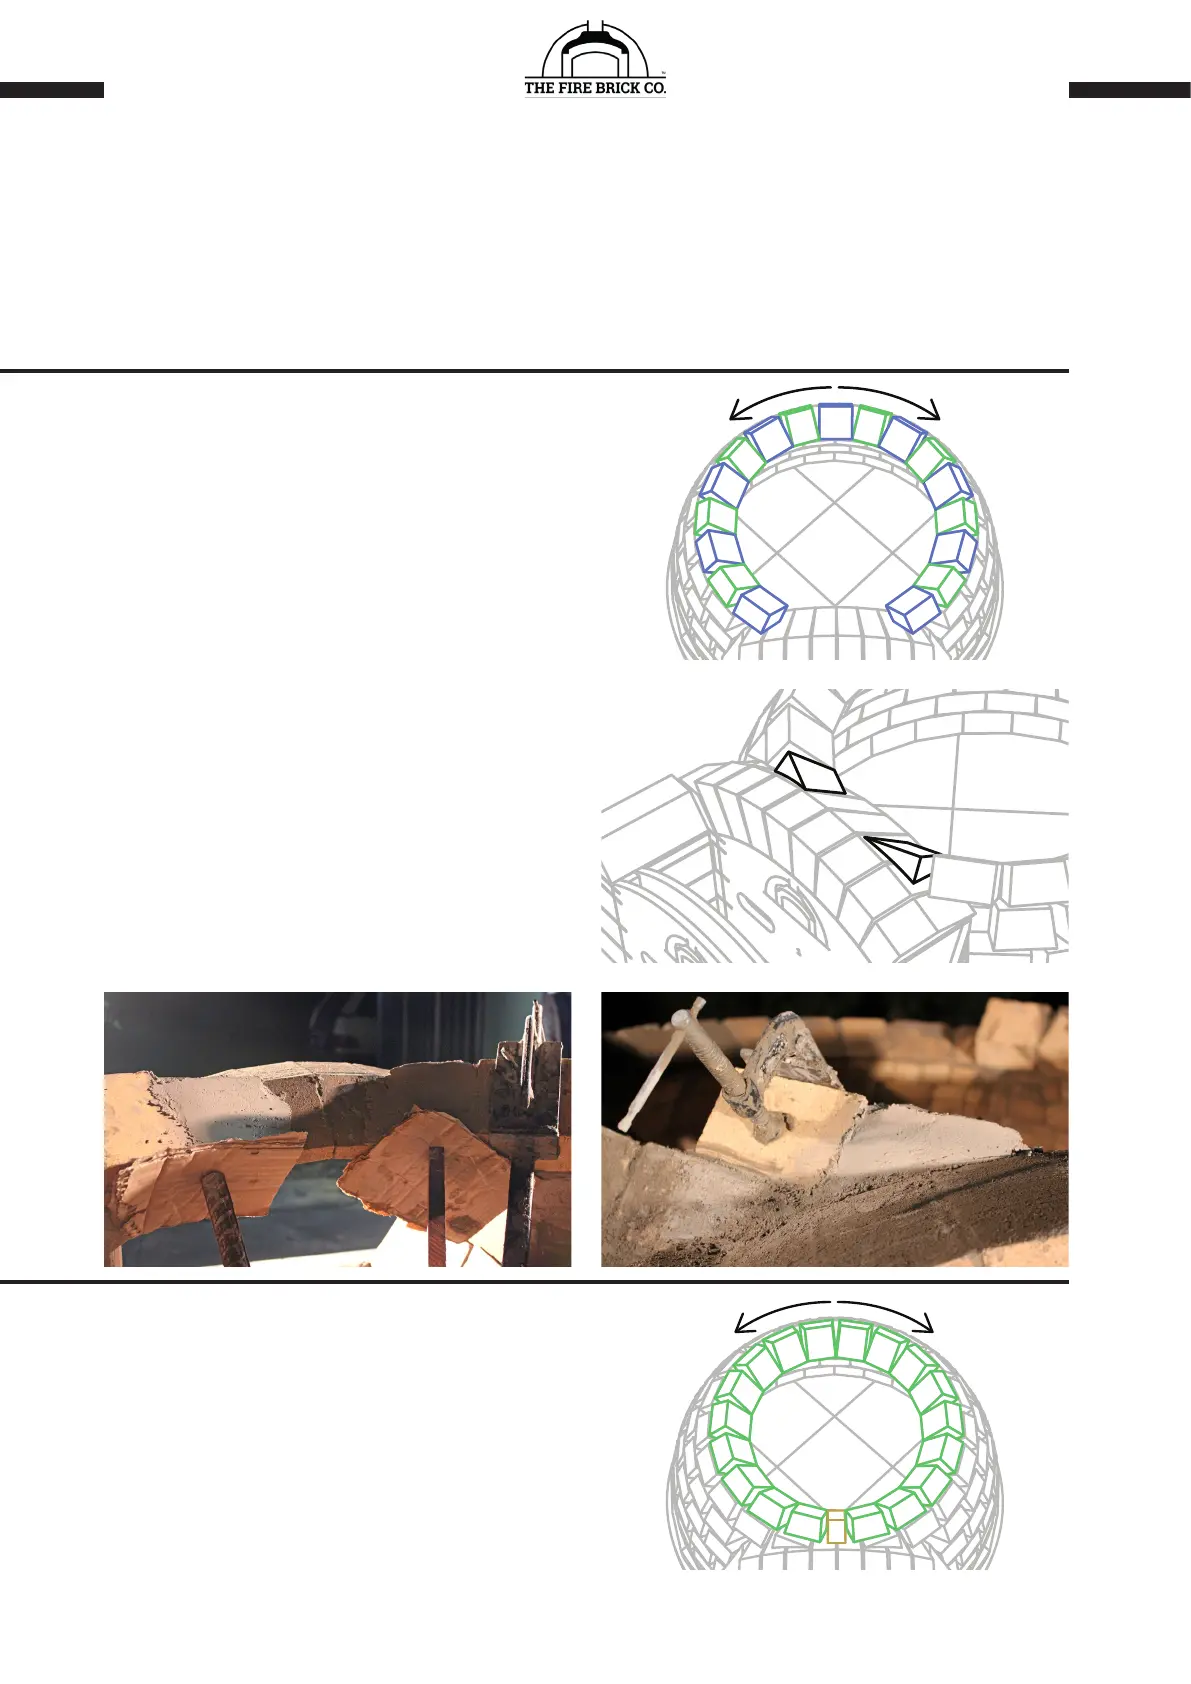
3M: COURSE 6
Lay Dome Course 6. This is made up of Type 1 and
Type 2 bricks, in an alternating pattern. As before,
start at the back in the center to keep your vertical
joints staggered.
You’ll need to use the Refractory Mortar to ll the
triangular gap left between the ends of course 6 and
the Entry Arch.
If you nd that the mortar won’t stay troweled in
place, you can temporarily ‘form up’ the inside face
using a piece of plastic or cardboard propped in place
as shown below.
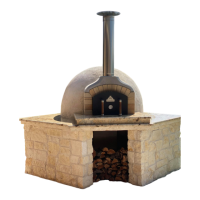
3N: COURSE 7
Lay Dome Course 7. This course is made up of Type
2 bricks only.
You may nd that the bricks over the entry arch will
need their undersides ground back slightly to t.
Watch the level of your bricks as they cross the Entry
Arch - don’t let them dip down.
Beyond this row there is no need to stagger the brick
joints, we are now laying complete rings of brick and
they’re no longer visible from the mouth of the oven.
Allow at least 12 hours for the Entry Arch bricks to set. You can leave the formwork in place for longer, however
you will need to remove it before you set up the breglass dome formwork. When you’re ready, pull the plastic
strips from under the formwork, which will allow you to carefully remove it. If the formwork gets stuck, don’t
panic! Just undo the screws that hold it together and gently tap the back piece out using a rod or similar
through the holes in the front piece. With that gone, you can tap the front piece out and remove the side pieces.