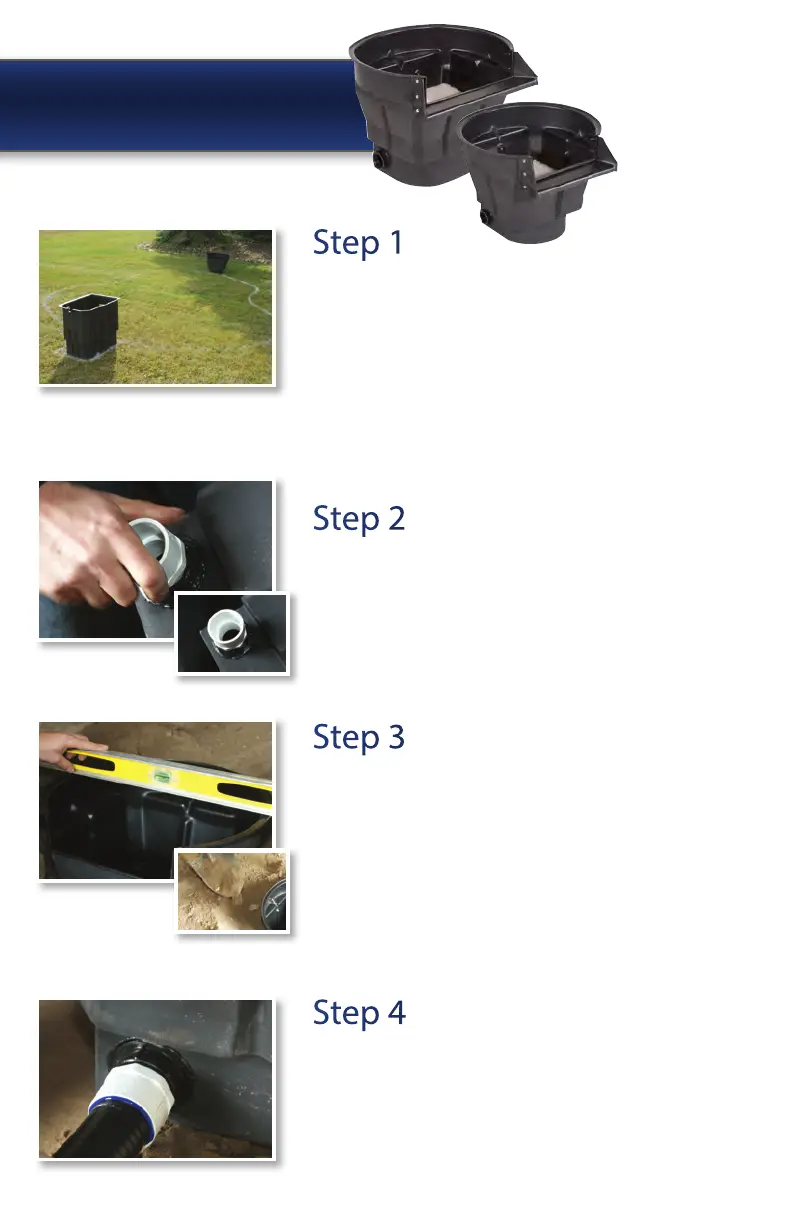
Step 1
Choose ClearSpring™ Pro Location
The waterfall should be positioned so that the water owing
from it enters the pond opposite the skimmer to ensure
proper water circulation. The waterfall is best positioned
so that you can view it from the outdoor and indoor areas
where you plan to enjoy your new water feature.
You can position the waterfall right at the pond’s edge or
at the top of a stream.
Step 2
Assemble Waterfall Plumbing
Your ClearSpring™ Pro Waterfall Box has one spinweld
tting, located on the side of the bottom of the box. Thread
the PVC male adapter (included) into that spinweld (use
the Teon Tape included on the threads rst).
Step 3
Position Waterfall Box
Compact the area where the waterfall box will sit to
prevent future settling. The waterfall box should sit level
from side to side and should be tilted forward slightly
(about ¼ bubble on your level) to ensure that the water
ows forward through the spillway.
Using soil, backll around both sides and the back of the
waterfall box.
Step 4
Hook-Up Flexible PVC Pipe
The ClearSpring™ Pro Waterfalls are plumbed to accept
1.5” Flexible PVC Pipe. We recommend using Flexible
PVC pipe as it is very exible and easy to work with.
Using PVC Primer & Cement, glue the ex pipe into the
PVC male adapter.
ClearSpring
™
Pro
INSTALLATION
2