26
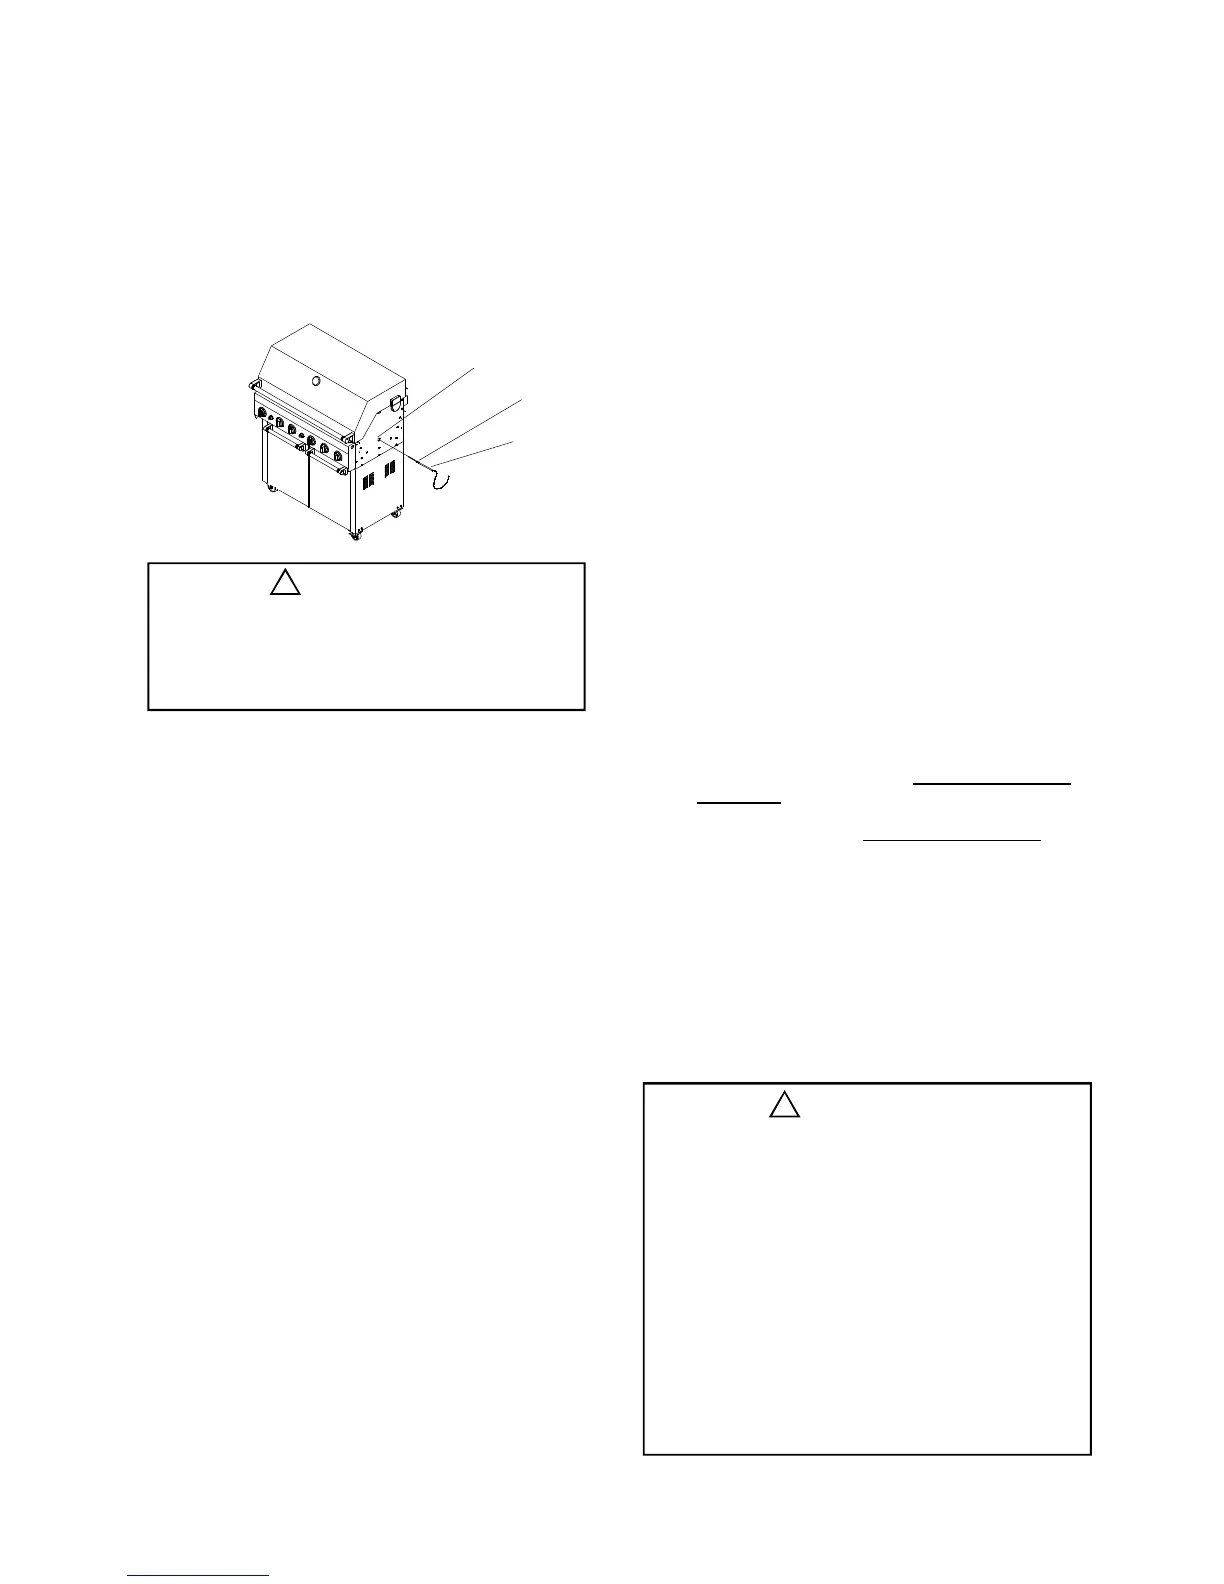
Manually Lighting Your Grill by Match
To light your gas grill by match, insert a match into the
Lighting Stick and follow steps 1 through 6 of the
Basic Lighting Procedures. Then, light the match and
place Lighting Stick through the Lighting Hole on the
right side of the grill. See Figure 1. Turn the nearest
Main Burner Control Knob to the HIGH setting to
release gas. The Burner should light immediately.
Figure 1
2.
3.
Turn gas off at source and turn the Control Knob to
OFF. Wait at least five minutes for gas to clear,
then retry.
If your grill still fails to light, check gas supply
and connections.
Repeat lighting procedure. If your grill still fails
to operate, turn the gas off at source, turn the
Control Knobs to OFF, then check the following:
If the grill fails to light :
1.
•
Misalignment of Burner Tubes over Orifices
Correction: Reposition Burner Tubes over Ori-
fices.
Obstruction in gas line
Correction: Remove fuel line from grill. Do not
smoke! Open gas supply for one second to clear
any obstruction from fuel line. Close off gas supply
at source and reconnect fuel line to grill.
Plugged Orifice
Correction: Remove Burners from grill by pulling
Cotter Pin (beneath Burner) using Long nose
pliers. Carefully lift each Burner up and away
from gas valve Orifice. Remove the Orifice from
gas valve and gently clear any obstruction with a
fine wire. Then reinstall all Orifices, Burners,
Cotter Pins and cooking components.
If an obstruction is suspected in Gas Valves or
Manifold, call the Grill Information Center at 1-
877-934-7455.
Obstruction in Burner Tubes
Correction: Follow the Burner Tube cleaning
procedure on page 32 of this Owner's Manual.
•
•
•
Never lean over the grill cooking area while
lighting your gas grill. Keep your face and
body a safe distance (at least 18 inches)
from the Burners, when lighting your grill
manually.
!
WARNING
LIGHTING
STICK
MATCH
LIGHTING
HOLE
•
Misalignment of Ignitor on Burner
Correction: Check for proper position of the
Electrode Tip as shown in step 12. The gap
between the Spark Electrode Tip and Spark
Receiver should be approximately 3/16".
Adjust if necessary. With the gas supply
closed and all Control Knobs set to OFF press
the Electric Ignitor cap and check for the
presence of a spark at the Electrode.
Disconnected Electric Wires
Correction: Inspect the Ignitor Junction Box
found behind the Control Panel. Connect loose
Electric wires to Junction Box and try to light the
grill.
Weak AA battery
Correction: Unscrew the Ignitor Cap and
replace the battery.
•
•
If all checks or corrections have been made and
you still have questions about operating your gas
grill, call the Grill Information Center
8:00am - 4:30pm CST, Monday through Friday
at 1-877-934-7455.
5.
4.
If the grill still does not light you may need
to purge air from the gas line or reset the
regulator excess gas flow device. Note: This
procedure should be done every time a new
LP gas tank is connected to your grill.
To purge air from your gas line and/or
reset the regulator excess gas flow device:
• Turn Control Knobs to the OFF position.
• Turn off the gas at the tank valve.
• Disconnect regulator from LP gas tank.
• Let unit stand for 5 minutes to allow air to
purge.
• Reconnect regulator to the LP gas tank.
• Turn the tank valve on slowly until 1/4 to
1/2 open.
• Open the Grill Lid.
• Push and turn the RIGHT Control Knob to
HIGH.
Press Electric Ignitor for 3-4 seconds to
light the burners.
•
Should a FLASHBACK fire occur in/or
around the Burner Tubes, follow the
instructions below. Failure to comply with
these instructions could result in a fire or
explosion that could cause serious bodily
injury, death, or property damage.
!
WARNING
• Shut off gas supply to the gas grill.
• Turn the Control Knobs to OFF position.
• Open the Grill Lid.
Put out any flame with a Class B fire
extinguisher.
• Once the grill has cooled down, clean the
Burner Tubes and Burners according to
the cleaning instructions found on page 32
in this manual.
•
•
•
•
•
 Loading...