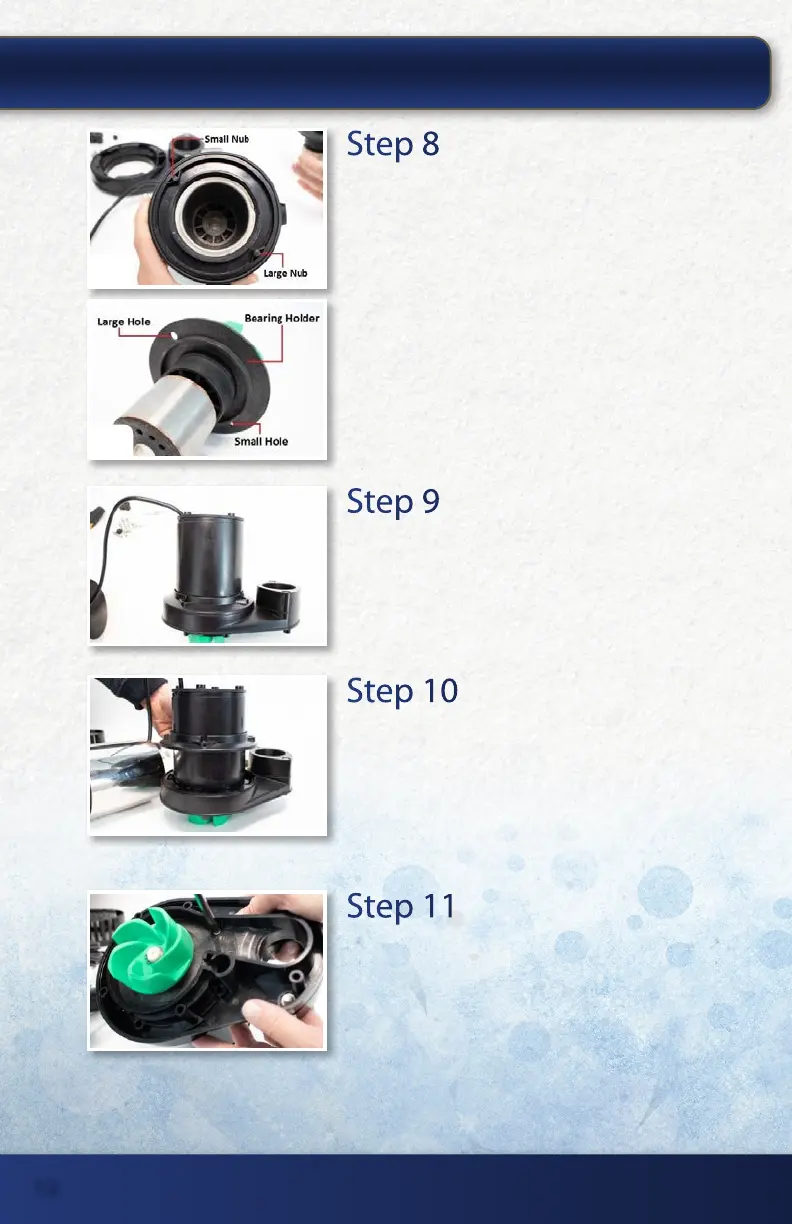
Step 8
Ensure Proper Alignment
Place the rotor and impeller assembly back inside the
stator, ensuring that the large and small holes (8a) on
the bearing holder seat properly on the corresponding
nubs on the motor; otherwise, the motor mounting
base will not t correctly (8b).
Step 9
Install Base
Reinstall the motor mounting base, making sure that,
when locking it in by turning ¼ turn clockwise, the
discharge and pump motor cord are opposite each
other.
Step 10
Install Trim Ring
Slide the trim ring back down against the motor
mounting base, and insert all four acorn nuts.
NOTE: Be sure to check that the impeller spins
freely by hand before completing the reassembly.
Step 11
Install Position Lock Screw
With the unit on its side (or upside down) reinstall the
position lock screw into the motor mounting base.
8a
8b
thepondguy.com | 866-POND-HELP (766-3435)
12
EXTENDED MAINTENANCE RAPIDFLO PUMP:


 To Next Page