The Thermacell LIV Smart Mosquito Repellent System is designed to provide area protection from mosquitoes and other flying insects in outdoor spaces. The system utilizes a Smart Hub to power on-demand repellers, which continuously release repellent to create a protective zone. Users can control the system, set schedules, and timers via the LIV+ app.
System Components:
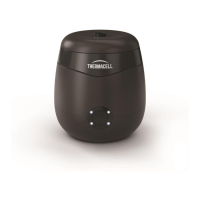
- Smart Hub: The central control unit that powers the repellers and connects to your home's Wi-Fi network. It should be located near an outdoor outlet with a strong Wi-Fi signal, no more than 6 feet from the power outlet, and at least 30 inches off the ground to avoid exposure to water and snow.
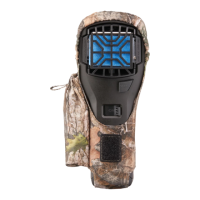
- Repellers: Devices that release mosquito repellent. These are placed strategically in the desired protection areas.
- Connecting Cables: Used to link the Smart Hub to the repellers and connect multiple repellers in a chain.
- Hub Mounting Template and Screws: For securely mounting the Smart Hub.
- Standard Mount: Used for installing repellers on decks or other flat surfaces.
- Ground Stakes: For installing repellers into soft ground like grass or mulch.
- Repeller Key: A tool for securing the repeller hood.
Sold Separately (What You Need):
- Repellent Cartridges: The consumable repellent units inserted into the repellers.
- Hardscape Bases: Optional bases for installing repellers on stone, paver, decking, or other hard surfaces where drilling is not desired.
- Outdoor GFCI Outlet: With Wi-Fi nearby.
- Tape Measure: For planning repeller placement.
- Phillips Head Screwdriver: For mounting the hub and standard deck screws.
- Drill with 1/8" bit: For drilling pilot holes for mounting screws.
- Standard Deck Screws: If installing repellers onto a deck.
- Wi-Fi (and password): Required for app connectivity.
- Smartphone with iOS 11.0 or later, Android 8.0 or later: For downloading and using the LIV+ app.
Function Description:
The LIV system works by connecting a Smart Hub to an outdoor outlet. The Hub then powers multiple repellers, which are daisy-chained together using connecting cables. Each repeller, when turned on, releases a continuous supply of mosquito repellent, creating a protective zone. The system can be managed remotely through the LIV+ app, allowing users to schedule automatic on/off times, customize repeller lights, and integrate with smart home systems for voice commands.
Usage Features:
- Area Protection: Repellers provide 360 degrees of protection. For best results, place a repeller within 10 feet of the areas you want to protect. For continuous area protection, space repellers 20 feet apart.
- Smart Control: The LIV+ app allows for remote control, scheduling, and timer functions.
- Voice Commands: Integration with smart home systems enables voice control.
- Flexible Mounting Options: Repellers can be installed using standard mounts on decks, ground stakes in soft ground, or hardscape bases on hard surfaces.
- Easy Cartridge Replacement: Repellent cartridges are designed for simple insertion and replacement.
Installation Process:
- Map It Out: Plan the layout of your repellers, considering outlet location, repeller placement, and cable paths.
- Mount the Hub: Secure the Smart Hub near an outdoor GFCI outlet, ensuring strong Wi-Fi signal. Use the provided template to drill holes and hang the hub.
- Lay It All Out: Place each repeller according to your plan and lay out the cables to ensure sufficient length.
- Mount the Repellers:
- Standard Mount (Deck): Hold the mount in place, mark holes, pre-drill, and attach with deck screws. Pass the cable through cutouts and install the repeller by squeezing quick-connect tabs.
- Ground Stake (Soft Ground): Press the stake into the ground until flush. Twist on the standard mount. Pass the cable through cutouts and attach the repeller.
- Hardscape Base (Hard Surfaces): Thread the standard mount to the base until secure. Pass leads from the repeller through the center of the base and install the repeller. Route pigtail connectors on the underside of the base.
- Connect the Cables: Connect the first cable to the smart hub, then connect subsequent repellers in a chain. Ensure connections are finger-tight and avoid over-tightening.
- Test Your System: Plug in the hub. The Status LED should blink blue. Press the center power button; the ring around the button illuminates. Check each repeller for flashing lights, which should turn solid blue within 5 minutes.
- Secure the Cables: Bury cables 1-2 inches deep, run them above ground, or cover them with mulch (at least 2 inches deep) to prevent damage and tripping hazards.
- Insert Repellent Cartridges: Remove the repeller hood by twisting 1/4 turn counter-clockwise. Open a cartridge by twisting the blue top counter-clockwise (do not touch the wick). Align tabs on the cartridge with tabs on the repeller, slide the cartridge into place until it clicks, and replace the hood. A set screw at the bottom of the hood can lock it to prevent unintended access.
- Download the App: Download the LIV+ app from the App Store or Google Play to connect and control your system.
- WARNING: To reduce the risk of injury or damage, read and follow all safety precautions.
- SAVE THESE INSTRUCTIONS.
- Electrical Safety: When using an electrical appliance, basic precautions should always be followed. The system is designed for outdoor use only. Do not use this device indoors.
- GFCI Outlet: Your smart hub comes with a region-approved power supply cord and is designed to be plugged into an outdoor GFCI outlet only. Do not use any other power supply cord. If the supply cord is damaged, it must be replaced by the manufacturer or its service agent.
- Repellent Cartridges: Do not open your smart hub or repellers, except to change cartridges. Store repellent cartridges away from children and pets in dry, room temperature environments only.
- Cable Management: If connecting cables are exposed, there is a chance that it will be a trip hazard or exposed to sharp objects such as lawnmowers. Ensure all cables are tucked out of the way or buried under grass or mulch.
- Service: There are no user-serviceable parts inside. Refer servicing to qualified service personnel.
- Placement: Do not place anything on top of your repellers.
- Maintenance: The failure to maintain cleanliness of repellers and smart hub could result in diminished ability to perform as designed.
Technical Specifications:
- Power Source: Outdoor GFCI outlet.
- Connectivity: Wi-Fi.
- App Compatibility: iOS 11.0 or later, Android 8.0 or later.
- Repeller Placement: Within 10 feet of desired protection area, 20 feet apart for continuous coverage.
- Hub Placement: No more than 6 feet from power outlet, at least 30 inches off the ground.
Maintenance Features:
- Cartridge Replacement: Users can easily replace repellent cartridges when depleted.
- Cleaning: Maintaining cleanliness of repellers and the smart hub is important for optimal performance.
- Cable Management: Securing cables through burial, running above ground, or covering with mulch helps protect them and ensures system longevity.