This document provides installation instructions for Thermador built-in dishwashers, specifically models DW244UB, DW244UW, DW245UB, DW245UW, DW246UB, DW246UW, and DWI246UB, DWI246UW. It emphasizes the importance of adhering to local and national electrical and plumbing codes for safe and optimal performance.
Function Description:
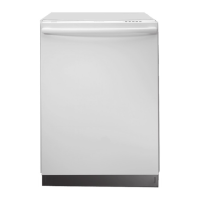
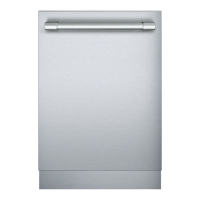
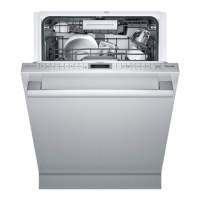
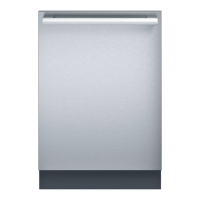
The device is a built-in dishwasher designed for residential use. Its primary function is to clean dishes, cutlery, and other kitchenware automatically. The installation instructions detail the necessary steps to properly integrate the dishwasher into a kitchen cabinet space, ensuring correct connections for water supply, drainage, and electrical power.
Important Technical Specifications:
- Dimensions (Cutout):
- Height: 36 inches (914 mm)
- Width: 24 inches (610 mm)
- Depth: 24 inches (610 mm)
- Dishwasher Overall Dimensions:
- Height: 33-7/8 inches to 35 inches (860 - 890 mm)
- Width: 23-9/16 inches (598 mm)
- Depth: 22-9/16 inches (573 mm)
- Electrical Rating:
- Volts: 120
- Hertz: 60
- Amperes: 12
- Watts: 1,450 (max)
- Hot Water Supply:
- Pressure: 5 - 120 psi (0.3 - 8.27 bars)
- Temperature: 140°F (60°C)
- Inlet Line: Minimum 3/8" O.D. copper tubing
- Drain Hose:
- Length: 7 feet (2.1 meters) provided
- Inner Diameter: Not less than 5/8" I.D. if additional hose is used
Usage Features:
- Built-in Design: The dishwasher is designed to be fully enclosed within kitchen cabinetry, providing a seamless look.
- Corner Installation Clearance: Specific instructions and diagrams are provided for corner installations to ensure adequate door opening clearance (90 degrees).
- Adjustable Toe Kick Height: The height of the toe panel cover can be adjusted by +/- 1-1/8" to align with cabinet space. The overall height of the unit can also be adjusted from 33-7/8" to 35" for better alignment.
- Door Tension Adjustment: After installation, the door tension can be adjusted to ensure it opens and closes smoothly, preventing it from closing too quickly or falling open. This is done using a Torx T20 screwdriver.
- Integrated Panel Installation (DWI246 models): These models feature an integrated design, allowing for a custom panel to be installed on the door. They come with an extension piece for the control panel, which can be extended up to an extra 13/16" (21 mm) to match the horizontal line of cabinet drawers. Special mounting hardware and a template sheet with pictograms guide the installation of custom panels.
- Accessory Panel Installation (DW24 non-integrated models except DW246US): For models where a custom wood panel insert is desired, Thermador offers black and white frame kits. These kits support a 1/4" thick wood panel and include heavy-duty door springs for panels weighing between 7-11 pounds.
Maintenance Features (Installation-related):
- Pre-installation Inspection: Thorough inspection for freight or cosmetic damage is required before installation. Cosmetic damage must be reported within 5 days.
- Leveling and Alignment: The dishwasher can be leveled and aligned using adjustable front and rear leveling legs. The rear leg is adjusted by a center screw at the front, while the front legs are rotated. Shims can be used if additional height is needed.
- Secure Mounting: The dishwasher must be secured to the underside of the countertop or to the sides of the cabinet opening using mounting brackets and wood screws to maintain its position and alignment.
- Drain Hose Management: The drain hose must be carefully guided during installation to prevent kinks. It can be connected to a sink, disposer, or air gap. If no air gap is used, the drain line must be elevated above the highest water level of the sink to prevent back siphoning.
- Hot Water Supply Connection: The hot water supply line should be flushed before connection. A 90° elbow fitting with Teflon tape or pipe sealant is used to connect to the water inlet valve. All solder connections must be made at least 6 inches (152.4 mm) away from the inlet valve to prevent damage from heat.
- Electrical Connection: The dishwasher requires a dedicated 120 volt, 60 Hz, 12 ampere, properly grounded circuit with copper conductors only. The electrical supply must be disconnected at the breaker box before installation. Wires are pressed back into the terminal box, and the cover is securely fastened after wiring and testing.
- Final Check List: A comprehensive final check is recommended, including verifying electrical requirements, turning on water and electricity, checking water temperature (140°F/60°C), and operating the dishwasher through one cycle to check for plumbing leaks.
The manual emphasizes safety warnings regarding electrical shock hazards and the importance of protecting water lines from freezing to prevent ruptures and flooding, which are not covered by the warranty. It also advises leaving the installation instructions and the care and use manual with the owner for future reference.