Do you have a question about the Thermador DW44ZB and is the answer not in the manual?
Key installation types and prerequisites for Thermador dishwashers.
Guide on inspecting the dishwasher for damage before installation.
Lists necessary tools like wrenches, screwdrivers, and saws for installation.
Details required supplies such as copper tubing, fittings, and electrical components.
Lists specific accessory parts included in the installation kit, like screws and brackets.
Details the items found in the manual bag, including use & care and installation instructions.
Specifies required height, width, and depth for the dishwasher cabinet opening.
Outlines the 1.25" access hole and connection for the drain hose.
Details water pressure, tubing size, and solder connection rules for the hot water line.
Covers voltage, amperage, circuit breaker, and conductor type for electrical connection.
Specifies the voltage, Hertz, amperes, and watts for the dishwasher's electrical needs.
Describes two methods for securing the dishwasher: top mount and side mount.
Instructions for connecting the drain hose to the sink, disposer, or air gap, noting height requirements.
Guidance on using fittings, flushing the line, and checking for leaks.
Steps for making the final electrical connections, including wire stripping and securing.
Mandates proper grounding of the dishwasher according to electrical codes.
Details how to adjust rear and front leveling legs for proper dishwasher height and stability.
Instructions for attaching the toe panel using specific screws and a Torx screwdriver.
Provides contact details and required information for service or warranty issues.
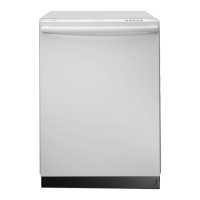
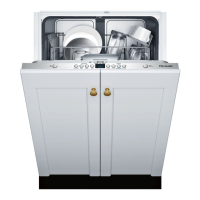
This document provides comprehensive installation instructions for Thermador Dishwasher Models DW44ZB, DW44ZW, DW44ZS, DW44ZP, and DW44ZSB. It is intended for use by qualified installers to ensure proper and safe installation, optimal performance, and compliance with all applicable electrical and plumbing codes. The manual emphasizes the importance of reading all instructions thoroughly before beginning the installation process.
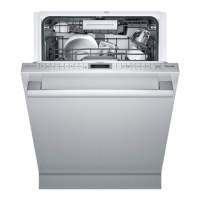
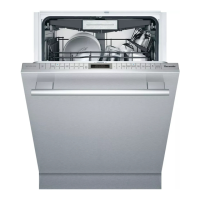
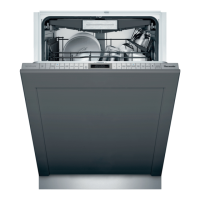
The dishwasher is designed for built-in installation, requiring a fully enclosed cabinet space. The installation process involves several key stages: choosing an appropriate location, preparing plumbing and electrical connections, physically placing and securing the dishwasher, and making final adjustments.
The ideal location for the dishwasher is as close to the sink as possible to facilitate easy access to water and drain lines. The cabinet opening must be square and meet specific dimensions: a minimum height of 34 inches (864 mm), a width between 24 and 24-1/4 inches (610-616 mm), and a depth of 24 inches (610 mm). If the dishwasher is installed in a corner, adequate clearance for the door to open fully must be ensured. Most of the preparatory work, including plumbing and electrical setup, should be completed before the dishwasher is moved into its final position.
The dishwasher requires a hot water supply line that provides between 5 and 120 psi (0.3-8.27 bars) water pressure. A minimum 3/8-inch O.D. copper tubing or metal braided dishwasher supply line is recommended. A 1-inch (25.4 mm) diameter access hole must be drilled in the cabinet for the water supply line, routed to the approximate fill valve location. All solder connections must be made before connecting the water line to the dishwasher's inlet water valve, and no soldering should occur within 6 inches (152.4 mm) of the inlet valve to prevent damage from high temperatures. It is also recommended to install a shut-off valve in the hot water supply line in an easily accessible location.
For drainage, the dishwasher comes with a 7-foot drain hose. A 1.25-inch access hole is required to run the drain hose to the drain connection. The drain hose must be connected to the sink, disposer, or an air gap using the provided hose clamps and rubber connection hose. A critical caution is highlighted: if no air gap is used and the drain line runs into a sink or disposer, it must be elevated to a point higher than the highest water level of the sink. This prevents back siphoning into the dishwasher, which could lead to improper draining and potential damage. Local codes may require an air gap, and kits are available from plumbing sources for this purpose. The proper drain connection height, 20 inches (508 mm) above floor level with a high loop or air gap, is essential for correct draining.
The dishwasher operates on a 120V, 60Hz, AC only electrical supply. It must be connected to a separate electrical circuit with a 15 Amp fuse or circuit breaker. If connected with a food disposer, a 20 Amp fuse or circuit breaker can be used, but not exceeding 20 Amps. Only copper supply conductors should be used. The dishwasher must be properly grounded by a qualified electrician, and no other appliances or outlets should share this circuit. A 1-inch (25.4 mm) diameter hole needs to be cut in the cabinet for the electrical cable, which should extend 30 inches (762 mm) from the back wall. For wood cabinets, the hole should be sanded smooth, and for metal cabinets, the edge should be covered with a grommet.
Before sliding the dishwasher into the cabinet opening, the hot water supply line and electrical cable should be straightened. The drain hose must be guided carefully to avoid kinks. Initial leveling and alignment adjustments should be made. The dishwasher's profile strips allow it to fit into cabinet openings with widths between 24 and 24-1/4 inches (610-616 mm).
To secure the dishwasher, installers must determine the appropriate mounting type. For countertops that will not be damaged by drilling, a "Top Mount" is used, where brackets are positioned flat on the top corners of the dishwasher. For granite, marble, or other hard natural surface countertops that could be damaged by drilling, a "Side Mount" is used, requiring the brackets to be bent and positioned for mounting to the side of the cabinets. Mounting screws are then driven through the bracket holes to secure the dishwasher.
The dishwasher's leveling legs allow for precise adjustment. The rear leveling leg is adjusted by turning a center screw at the front of the dishwasher. The front leveling legs are adjusted by rotating them on the front left and right sides. A screwdriver and light hammer taps can be used to turn the legs. If additional height is needed, shims can be added under the leveler feet.
The toe panel is installed using the provided toe panel screws from the installation kit. The screws are inserted through the toe panel and then fastened into the dishwasher base using a Torx screwdriver.
Before concluding the installation, a final checklist ensures all steps are completed correctly. This includes verifying electrical requirements, confirming the correct electrical supply and grounding method, turning on the hot water shut-off valve and electrical supply, and operating the dishwasher through one cycle to check for plumbing leaks. If the dishwasher does not operate properly, the user is directed to the SELF-HELP, CUSTOMER SERVICE, and WARRANTY sections of the Use and Care Manual.
The manual provides detailed instructions for obtaining customer service, including contacting the dealer, installer, or an authorized service contractor. Users are advised not to attempt repairs themselves, as this could void the warranty. Contact options include email via the Thermador website, postal mail to BSH Home Appliances, Corp. in Huntington Beach, CA, or a toll-free phone number. When contacting service, users should have the model number, serial number, date of original purchase, date the problem originated, and an explanation of the problem readily available. The model and serial numbers are located on a label on the right-hand side of the inner door of the dishwasher.
The document emphasizes the importance of leaving both the Installation Instructions and the Use and Care Manual with the owner for future reference. This comprehensive guide ensures that the Thermador dishwasher is installed safely, efficiently, and in compliance with all necessary standards, providing the foundation for reliable operation.
| Brand | Thermador |
|---|---|
| Model | DW44ZB |
| Type | Built-In |
| Place Settings | 14 |
| Number of Wash Cycles | 6 |
| Tub Material | Stainless Steel |
| Drying System | Condensation |
| Energy Star Certified | Yes |
| Third Rack | Yes |
| Stainless Steel Interior | Yes |
| Wash Cycles | Auto, Normal, Rinse |
| Noise Level | 44 dB |
| Control Type | Touch |