EasyManua.ls Logo

Thermador SCD272 User Manual

Thermador SCD272
8 pages
To Next Page IconTo Next Page
Page #1 background imageLoading...
Page #1 background image
INSTALLATION INSTRUCTIONS
FOR THERMADOR
®
BUILT-IN ELECTRIC OVENS
Models:
C272 / C302 / CM302 / CJ302 / C271 / C301 / CM301
S272 / SC272 / SCD272 / S302 / SC302 / SCD302 / S301 / SC301 / SMW272 / SM272
TIMER 2
STOP
TIME
TIMER 1
CLOCK
COOK
TIME
OVEN
LIGHT
1
4
7
8
5
2
3
6
9
0
UPPER OVEN
BROIL
CONVECTION
ROAST
SELF
CLEAN
CONVECTION
BAKE OFF
TIMER 2
STOP
TIME
TIMER 1
CLOCK
COOK
TIME
OVEN
LIGHT
1
4
7
8
5
2
3
6
9
0
UPPER OVEN
BROIL
CONVECTION
ROAST
SELF
CLEAN
CONVECTION
BAKE OFF
BROIL
CONVECTION
ROAST
SELF
CLEAN
CONVECTION
BAKE OFF
LOWER OVEN
Please read this entire instruction manual before proceeding.
IMPORTANT:
Local codes vary. Installation, electrical connections, circuit
breakers
and grounding must comply with all applicable codes.
Save these instructions for the Local Electrical Inspector's use.
INSTALLER: Please leave these Installation Instructions with this unit for the
owner.
OWNER: Please retain these instructions for future reference.
WARNING: Disconnect power at the breaker before installing.

Other manuals for Thermador SCD272

Question and Answer IconNeed help?

Do you have a question about the Thermador SCD272 and is the answer not in the manual?
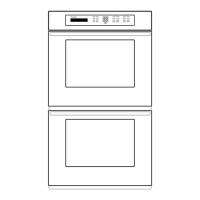
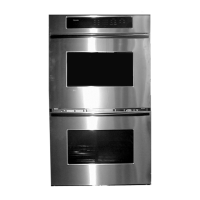
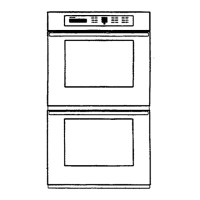
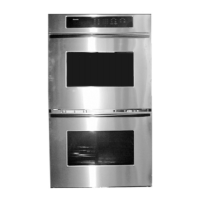
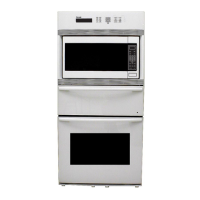
Thermador SCD272 Specifications

General IconGeneral
TypeDouble Oven
Fuel TypeElectric
InstallationBuilt-In
ConvectionYes
Self-CleaningYes
ColorStainless Steel
Control TypeElectronic
Interior LightYes
Width27 inches
Depth24 in
Oven Capacity4.7 cu. ft. per oven
Oven FeaturesConvection, Self-Cleaning

Summary

Step 1: Unpacking

Step 2: Cabinet Preparation

Wall Mounted Units

Instructions for preparing wall-mounted cabinets for oven installation, including support requirements.

Step 3: Electrical Installation

Grounding

Information on electrical grounding procedures, including local code compliance for supply connections.

208V Electrical Hookup

Procedure for switching the oven's electrical supply from 240V to 208V, detailing the steps.

Step 4: Installing the Oven

Step 5: Installing the Bottom Trim

Related product manuals