2.
Tut the torch
head
to remove the tip
and
starter car-
tridge.
3.
Inspect the
two
0-rings
on
the torch head. Ensure they
are
undamaged
and
seated in the
0-ring
grooves.
4.
Fit
the
desired starter cartridge
and
tip
onto
the elec-
trode.
0
NOTE!
Refer to the consumables se-
lection
chart
for
the
proper
combination of torch parts, in-
cluding shield cups
and
caps.
5.
Hand
tighten the shield
cup
until it is seated
on
the
torch head. Do
not
use tools
to
tighten the cup. Jf
resistance is feit
when
installing the cup, check the
threads before proceeding.
0
NOTE!
When
operating
the
torch
in
a
normal
condition, a small
amount
of gas vents
through
the
gap
between
the
shield
cup
and
the
torch handle.
Do
not
attempt
to overtighten the
shield
cup
as irreparable darn-
age
to
internal
components
mayresult.
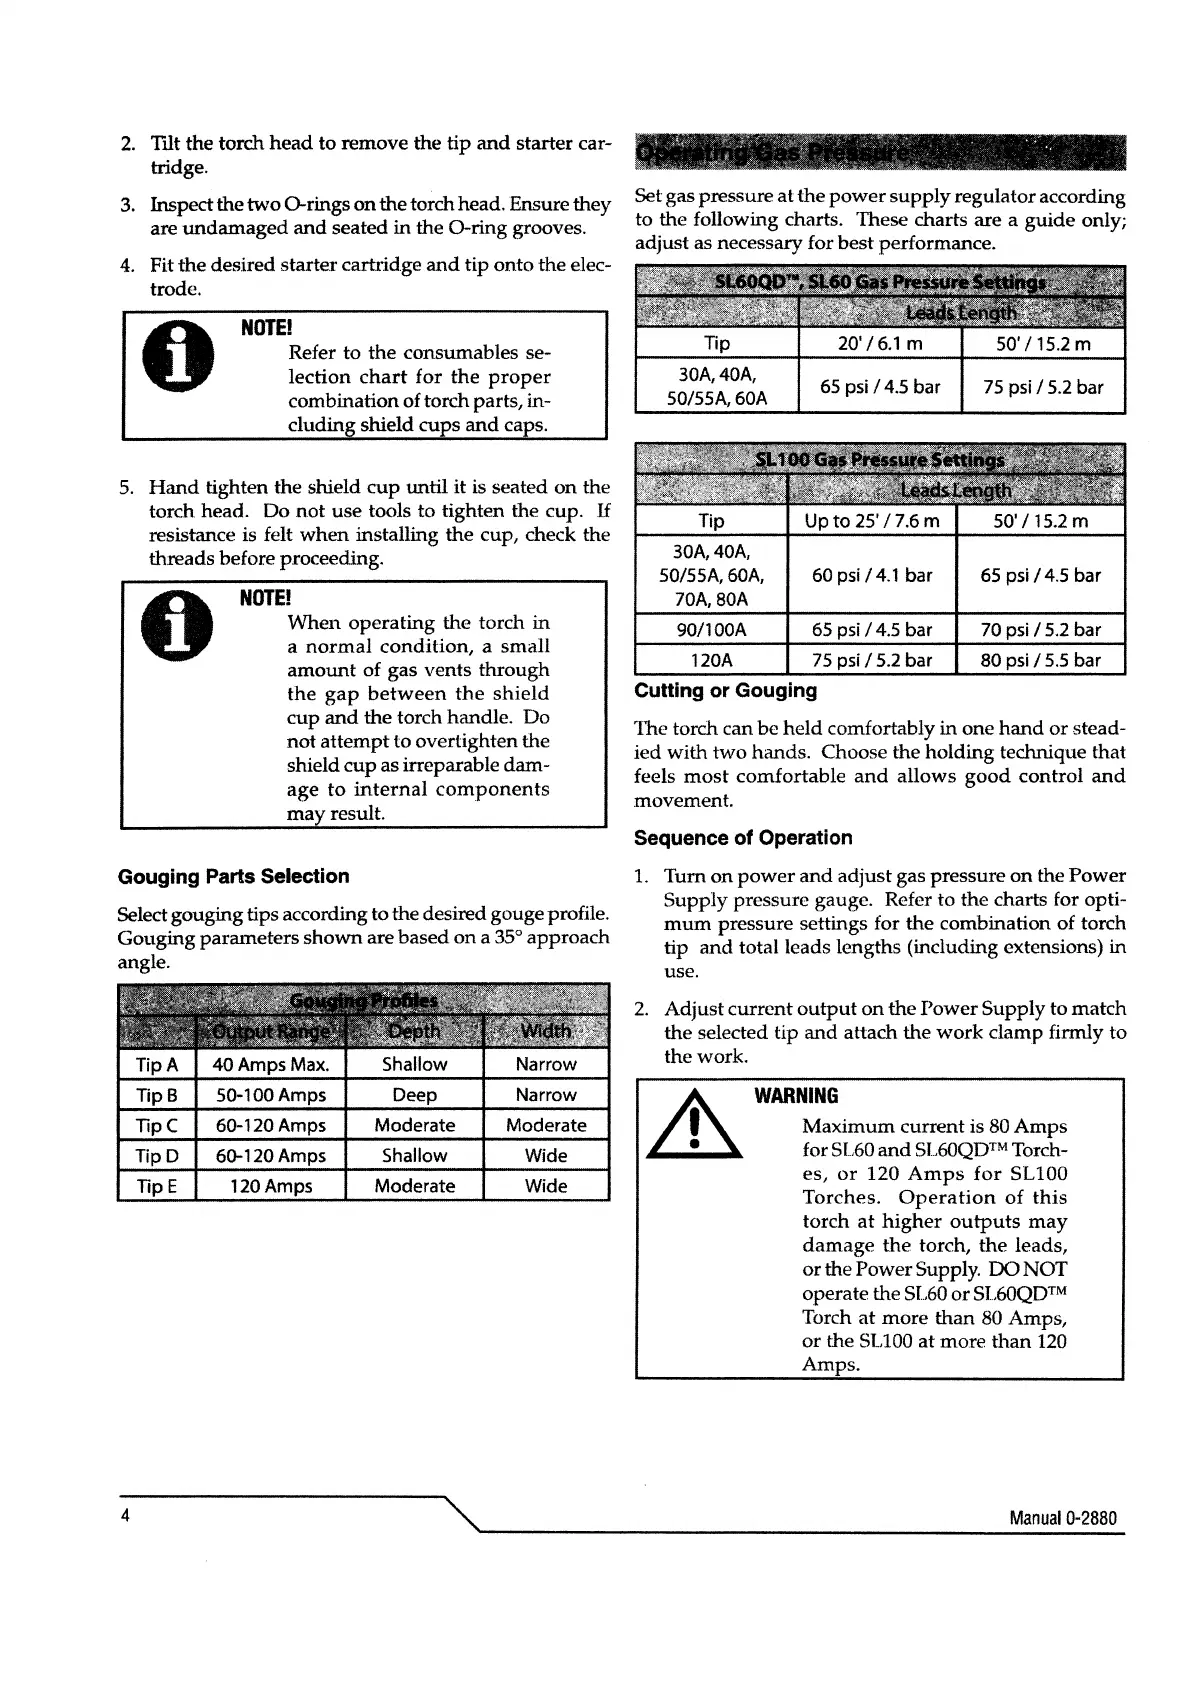
Gouging Parts Selection
Select gouging tips according to the desired gouge profile.
Gouging parameters
shown
are
based
on
a 35° approach
angle.
Setgas
pressure
at
the
power
supply
regulator according
to the following charts. These charts are a
guide
only;
adjust as necessary for
best
performance.
30A,40A,
50155A,
60A,
70A,80A
65 psi
I 4.5 bar
60
psi I
4.1
bar
65 psi I 4.5 bar
75 psi I 5.2 bar
65
psi I 4.5
bar
70
15.2
bar
120A 75 psi I 5.2 bar
80
psi
I 5.5 bar
Cuttlng or Gauging
'lhe
torch can
be
held
comfortably
in
one
hand
or
stead-
ied
with
two
hands. Choose the holding technique that
feels
most
comfortable
and
allows
good
control
and
movement.
Sequence of Operation
1. Turn
on
power
and
adjust gas pressure
on
the
Power
Supply pressure gauge. Refer
to
the charts for opti-
mum
pressure settings for the combination of torch
tip
and
totalleads
lengths
(induding
extensions) in
use.
2.
Adjust
current
output
on
the
Power
Supply to
match
the
selected tip
and
attach the
work
damp
firmly
to
thework.
WARNINS
Maximum
current is 80
Amps
for SL60
and
SL60QD™ Torch-
es,
or
120
Amps
for
SL100
Torches.
Operation
of
this
torch
at
higher
outputs
may
darnage
the
torch, the leads,
or
the Power Supply.
00
NOT
operate the
SL60
or
SL60QD™
Torch
at
more
than
80 Amps,
or
the
51.100
at
more
than
120
Amps.
4
"'-
Manual
0-2880
"'-~---------------------------
 Loading...