Page | 6
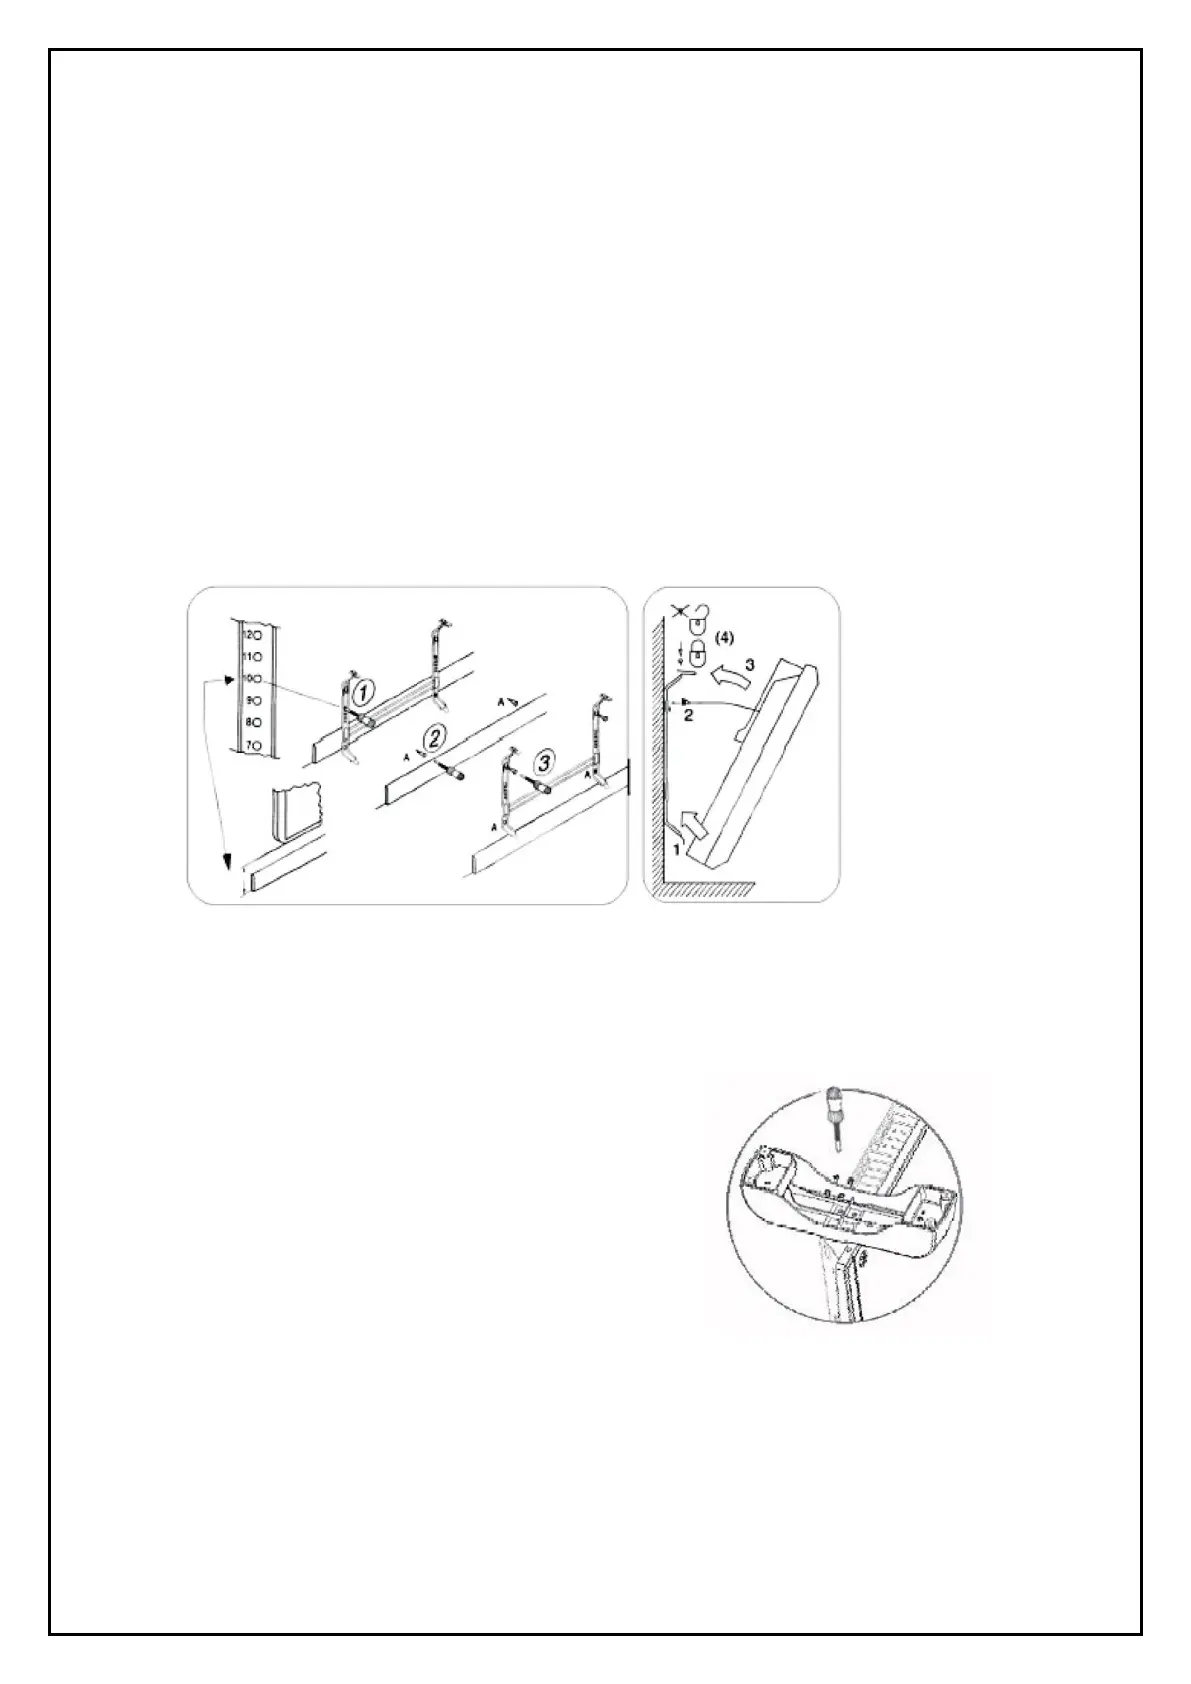
4. Put visible marks in the mounting holes.
5. Drill holes where marked, insert dowels (for extra support where applicable),
attach the mounting bracket and fasten screws to secure the bracket to the wall
(figure 1).
6. Suspend the heater onto the bracket by holding the unit at a 50 degree angle.
Attach the lower part of the unit to the lower extension of the bracket first (figure
2).
7. Move the unit up vertically until the upper extension of the bracket coincides with
the upper slots of the unit. Press on the unit until you hear a click.
8. To dismount the unit, press the leverages of the brackets upper extensions and
disconnect the unit from it. Carry out the above mentioned steps in reverse order.
Figure 1 Figure 2
Leg mounting of the heater
1. Take 2 legs out from the packaging.
2. Turn the unit over so that the lower end of the
unit is at the top.
3. Attach the legs to the lower end of the unit
from the left and right sides so that the
mounting holes coincide with the holes on the
unit case.
4. Fasten the mounting screws in the present
holes.
5. Place the unit on a smooth surface, strictly in a
vertical position.
The unit is ready to use.
Precaution! When this heater is used with the legs
installed and provides portability, DO NOT use this
heater in the immediate surroundings of wet
areas such as a bath, a shower or a swimming
pool.