Installation Method
The ThermaQ Midi electric water heater can be used for hand washing or
cleaning in a kitchen, etc. and it can be installed above or under the sink.
INSTALLING THE UNIT
Using the brackets and mountings provided please mount your unit on the wall, please take
into account the following points when choosing where to mount your water heater.
1. The wall must be strong enough to take the weight of not just the water heater, but
the water it holds as well, wherever possible we would recommend securing onto
an external brick wall Fig. 2.
2. The unit should be located in a position as close to the outlets as possible, this
reduces the amount of pipework between the heater and the outlet thus reducing
heat loss across the pipework..
3. Ensure the water heater is in the correct orientation, the oversink model should
always have the connections at the bottom of the unit and the undersink module
should always have the connections on the top of the unit Fig. 1.
Fig 2. Fixing unit to an external brick wall.
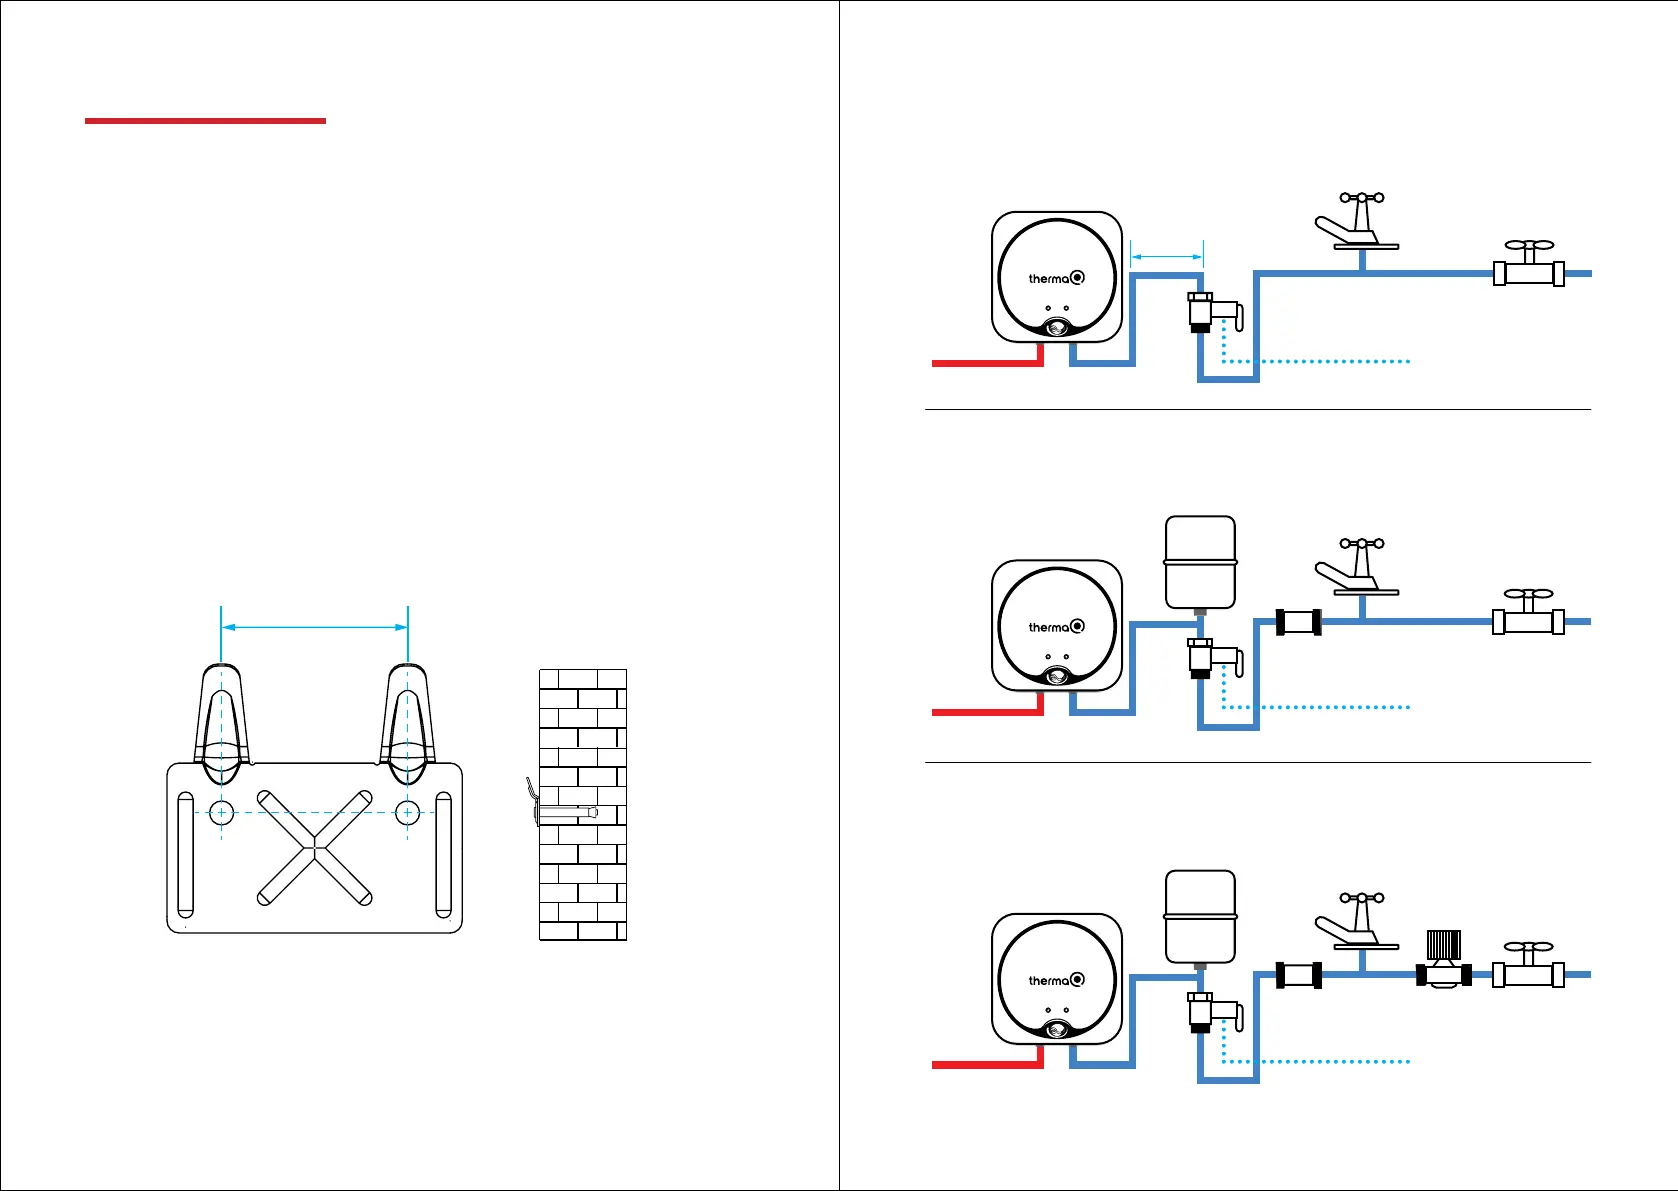
System 3
Incoming Cold Mains 5 Bar Or Above.
Additional Equipment Required:
2L Portable Expansion Vessel
Check Valve
Pressure Reducing Valve
HEATER
Expansion Vessel
Check Valve
Closest Cold
Draw O
Pressure
Reducing
Set
Service Valve
(Not Supplied)
Discharge To Drain
Pressure
Relief Valve
System 2
Pressure Relief Closer Than Required (See System 1).
Additional Equipment Required:
2L Portable Expansion Vessel
Check Valve
HEATER
Expansion Vessel
Check Valve
Closest Cold
Draw O
Service Valve
(Not Supplied)
Discharge To Drain
Pressure
Relief Valve
No Additional Equipment Required
HEATER
Closest Cold
Draw O
Service Valve
(Not Supplied)
Pressure
Relief Valve
Discharge To Drain
Minimum Distance Required
A
Pressure Relief for Expansion:
6L Unit - 1.85m
10L Unit - 2.80m
15L Unit - 4.20M
Incoming Cold Mains Below 5 Bar.
External
Brick Wall
Fig 3. System requirements.
Excellence in Hot Water Technology.
6
7
ThermaQ Specification Hotline 01924 270847
 Loading...