Heat Pump Manual
SERVICE and MAINTENANCE
Email Alarms
The heat pump can also be programmed to send emails in the event of a problem and this
data log will be emailed as at the same time – see the installation section on setting this up
and it will have to be turned on in the parameters menu of the program. The email will be
sent with the data log file attached.
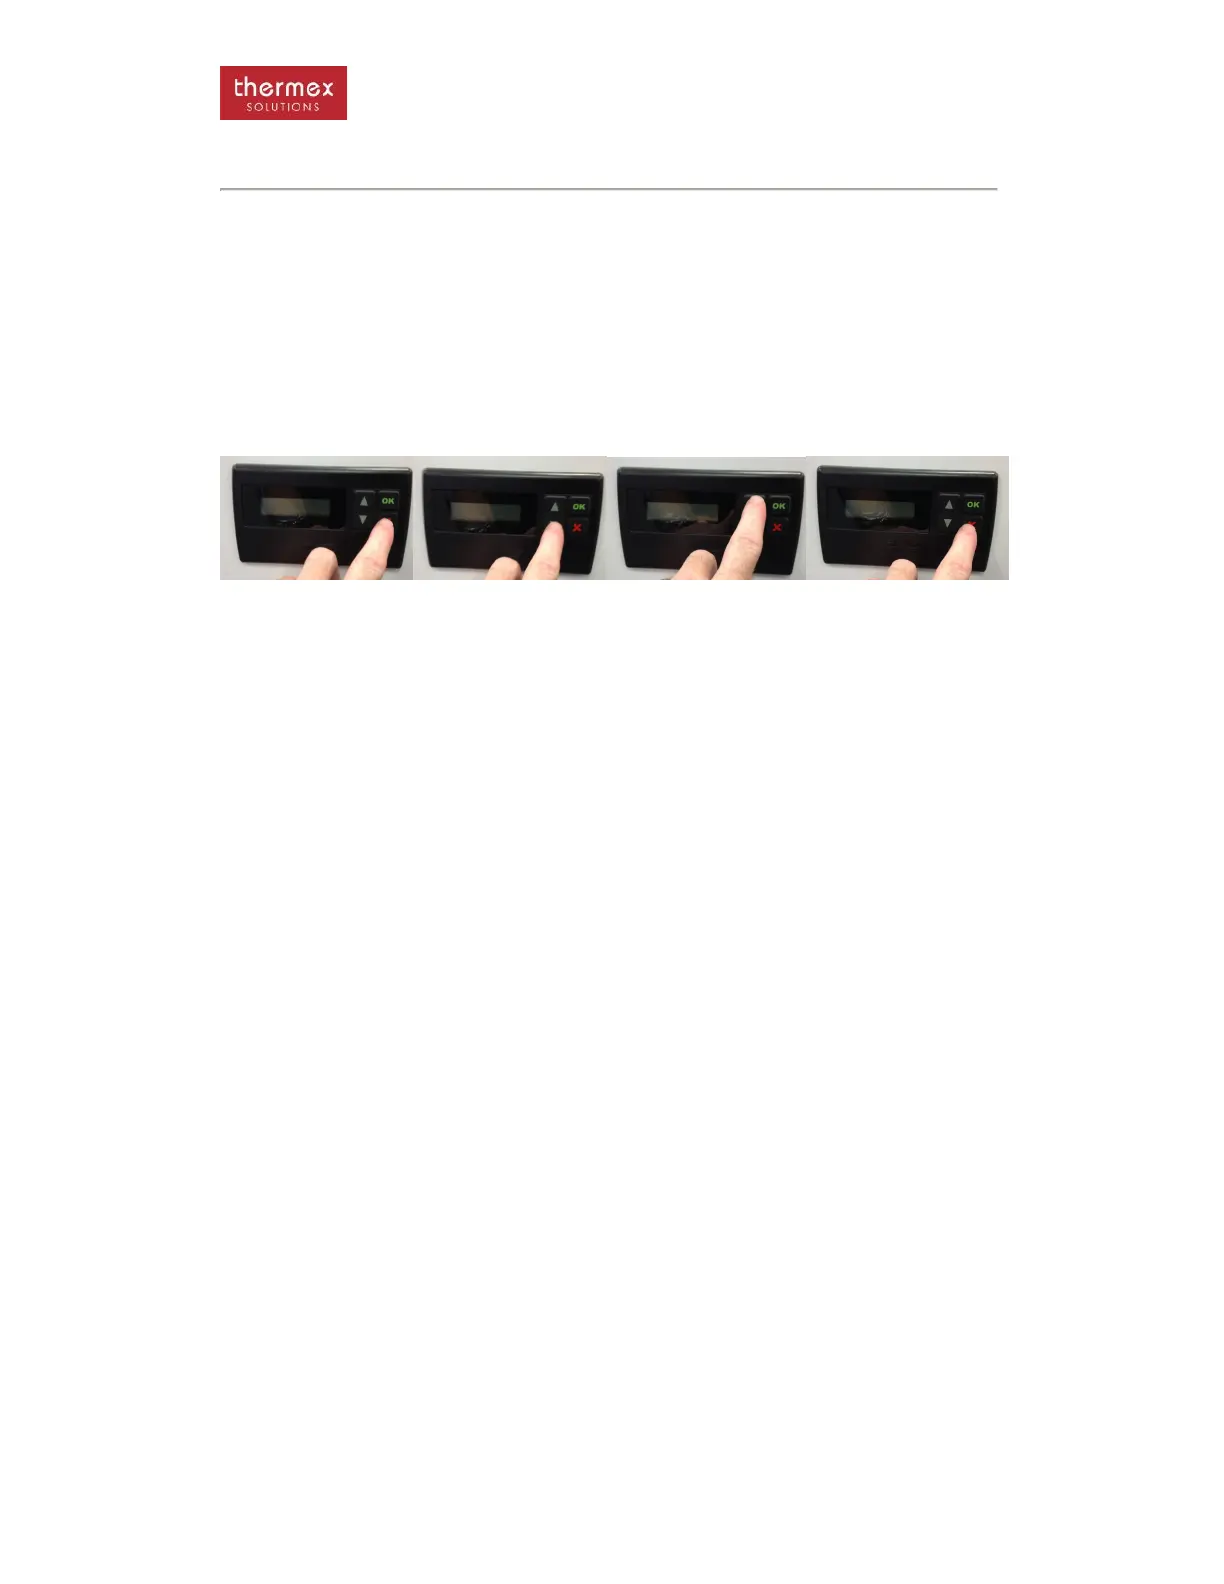
UNLOCKING THE KEY PAD
· The key pad on the smart controller will lock out after 10 minutes of non-use.
To unlock the key pad press the ESC, DOWN, UP and ESC keys in sequence
Calibration of Sensors
The temperature sensors will be calibrated before dispatch but in the even one needs to be
replaced then it is a good idea to recalibrate the sensors as they effect the operation of the
heat pump.
1. Scroll through the controller to parameters menu
2. Scroll down to the Sensor Menu sub- menu
3. Scroll through to the ambient, supply or return calibration
4. Place the sensor and a calibrated thermometer together and allow the temperature to
settle
5. Press OK and the value will flash. Use the up and down scroll buttons to calibrate the
sensor to the thermostat and press OK again
6. Exit the program
Updating Software
Always remember that when working in the electrical box that care is taken to ensure that
none of the live parts are touched.
From time to time requirements may require a software upgrade of the system and with the
right programmer this can be done from a laptop on site. If the heat pump is connected to the
internet or a high level management system then the upgraded software will also be
accompanied by a new BIN file to allow viewing on standard SNMP based systems
If new firmware has been released, it can be uploaded to the controller with a USB key.
Presumably Thermex will email the firmware – this has to be loaded onto the USB – ensure
that the firmware is the only .HEX file in the route directory. Put the USB key into the USB
slot on the rear of the controller. The controller will recognise the file and automatically
upload the firmware. The screen will confirm if the firmware is successfully uploaded and the
version number will change in the INFO page. The new firmware will not override the setting
in the control so once the new firmware is uploaded the machine will go straight back to
normal operation. If a new feature has been added then this may have to be adjusted.
 Loading...