an omnipolar switch with a minimum contact opening of
3 mm must be placed in between the two; its size must
be suitable for the load required and it must comply with
current legislation.
• If the hob is electric, gas, or induction, the minimum distance
between the same and the lower part of the hood must be
at least 45 cm.
If a connection tube composed of two parts is used, the upper
part must be placed outside the lower part. Do not connect
the cooker hood exhaust to the same conductor used to
circulate hot air or for evacuating fumes from other appliances
generated by other than an electrical source.
• In the case of assembly of the appliance in the suction version
prepare the hole for evacuation of the air.
• We recommend the use of an air exhaust tube which has the
same diameter as the air exhaust outlet hole. If a pipe with a
smaller diameter is used, the e ciency of the product may be
reduced and its operation may become noisier.
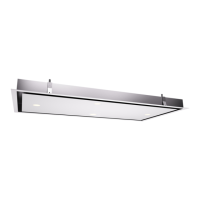
• Installation
Note: The appliance can be supplied with upper or
back air outlet. This setting is pre-configured by the
manufacturer, therefore it is not possible to change it during
the installation
Before proceeding with the assembly operations, follow the
steps below:
1. Open the front panel. Fig.2
NOTE! Open the front panel while holding it by its external
sides, as shown in Fig.2, and keep at a suitable distance to
avoid impacting it.
- Remove the anti-grease lte. Fig.3
- Loosen the two screws B inside the hood that fasten the
lid M. Fig. 4
- Close the front panel while holding it by its external sides
until it shuts.
- Slide the top cover o by lifting it.
• Installation of models without decorative ducts
Extractor hood
- Remove both grid E on the air outlet hole and lid M as
shown in (Fig.5).
- Connect the hood to the flexible hose (not supplied)
and the hose to the air exhaust hole previously prepared
(Fig.6A/6B).
- Fix the lid once again by using the 2 screws previously
removed.
• Optional accessories
This model may have decorative ducts as optional accessories
- ask your retailer for information.
• Installation of models with decorative ducts
- Make sure the electrical power supply is within the
measurements of the decorative connector.
- Adjust the width of the support bracket of the top
connector.
Then x it to the ceiling so that it is on the same axis as the
hood using screws A (Fig.8) adhering to the distance from
the ceiling shown in (Fig.7).
- Connect ange C to the air exhaust hole using exible hose
L (Fig.9).
- Slide the top duct into the bottom duct.
- Pull out the top duct as far as the bracket and x it using
screws F (Fig.8).
• Filter hood
Please note:
In order to transform the hood from EXTRACTOR HOOD
into FILTER HOOD the carbon lters must be ordered at your
distributor as accessory.
We have two different types of Kit, one with extractable carbon
filters (Fig.10) and the other one with re-usable carbon filters
(washable). (Fig.11)
- To replace the extractable active carbon filters X, pull lever
outwards as shown in Fig.10
- To replace re-usable carbon filters Y, remove the brackets
from their seat, pulling them outwards. (Fig.11)
If you find a bracket such as the one indicated in Fig.10a or
Fig.11b included in the product packaging, this should be
fixed to the hood using the supplied screws.
NOTE: In both cases the anti-grease panel, must be positioned
on the door. Fig.12
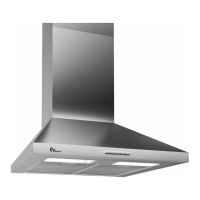
• Wall xing
- Mark the position of the lower side of the hood on the wall
(Fig.13A). Maintain the minimum distance required from the
hob as shown in Fig.13B.
- Position the xing template on the wall, making sure that the
line coincides with the line previously made on the wall.
- Mark the fixing holes and cut them into the material
(Fig.14).
- Fix the 2 top screws K and screw anchors (Fig.14), without
tightening them completely.
- Place the appliance against the wall, align it in horizontal
position and tighten screws K (Fig.15).
- Open the front panel while holding it by its external sides,
as shown in Fig.2, and keep at a suitable distance to avoid
impacting it.
- Once the adjustment has been completed, x the hood using
the 2 screws C (Fig.16).
- Place the anti-grease panel.
- Close the front panel while holding it by its external sides
until it shuts.
- When carrying out the xing operations, use only screws
and screw anchors suited to the type of wall (e.g. reinforced
concrete, plasterboard etc.).
- If the screws and screw anchors are supplied with the
appliance, make sure that they are suited to the type of wall
to which the hood must be xed.
USE AND MAINTENANCE
• We recommend that the cooker hood is switched on before
any food is cooked.
We also recommend that the appliance is left running for
15 minutes after the food is cooked, in order to thoroughly
eliminate all contaminated air.
The e ective performance of the cooker hood depends on
constant maintenance; the anti-grease lter and the active
carbon lter both require special attention.
• The anti-grease lter is used to trap any grease particles
suspended in the air, therefore is subject to saturation (the
time it takes for the lter to become saturated depends on
the way in which the appliance is used).
- To prevent potential re hazards, the anti-grease lters should
be washed a minimum of every 2 months (it is possible to use
the dishwasher for this task).
- After a few washes, the colour of the lters may change. This
does not mean they have to be replaced.
- 28 -