Do you have a question about the Thermo Scientific Jewett CTF306 and is the answer not in the manual?
| Brand | Thermo Scientific |
|---|---|
| Model | Jewett CTF306 |
| Category | Freezer |
| Language | English |
Describes the normal cooling cycle when the unit is operating.
Details the automatic defrost process, including heater activation and frost melting.
Explains the post-defrost cycle where the unit cools down to operating temperature.
Covers the fan activation and return to normal refrigeration after defrost.
Explains how the compressor operates based on temperature and differential settings.
Details the defrost modes and control parameters for electrical or hot gas defrost.
Describes fan control modes and their interaction with compressor and defrost cycles.
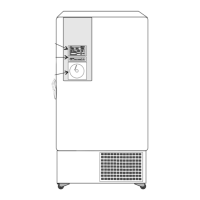
Explains the meaning of each LED indicator on the front panel.
Instructions on how to view the minimum recorded temperature on the display.
Instructions on how to view the maximum recorded temperature on the display.
Steps to clear the stored maximum and minimum temperature records.
Procedure to view the current target temperature setpoint.
Guide on adjusting the target temperature setpoint using the front panel controls.
Steps to manually initiate a defrost cycle from the control panel.
Instructions for accessing and modifying parameter values in the controller.
Overview of the hidden menu for advanced parameter access and adjustments.
Procedure to disable front panel buttons to prevent accidental changes.
Steps to re-enable the front panel buttons after locking.
How to activate and use the continuous operation mode.
How to enable and utilize the energy-saving mode for temperature control.
Configuration and behavior of the digital input used as a door switch.
How the digital input is configured for generic external alarms.
Setting the digital input for serious alarm conditions that shut down outputs.
Configuration of the digital input for pressure switch alarms.
Using a digital input to manually trigger a defrost cycle.
How a digital input can invert the controller's operation mode (heating/cooling).
Enabling the energy saving function via a digital input.
Setting the polarity for digital input activation (opening or closing contact).
Guidance on correctly connecting temperature probes to the instrument.
Instructions for saving controller settings to a Hot Key device.
Instructions for loading settings from a Hot Key device to the controller.
How various alarm conditions are cleared and recovered.
Explains status messages displayed on the controller, like keyboard lock/unlock.
Wiring diagram and connection details for specific model variants.
Wiring diagram and connection details for specific model variants.
Wiring diagram and connection details for specific model variants.
Procedure for adjusting the door hinges to ensure proper seal and function.
Steps for adjusting the door latch and strike plate for optimal engagement.