Accessories
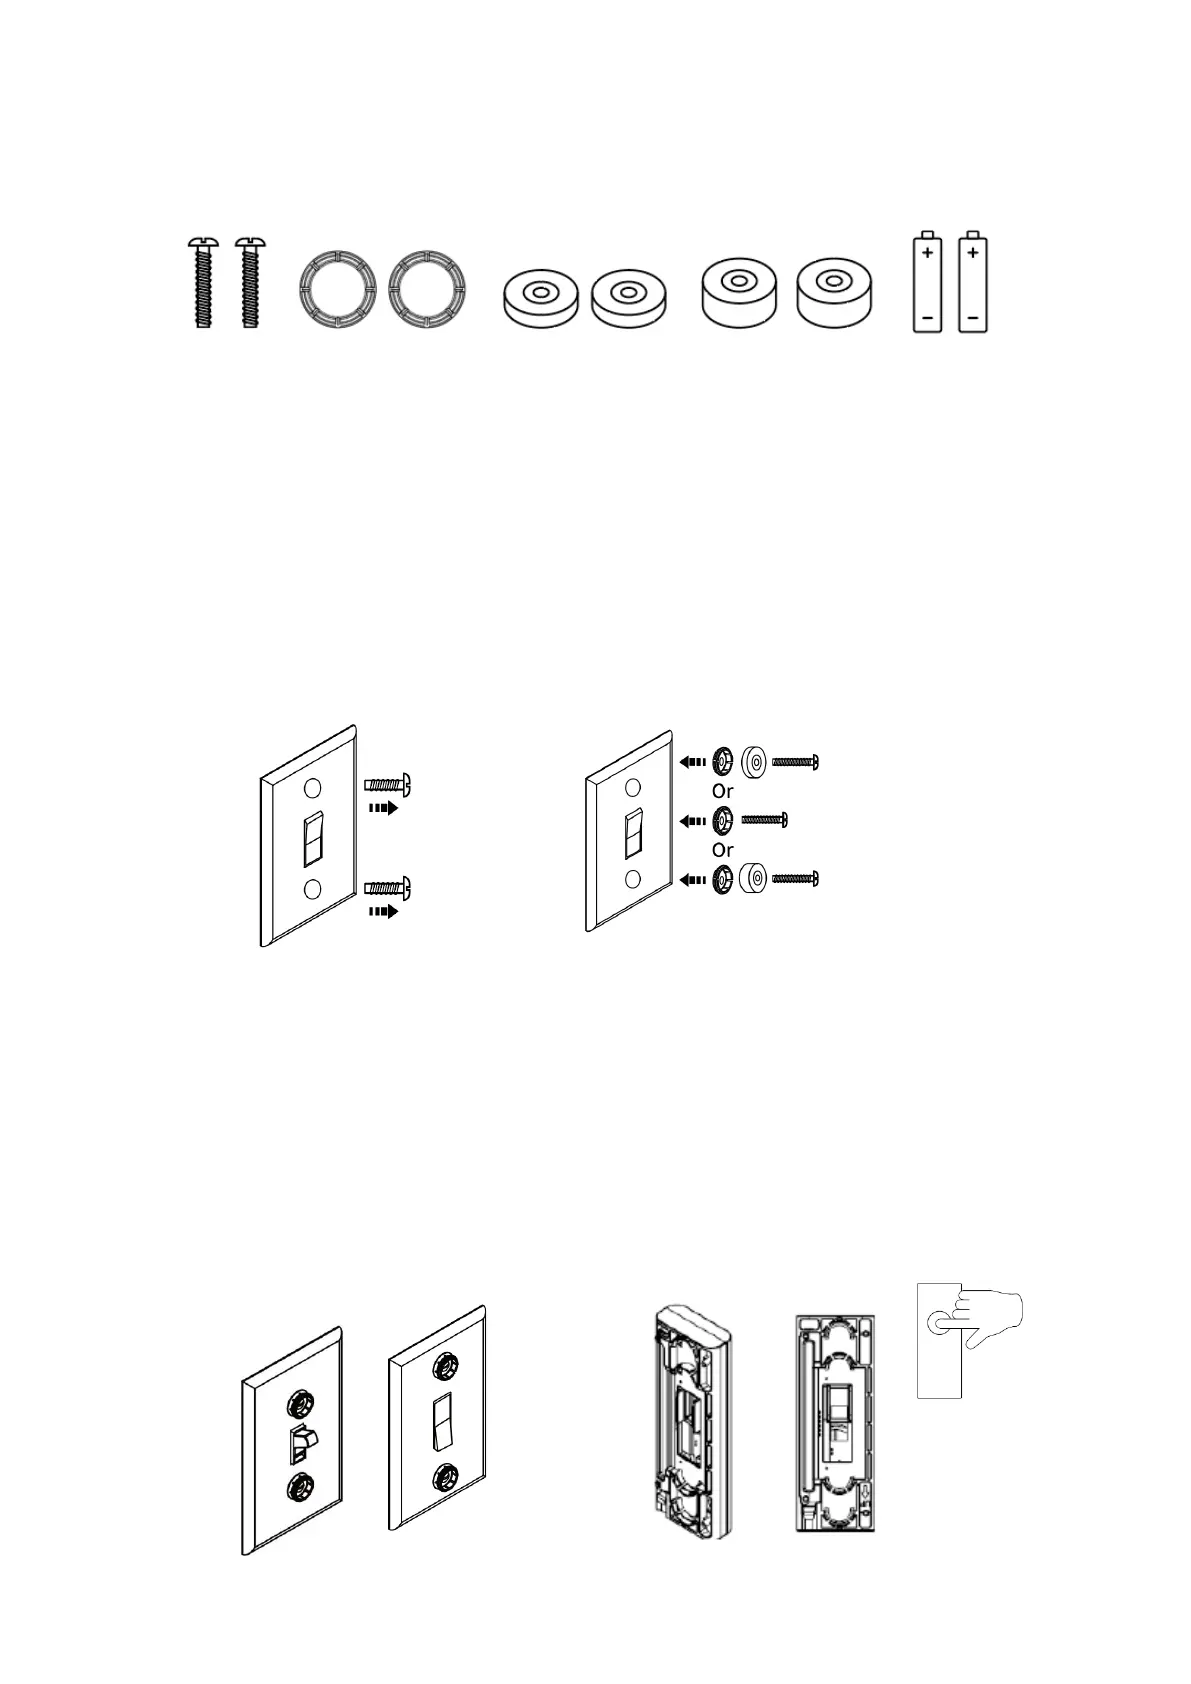
Screw*2 Fixator*2 Thin rubber ring*2 Thick rubber ring*2 Battery*2
Setting up your Smart Switch
Third Reality Smart Switch Gen3 can work with both toggle and rocker style switches.
Step 1: Step2:
Remove screws from faceplate. Insert with new screws and attachment assembly
as follows.
In most case, you need to combine fixator with thin rubber ring. However, you can also use
fixator only or combine fixator with thick rubber ring to adjust the thickness of attachment
assembly.
Step 3:
Place two AA batteries inside the Smart Switch. Check the Smart switch clip position with your
switch panel. If your toggle switch lever or rocker switch board is up/down, you need to match
the Smart Switch clip position as up/down.
For example: